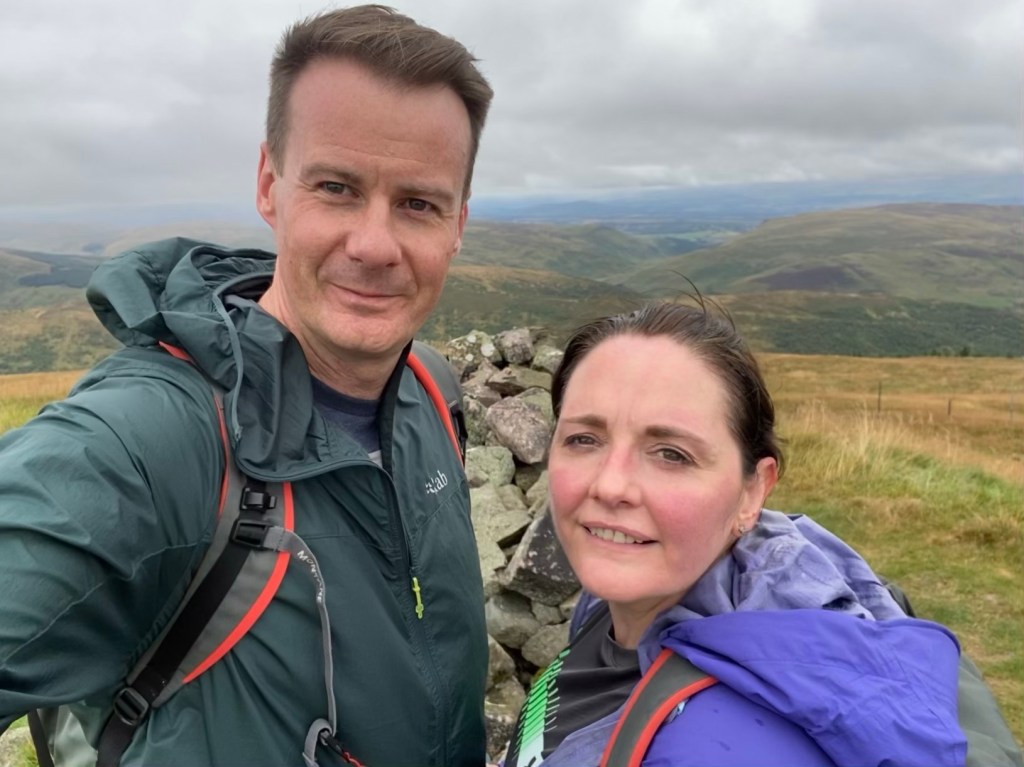
Scottish based aspiring mountaineer always on the look out for some new adventure that will stretch and develop me. One half of a husband/wife Alpine adventure couple.
Ahead of the Christmas break we wanted to get a decent hill in and forecasts pointed east so Schiehallion in the Low east Highlands , near Aberfeldy was our decision.
We’ve done Schiehallion twice already once in mid winter and once in spring , both times required crampons with a lot of lying snow and ice around the rocky summit but today it was a different story
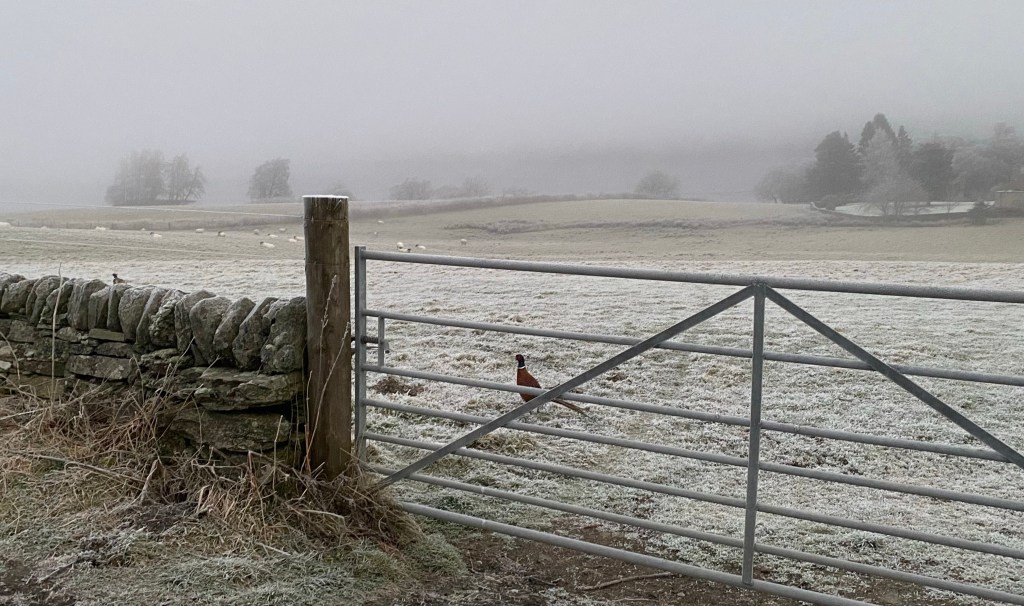
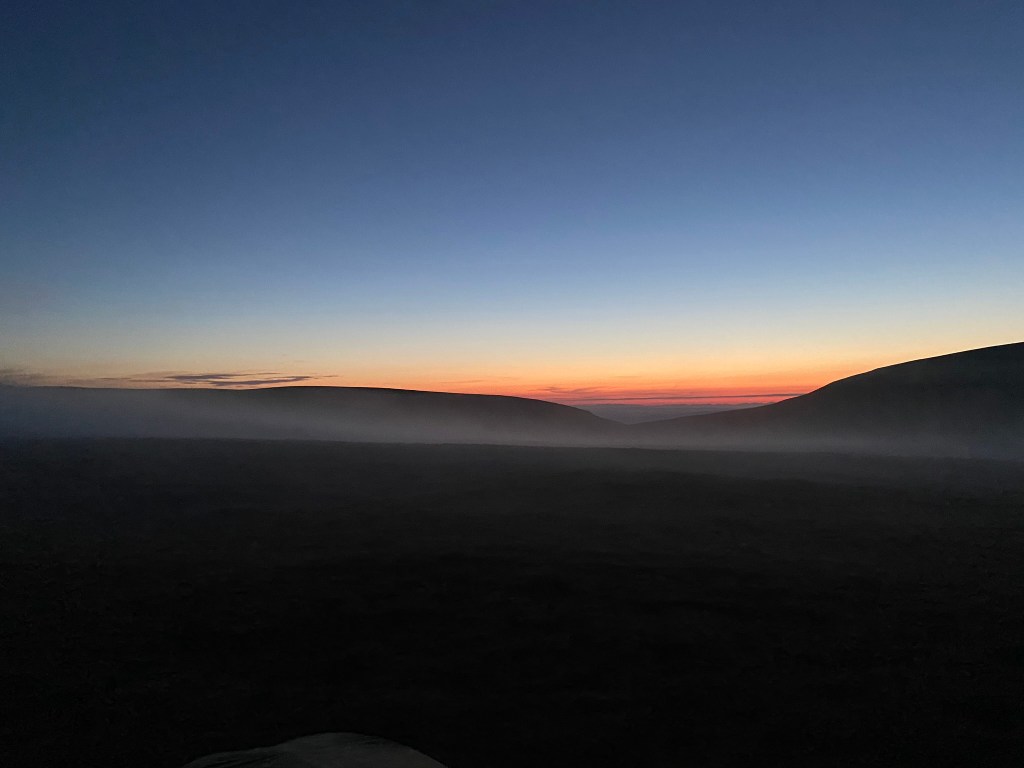
Setting out early ( been a while sixes we’ve been up at 6am!) , gear packed and coffee in the flask we headed up through the foggy cold rural roads , passing dozens of pheasant at one point and stopping to take some beauty beautiful photos of the moon setting and sun rising above the fog banks to arrive in the car park for about 9.
Unusually it was fairly quiet so grabbed a space , paid for parking ( a very reasonable £2 for the day – which supports protection and maintenance of the area) – then set up into the white misty wonderland .
Making our way up the path, past the ruins of sheilings (houses and pens higher on slopes used by crofters in the summer months before the highland clearances) to start ascending the long hump of the hill. The Scheihallion route it very simple with a well made and easy to follow path almost to the summit ( where boulders mean you do need to be aware and be ready to navigate in poor weather – knowing the summit line runs roughly west to east helps).
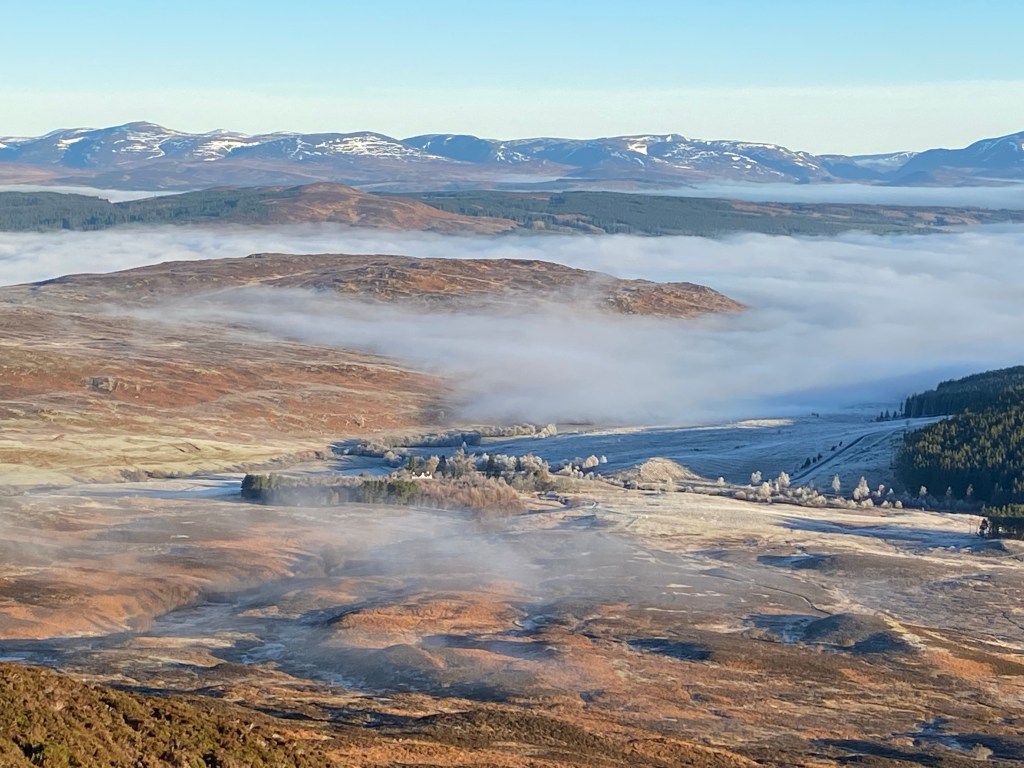
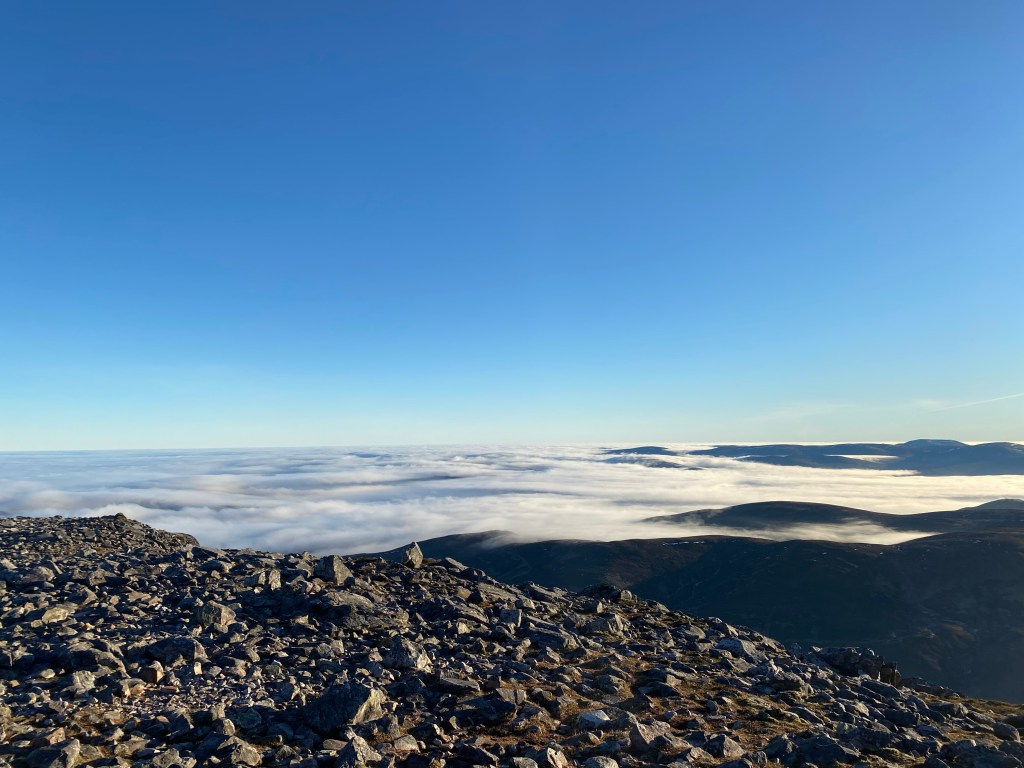
At valley level the temperature was a brisk -5 C and around us the land was a gold tinged white as the sun began to rise and pierce through the blanket of fog – really beautiful.
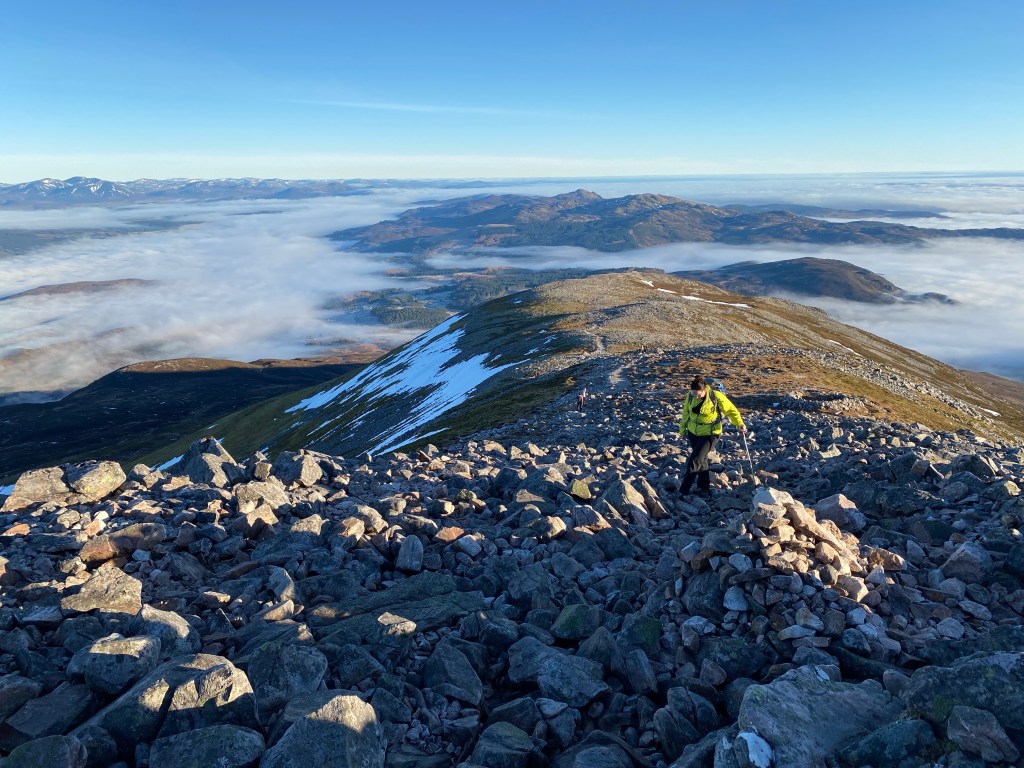
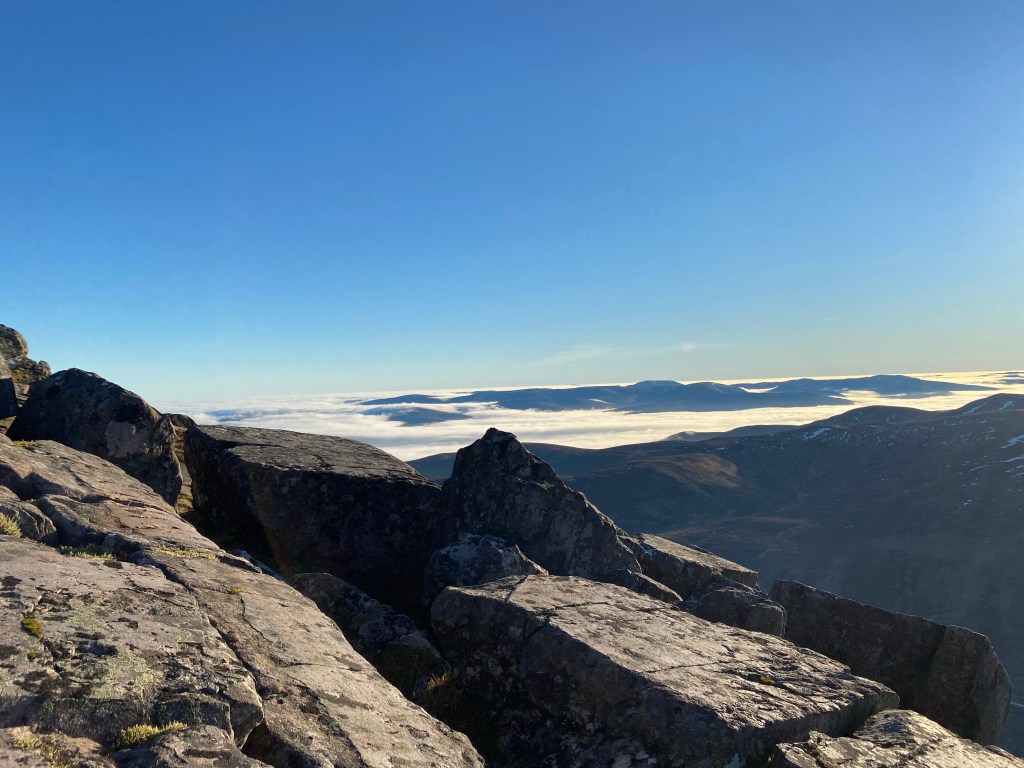
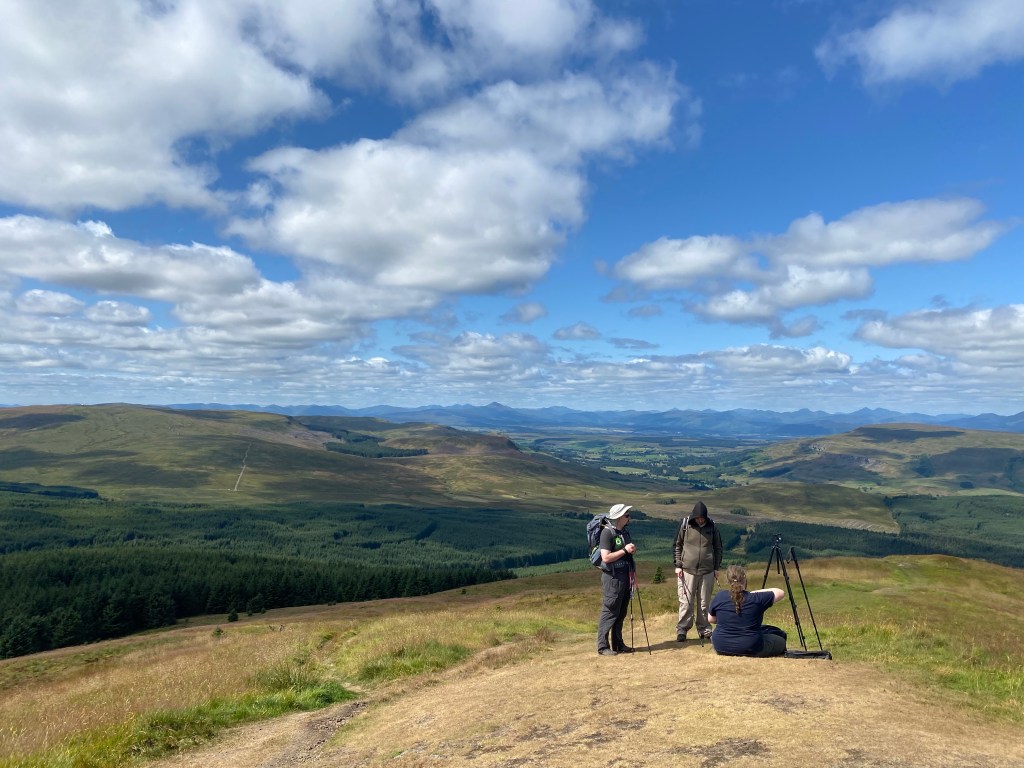
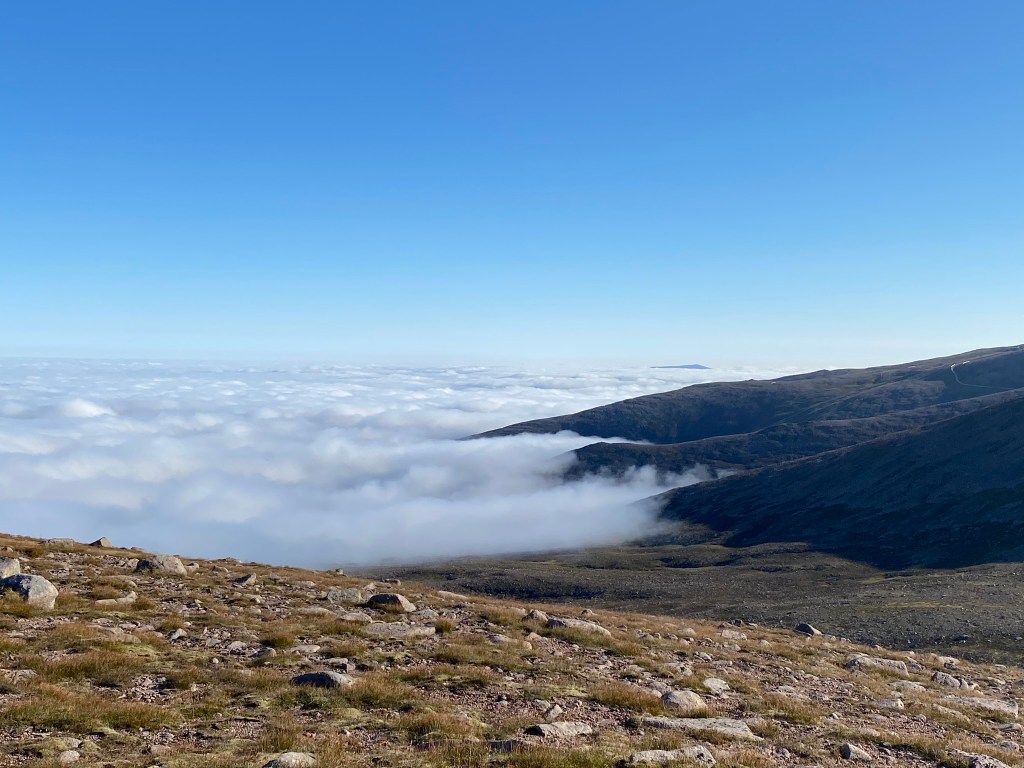
As we rose so did the temperature , leaving the freezing mist below , blue skies all around, the temperature inversion meant stripping off layers and being treasure to stunning sights below – the valleys lying in mist abs frost like something out of Narnia . We took out time , taking loads of photos and sitting often just to enjoy being out so this was no guidebook pace 😂
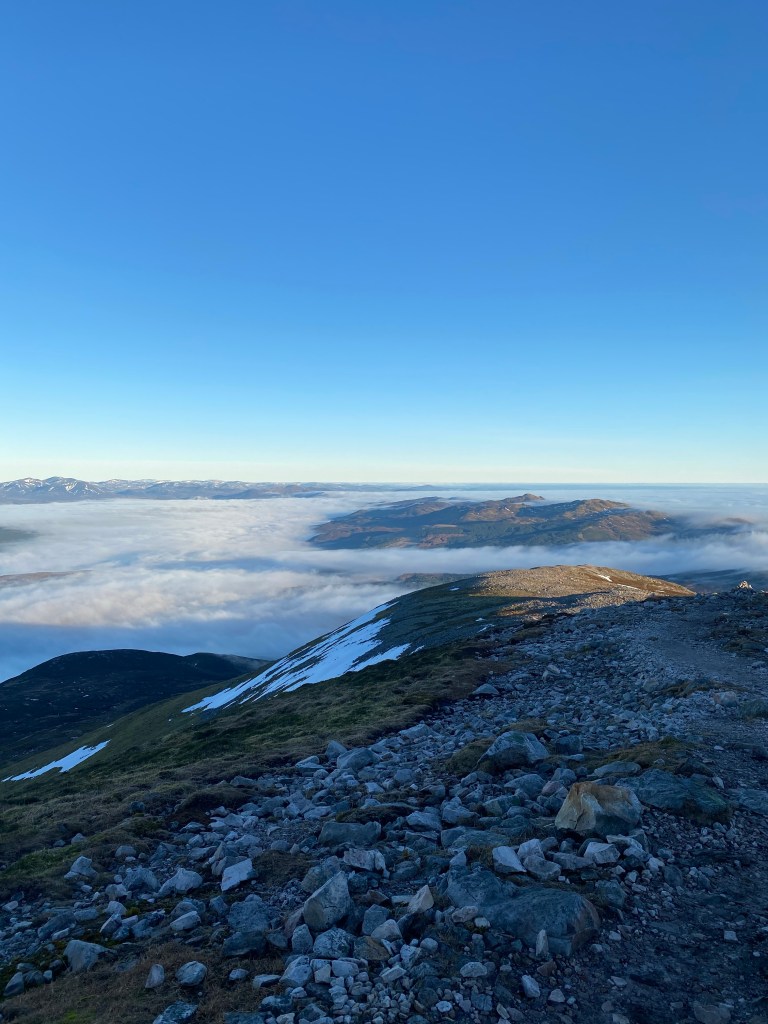
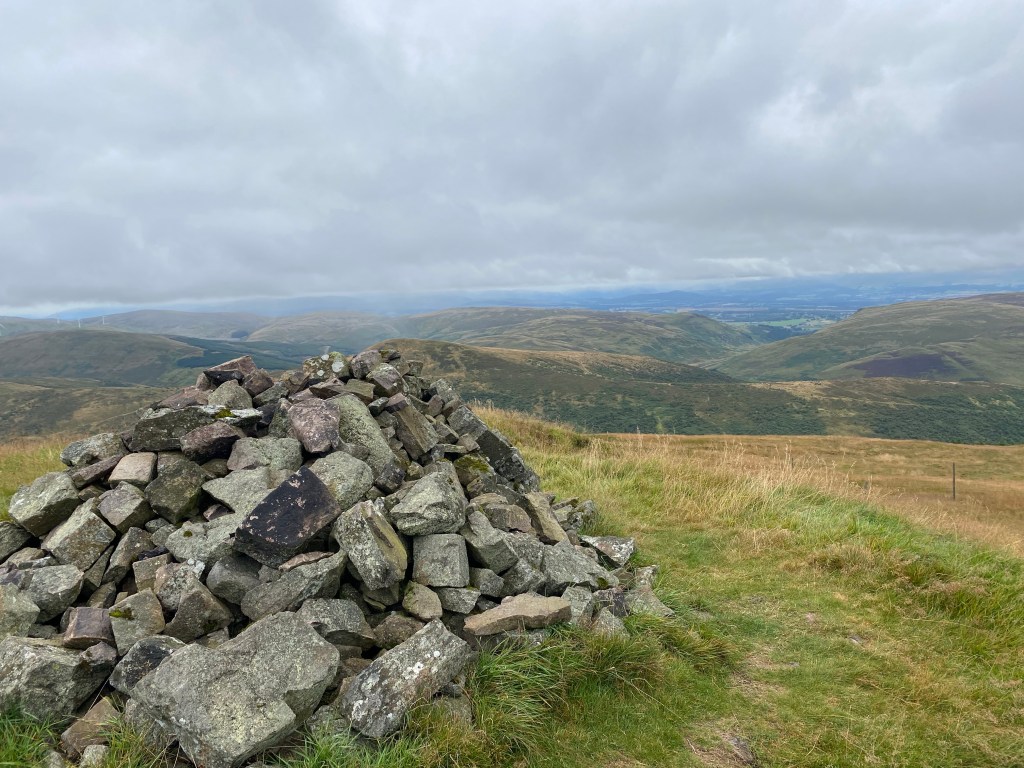
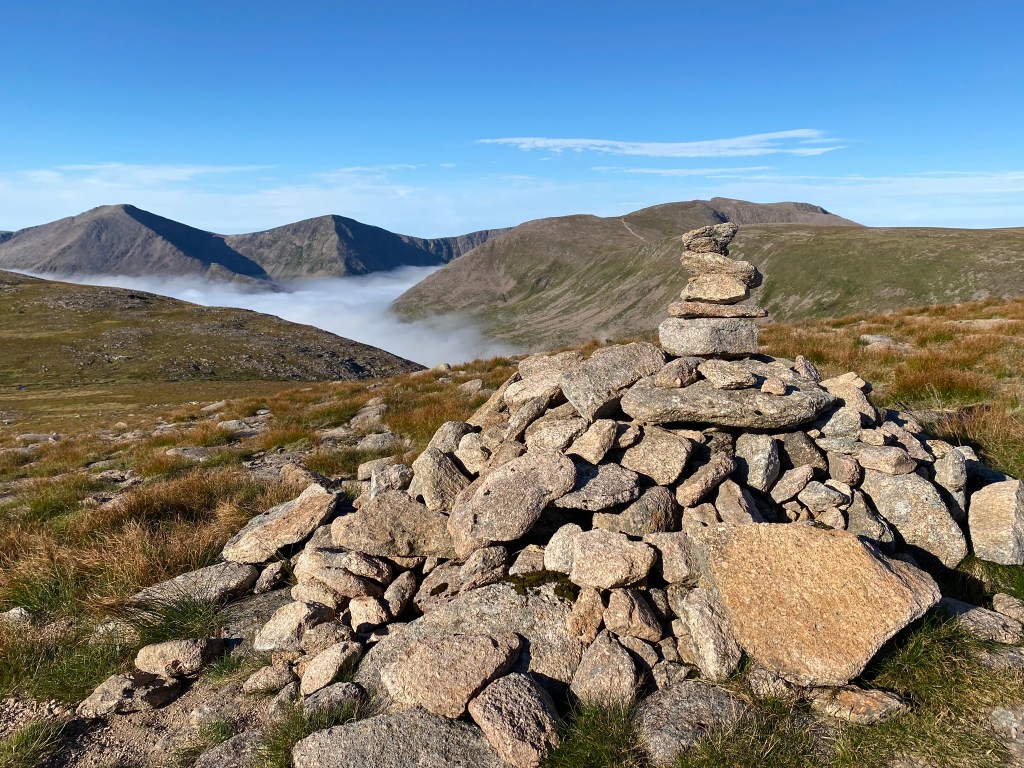
Schiehallion “treats” you to a few false summits before you work your way over the broken Boulder fields to the Rocky, narrow summit ridge . It’s a stunning summit with incredible views all around and well worth having a break and a coffee just to enjoy it .
As always a summit and a hill blew away the many lockdown cobwebs and it was great to be out .
As its winter and the days much shorter we soon felt the need to start coming down before it started to get dark, so we set off to pick our way down through the boulders and wind back down to the car.
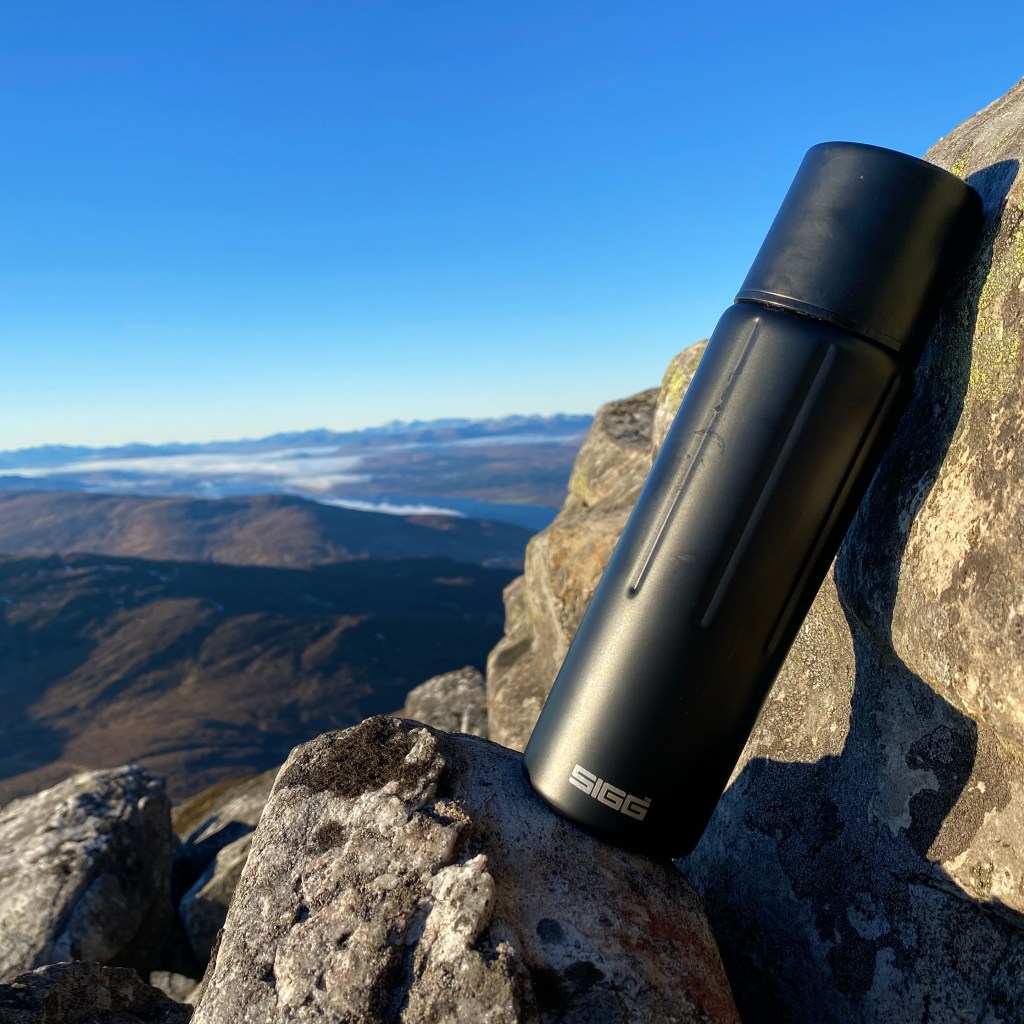
Amazingly after around 8 hours since pouring it my little SIGG flask had kept the remains of my coffee hot ! That’s impressive especially with such a cold start .
Was great to be back out and we couldn’t have asked for a better day for it. Hope you enjoy the pictures
After visiting Cowden Japanese Garden ( see my recent post) we had spotted some nice hills around dollar / Glen Devon and my mountain buddy Fraser ( See Ficaill Ridge post) has mentioned there was a couple of nice horseshoes so we decided to do a quick Bank Holiday Monday hit , do a bit and play it by ear as the weather looked a bit questionable .
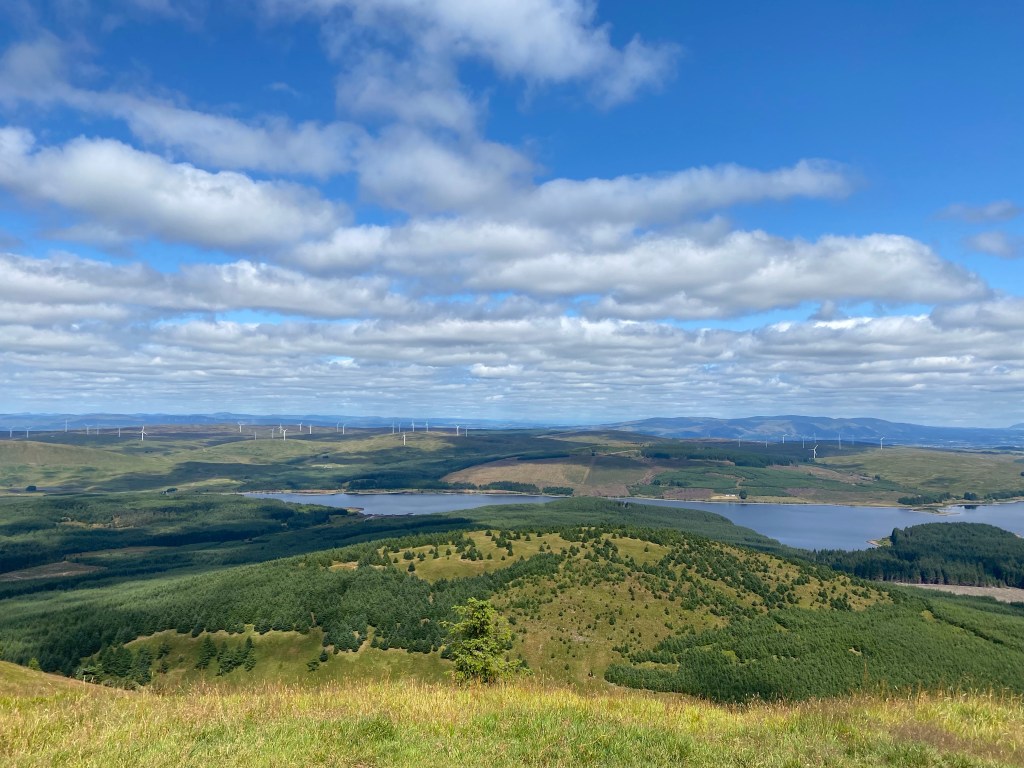
Glen Devon , part of the Ochills near startling has some lovely hills and from what we can tell it’s pretty overlooked as most head to he usual honeytraps around Glen Coe , Loch Lomond , the Trossachs etc so for a quiet walk we thought it would be ideal – and we weren’t wrong .
Nice big car park and obvious trail start to get us going we followed as usual the walkhighlands route , map and compass in pack as always ( good to practice and you never know when you will find yourself inside a cloud and blind in Scotland !)
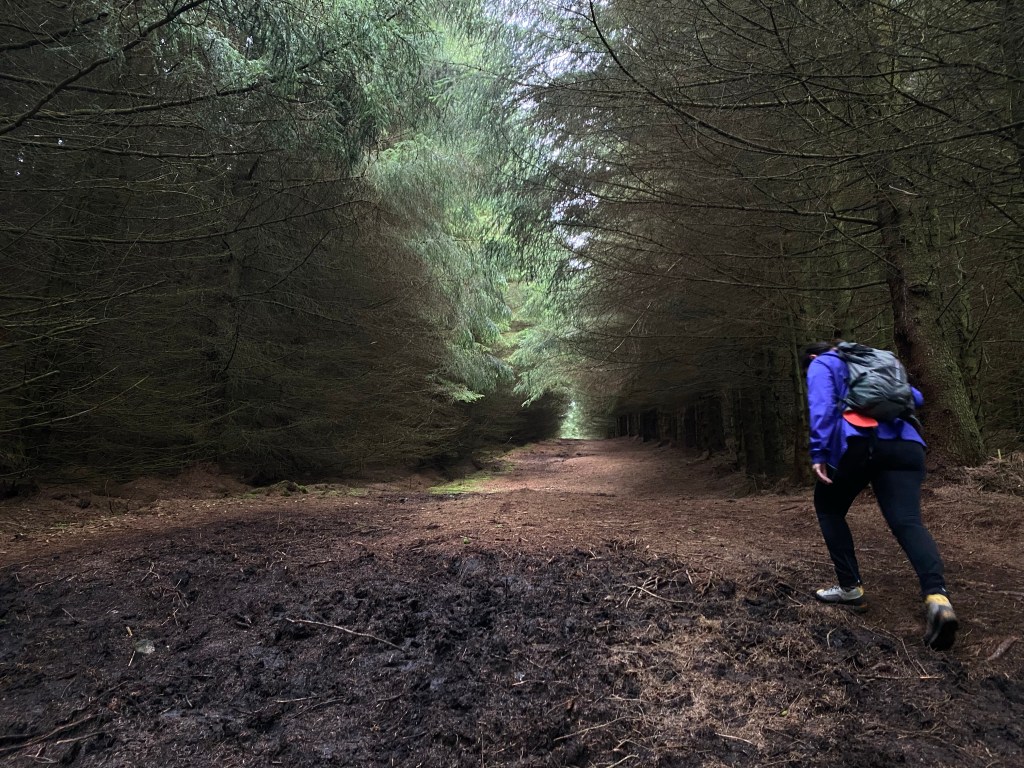
The route heads up from and around the Glen Devon reservoir via an easy but steady incline from the car park , through the forest track and then a right turn at a small cairn after about 2.5km , up via a fire beak to the hills themselves and to the lovely views all around . Plenty Mountain biking trails as well so we actually saw more bikers than walkers i think but overall it’s a pretty quiet place ( ideal!)
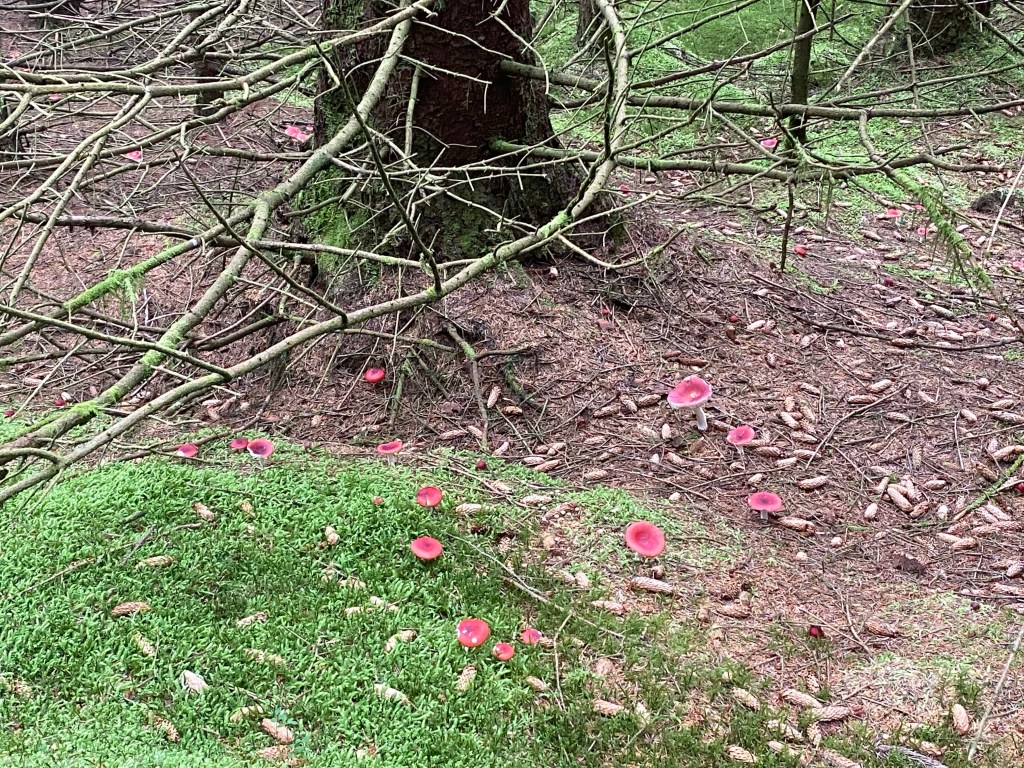
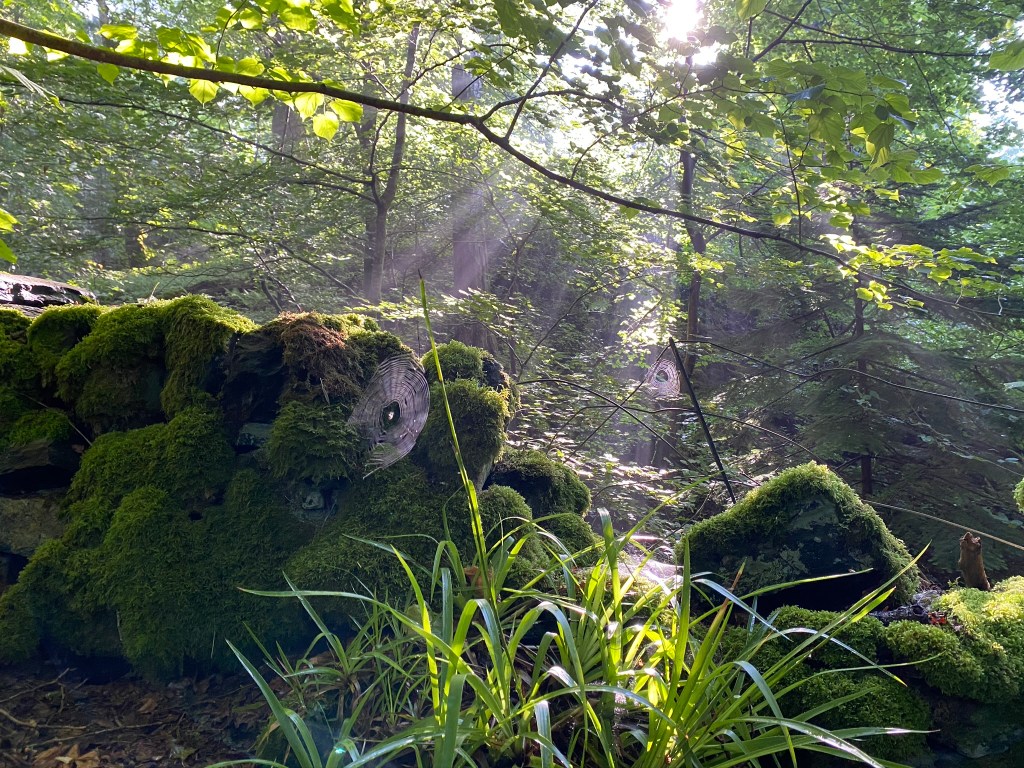
As you work up through the forest itself you’ll find a whole carpet of various types of mushroom 🍄 – incredible – never seen so many ! ( remember unless you know your fungus and are are very sure never eat any you find some can kill … or at least send you a bit loopy)
Pretty quick up and down just to the first summit as rain was setting in and we’d been out for a couple of hours so happy to enjoy it and head back . 9km all in , the full round is only about 15km so an easy one for when you feel like it and it would make a good, relatively easy but worth it winter day for anyone starting to get used to winter walking and gear . Remember off you’ve only done summer / Autumn walking telnet Winter is VERY dodder and takes extra thought and skills – but is my favourite season for walking and especially climbing !
Over to the pics .
I’ll say it again – Remember as we head into Autumn that Scottish hills can be less forgiving than we think – so planning ( route, map, food/drink) are essential, having the right gear ( including “just in case” and summit layers ) and knowing how to navigate I.e. a map + compass and skills to use them , never mind how many apps / gps’ you have ) are all critical – our mountain rescue folks are incredibly stretched and we shouldn’t be placing pressure on them, or putting them in danger when we could have simply prepared a little better !
If you are new to winter check out our blogs on preparing and kit for winter – a read could save you trouble – or even a life .
Enjoy the hills – take care – and let me know if you do any of the routes we have – or suggest others you love !
One positive of the last 18 months is that we have explored more of Scotland (beyond the mountains) and discovers some great hidden gems .
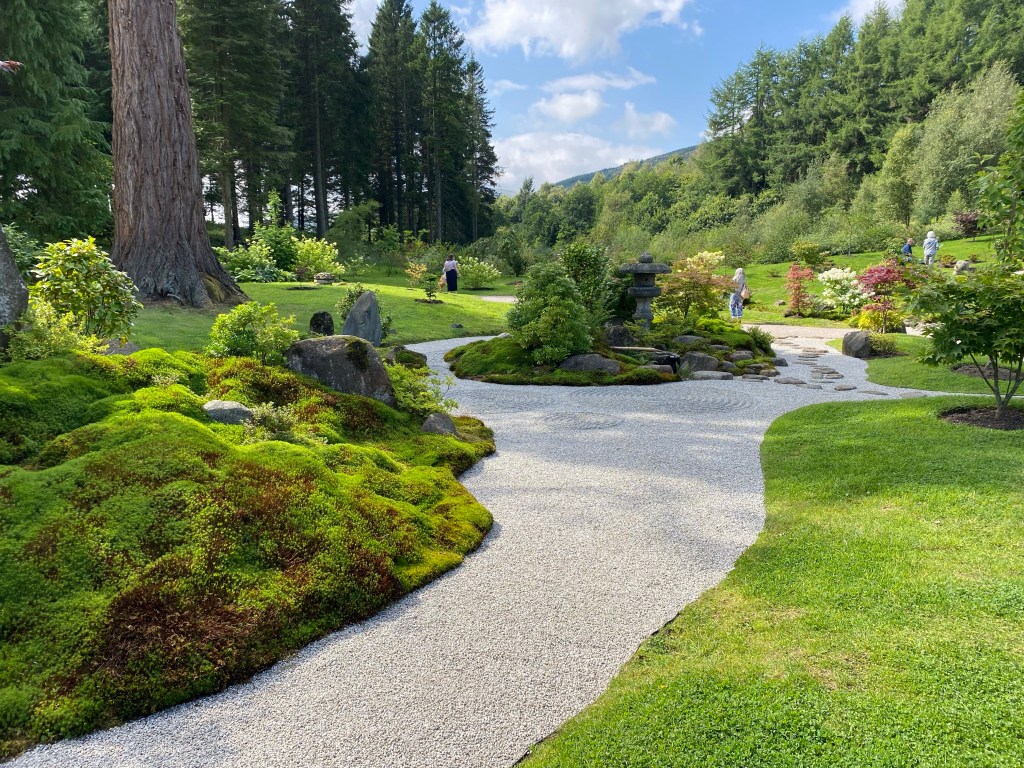
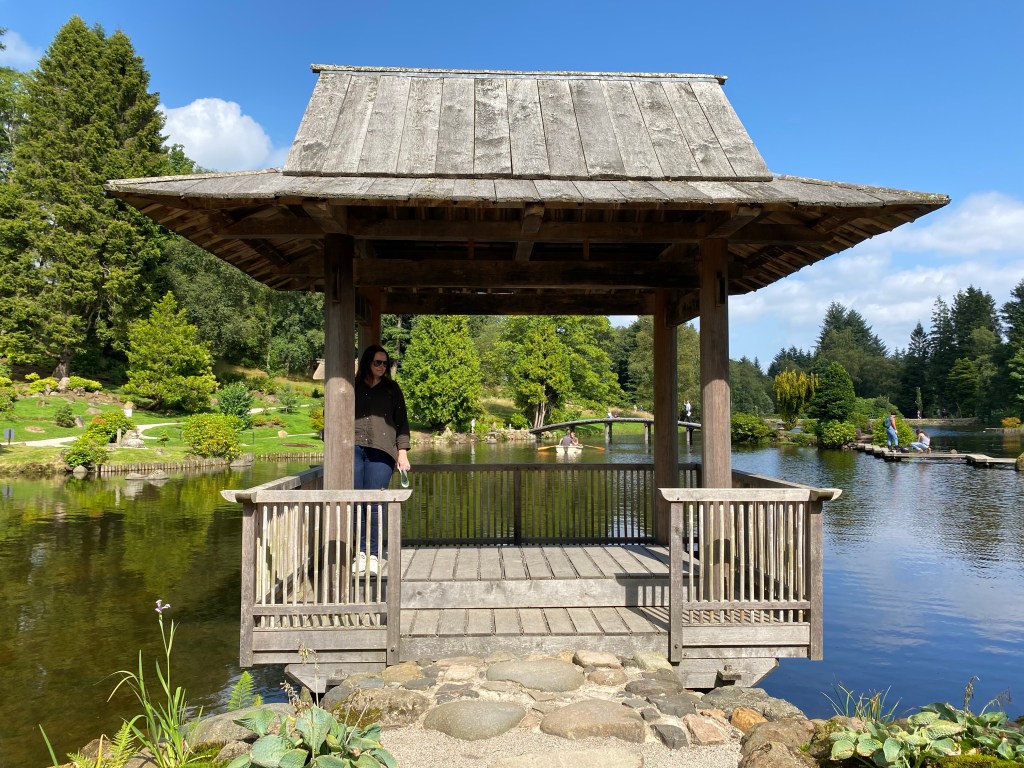
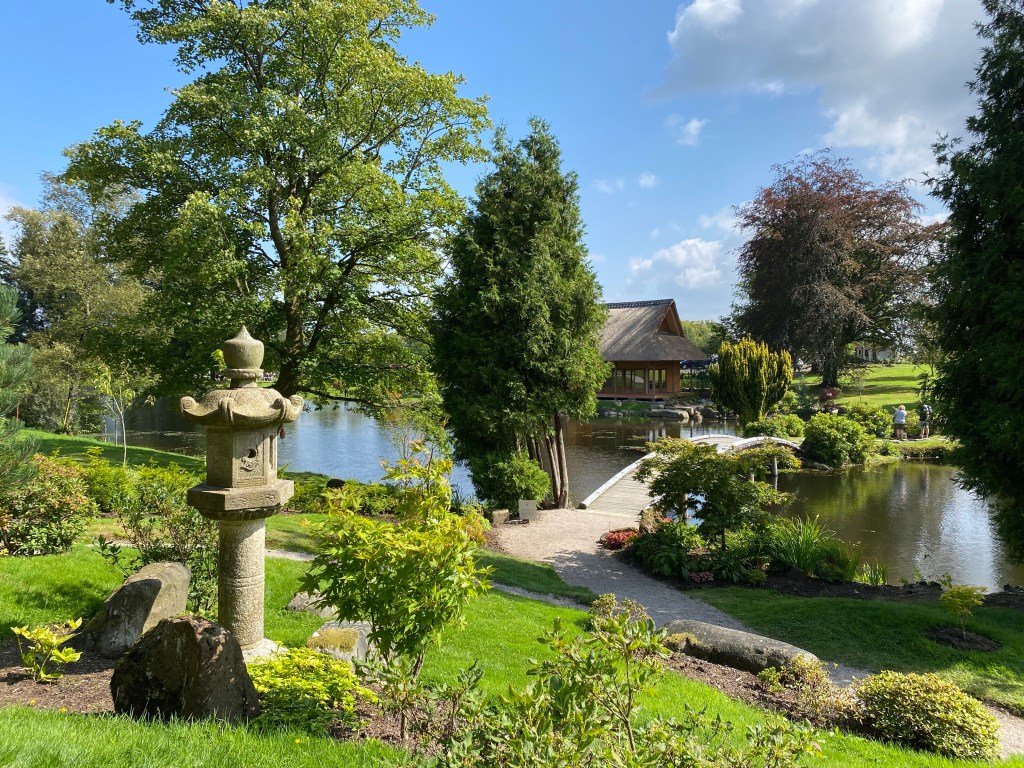
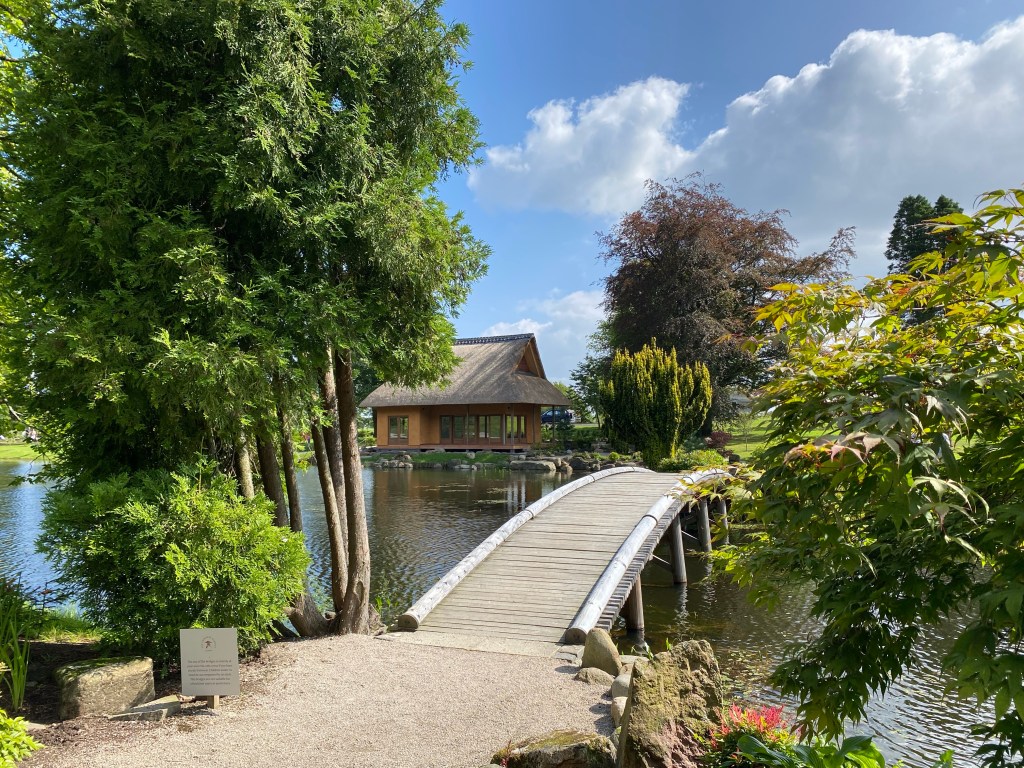
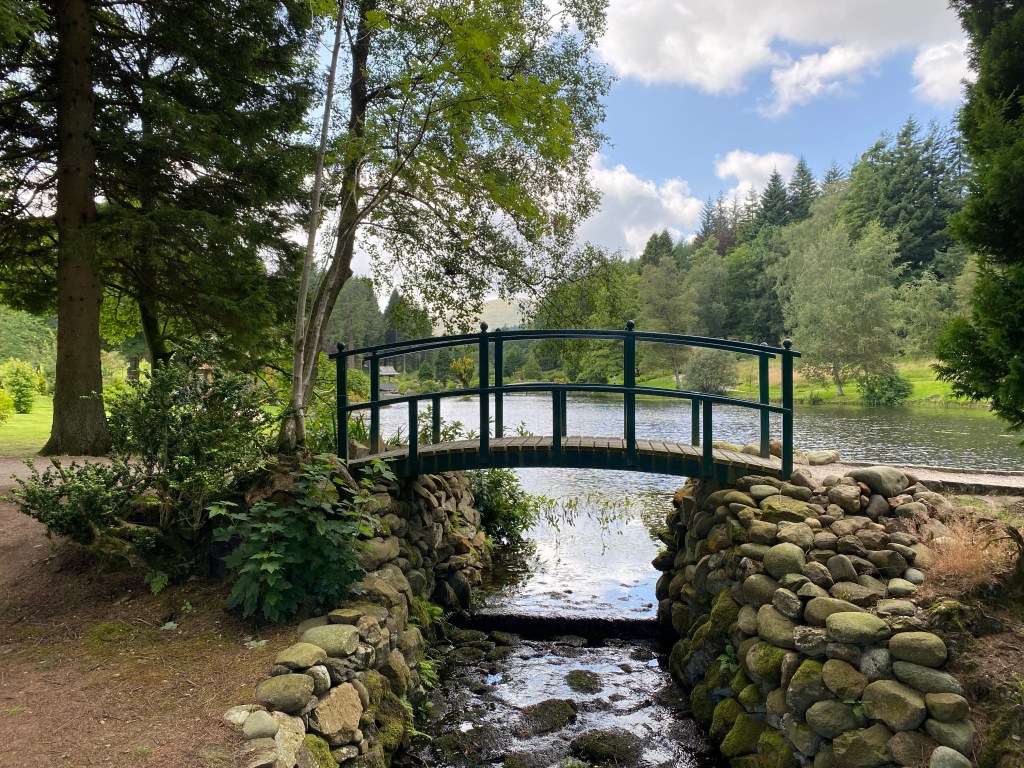
Yesterday we finally visited the simply sublime Japanese Gardens at Cowden , near Dollar .
Set near Glen Devon , close to Stirlings Ochil hills this beautifully architected garden was first developed at the turn of the century by the Scottish adventurer Ella Christie after a trip to the Orient .
After falling into decline and suffering vandalism in the 1960’s it’s being brought back to its full glory now by a dedicated team of experts led by Professor Masai Fukuhara.
It’s on the MUST see list for all ages ( there is also a small kids adventure playground in the woods and a tea room and shop – including plants of course) .
I’ll let the pictures tell the story although I could have posted far more but I don’t want to spoil it – it needs to be enjoyed , at leisure for that true zen experience 🙏
For more information and to book in advance (required) check
Been a very long time ( 2 years + I reckon) since Fraser and I got on a hill – of course the C19 issue stopped us all but Fraser and I did a lot of mountains together and it’s been faaar to long !
Grabbed some annual leave and we stuck August 12th in the diary for a hill day – both knowing we were way off our previous fitness after a year and a half of on and off lockdown and the inevitable Banana Bread … we opted therefore for something “easier” – and the Cairngorms with its higher start and relatively easy walk ins to routes was a no brainier .
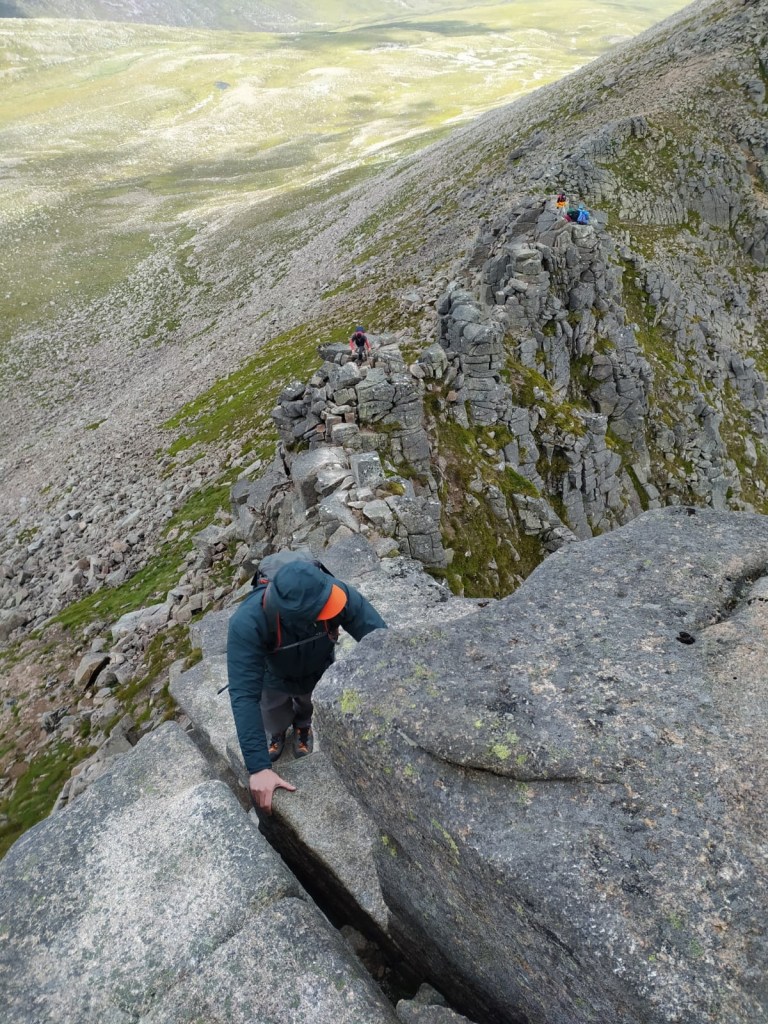
Neither of us , despite winter climbing in the area and walking often had done the low grade scramble of Fiaciall Ridge , which sits atop the buttress of the same name creating a curtain between Coire an t-Sneacha and coire an Lochan in the North of the Caitrngorm plateau. A great summer and winter route it’s been on the to do list for a while.
It’s August – summer… right?? About the same time of year 3 years ago we’d done a day around the corries and it was sweltering so as clothing is a critical part of kit in the mountains the joint agreement was shorts would be the right choice ..
Drove up in lovely weather but as we arrived in the Ski Cairpark ( the starting point to walk in) it struck me folks around us were gearing up like it was winter … stepped out the car in shorts and flip flops ( for driving) and whammy – it’s blowing a hoolie and is baltic … so NOT short then !
Making out way up the hill to the ridge , Loch Morlich in the background
Hope for the best , Plan for the worst … luckily we had brought spare gear and proceeded to layer up like it was October ! Then off we set . The usual route is out south west from the ski centre and up along the broad rising hill that takes your to the ridge proper. Clearly our fitness ha suffered as it was a far harder slog than it should have been – the hard headwind didn’t help – but at least it saved us from midges 😂
Fraser approaching the ridge proper Lunch before heading up the ridge itself ( on the right hand path) Looking back from the ridge
Arriving at the start of the ridge we dropped down right off the ridge start to a path for a quick bite and drink to take us up the ridge to the summit ( there is always an option to drop right off the spine of telnet ridge onto a path , for anyone considering it , and it takes you to the summit of the ridge of the exposure gets too much but be aware it’s steep and in itself can present difficulty)
Starting on the ridge itself Early sections of the ridge Fairly easy going , big blocks , good holds Fraser heading up Views into Coire an Lochan on the right
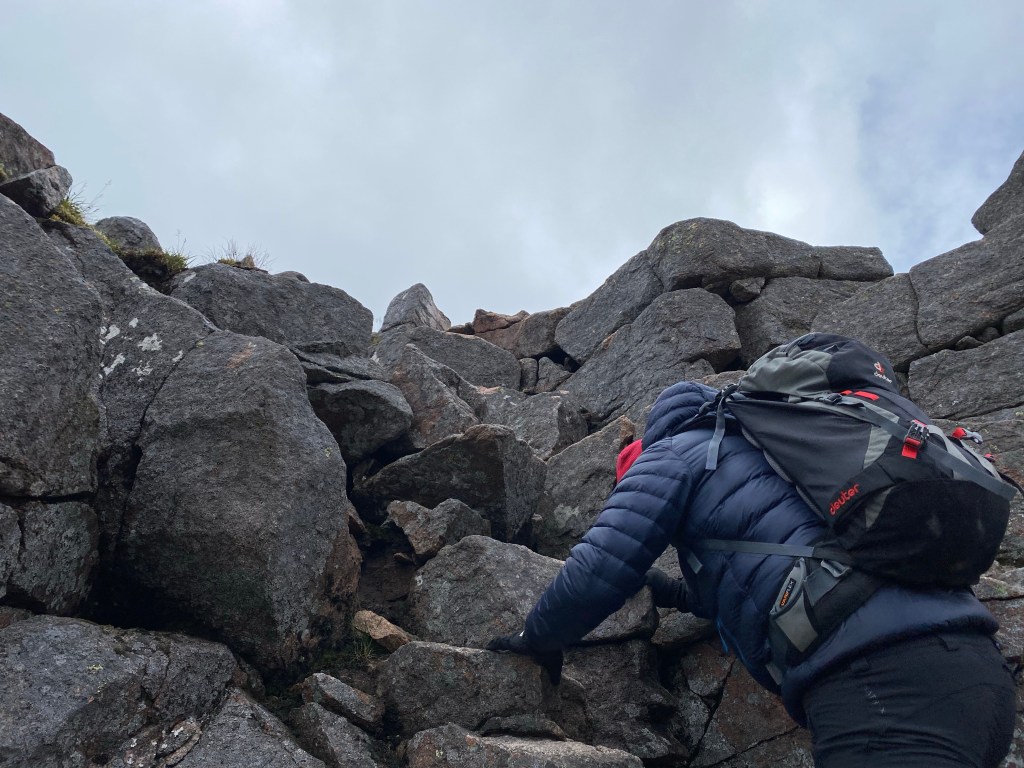
Up onto the ridge and head down against the wind we made our way along the start , over large blocks , making for fairly easy scrambling before approaching the more vertical summit line . From the ridge the last section can look vertical and exposed however as you reach it’s base you turn out slightly to the right and find a very comfortable chimney to climb which the eventually pops you out left and up to the plateau itself. A short but fun scramble !
As soon we summited the wind just slammed into us – comical at times but making for difficult walking we made a quick like for , and then descended by the Goat Track , back into Coire an t-Schneachda and wound out way through the Lochan and boulder field to the path and back down to ye ski centre – stunning views down to Loch Morlich and Aviemore with us all the way.
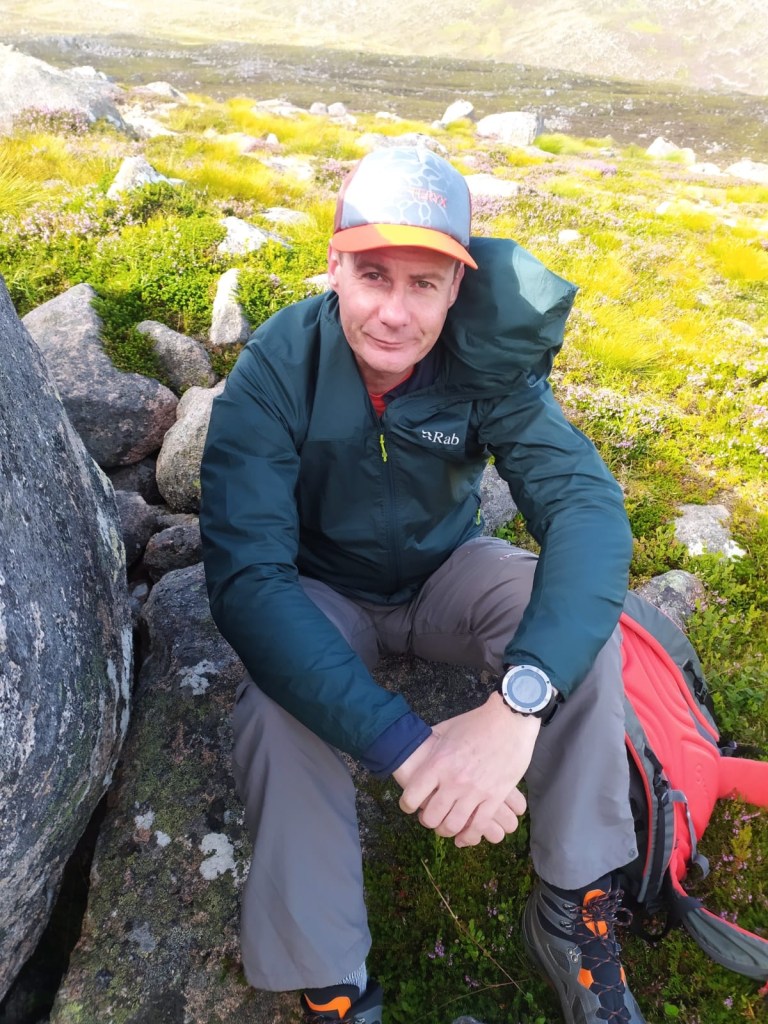
Looking along the plateau towards Cairn Gorm Yours truly
Awesome day out as always with a great buddy , thanks also to Fraser for some of the pics – next day needed soon!
… are lost – we all know this one but I found myself saying it in earnest for the first time at the weekend.
We went for a “quick hit “ to Meikle Bin , a small 570m hill in the Campsie Fells , just north of Glasgow . Long story short .. wrong car park .. a much longer walk ensued but a lovely day out , a lot of in the forest trails and one very overgrown out of use path , a lovely summit and the worst heel blisters I’ve had in ages ( lockdown feet!)
Great to be out of the house proper and to just breathe it in again – off to Cairngorms next week for Fiacaill ridge and can’t wait – getting back in the saddle !
How long have we all been in “lockdown” .. honestly I’m at the point it’s hard to remember how the before tikes felt but I’m slowly starting to emerge from my imposes cocoon and get out and about .
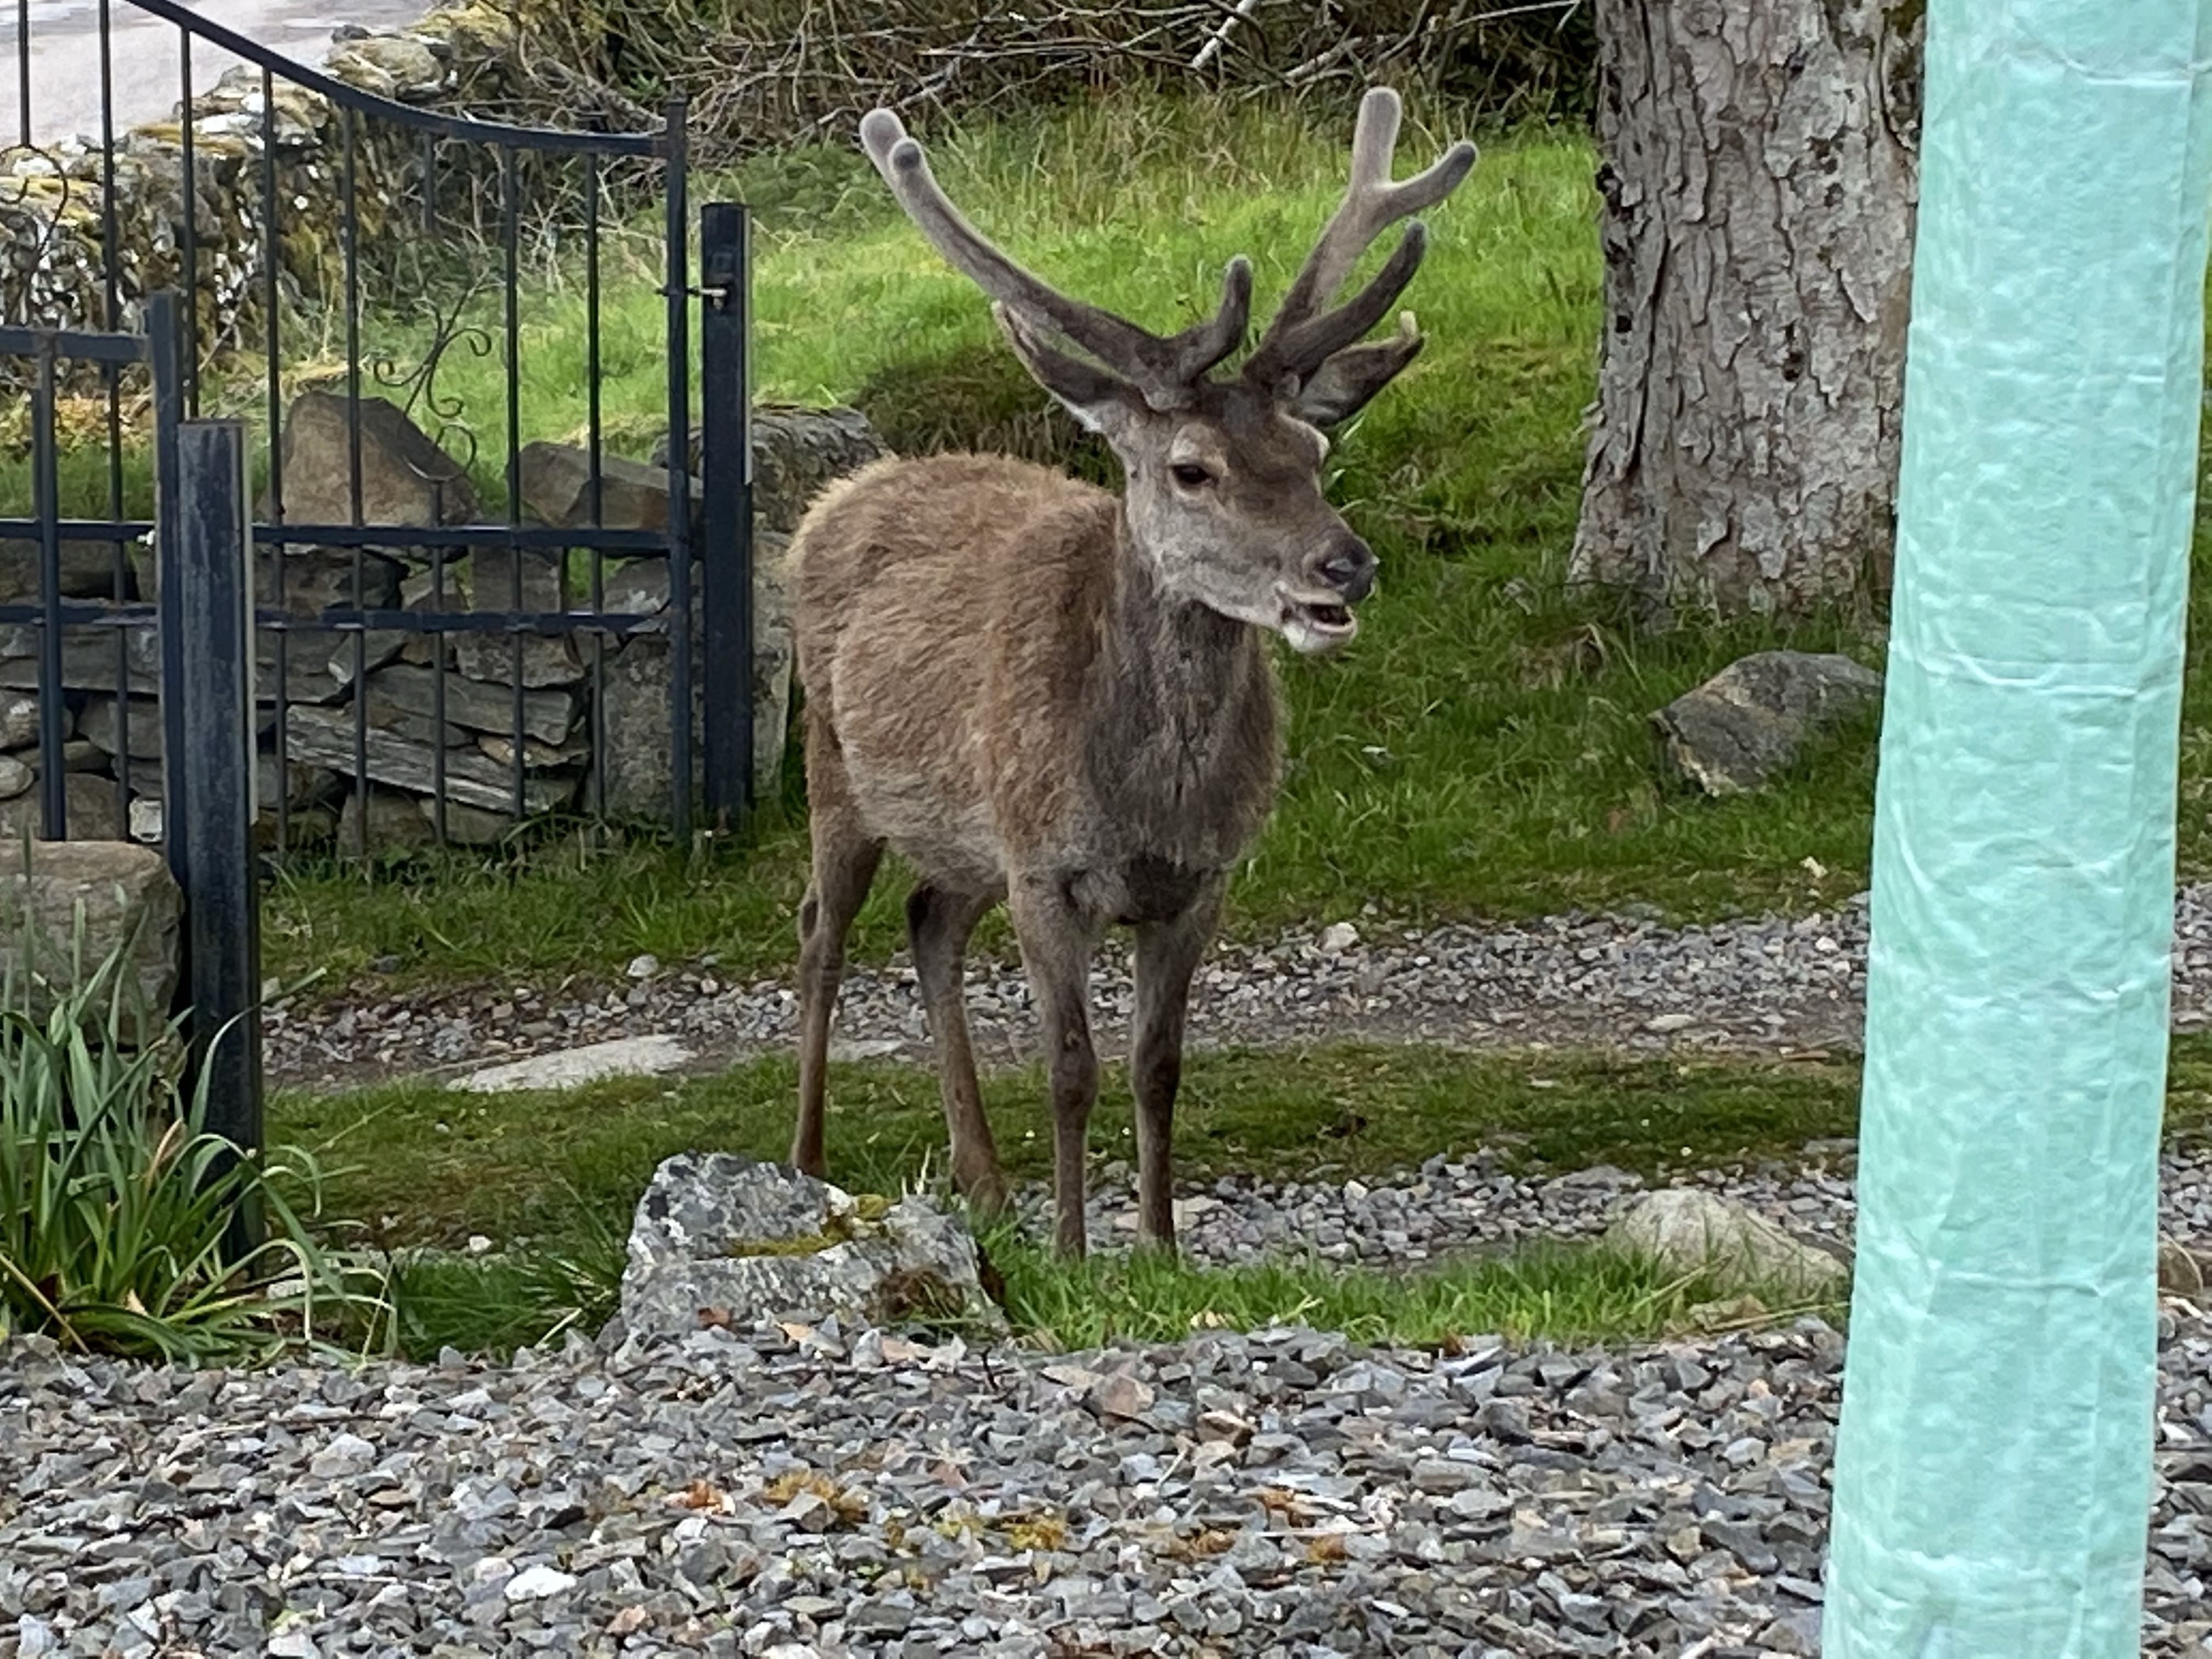
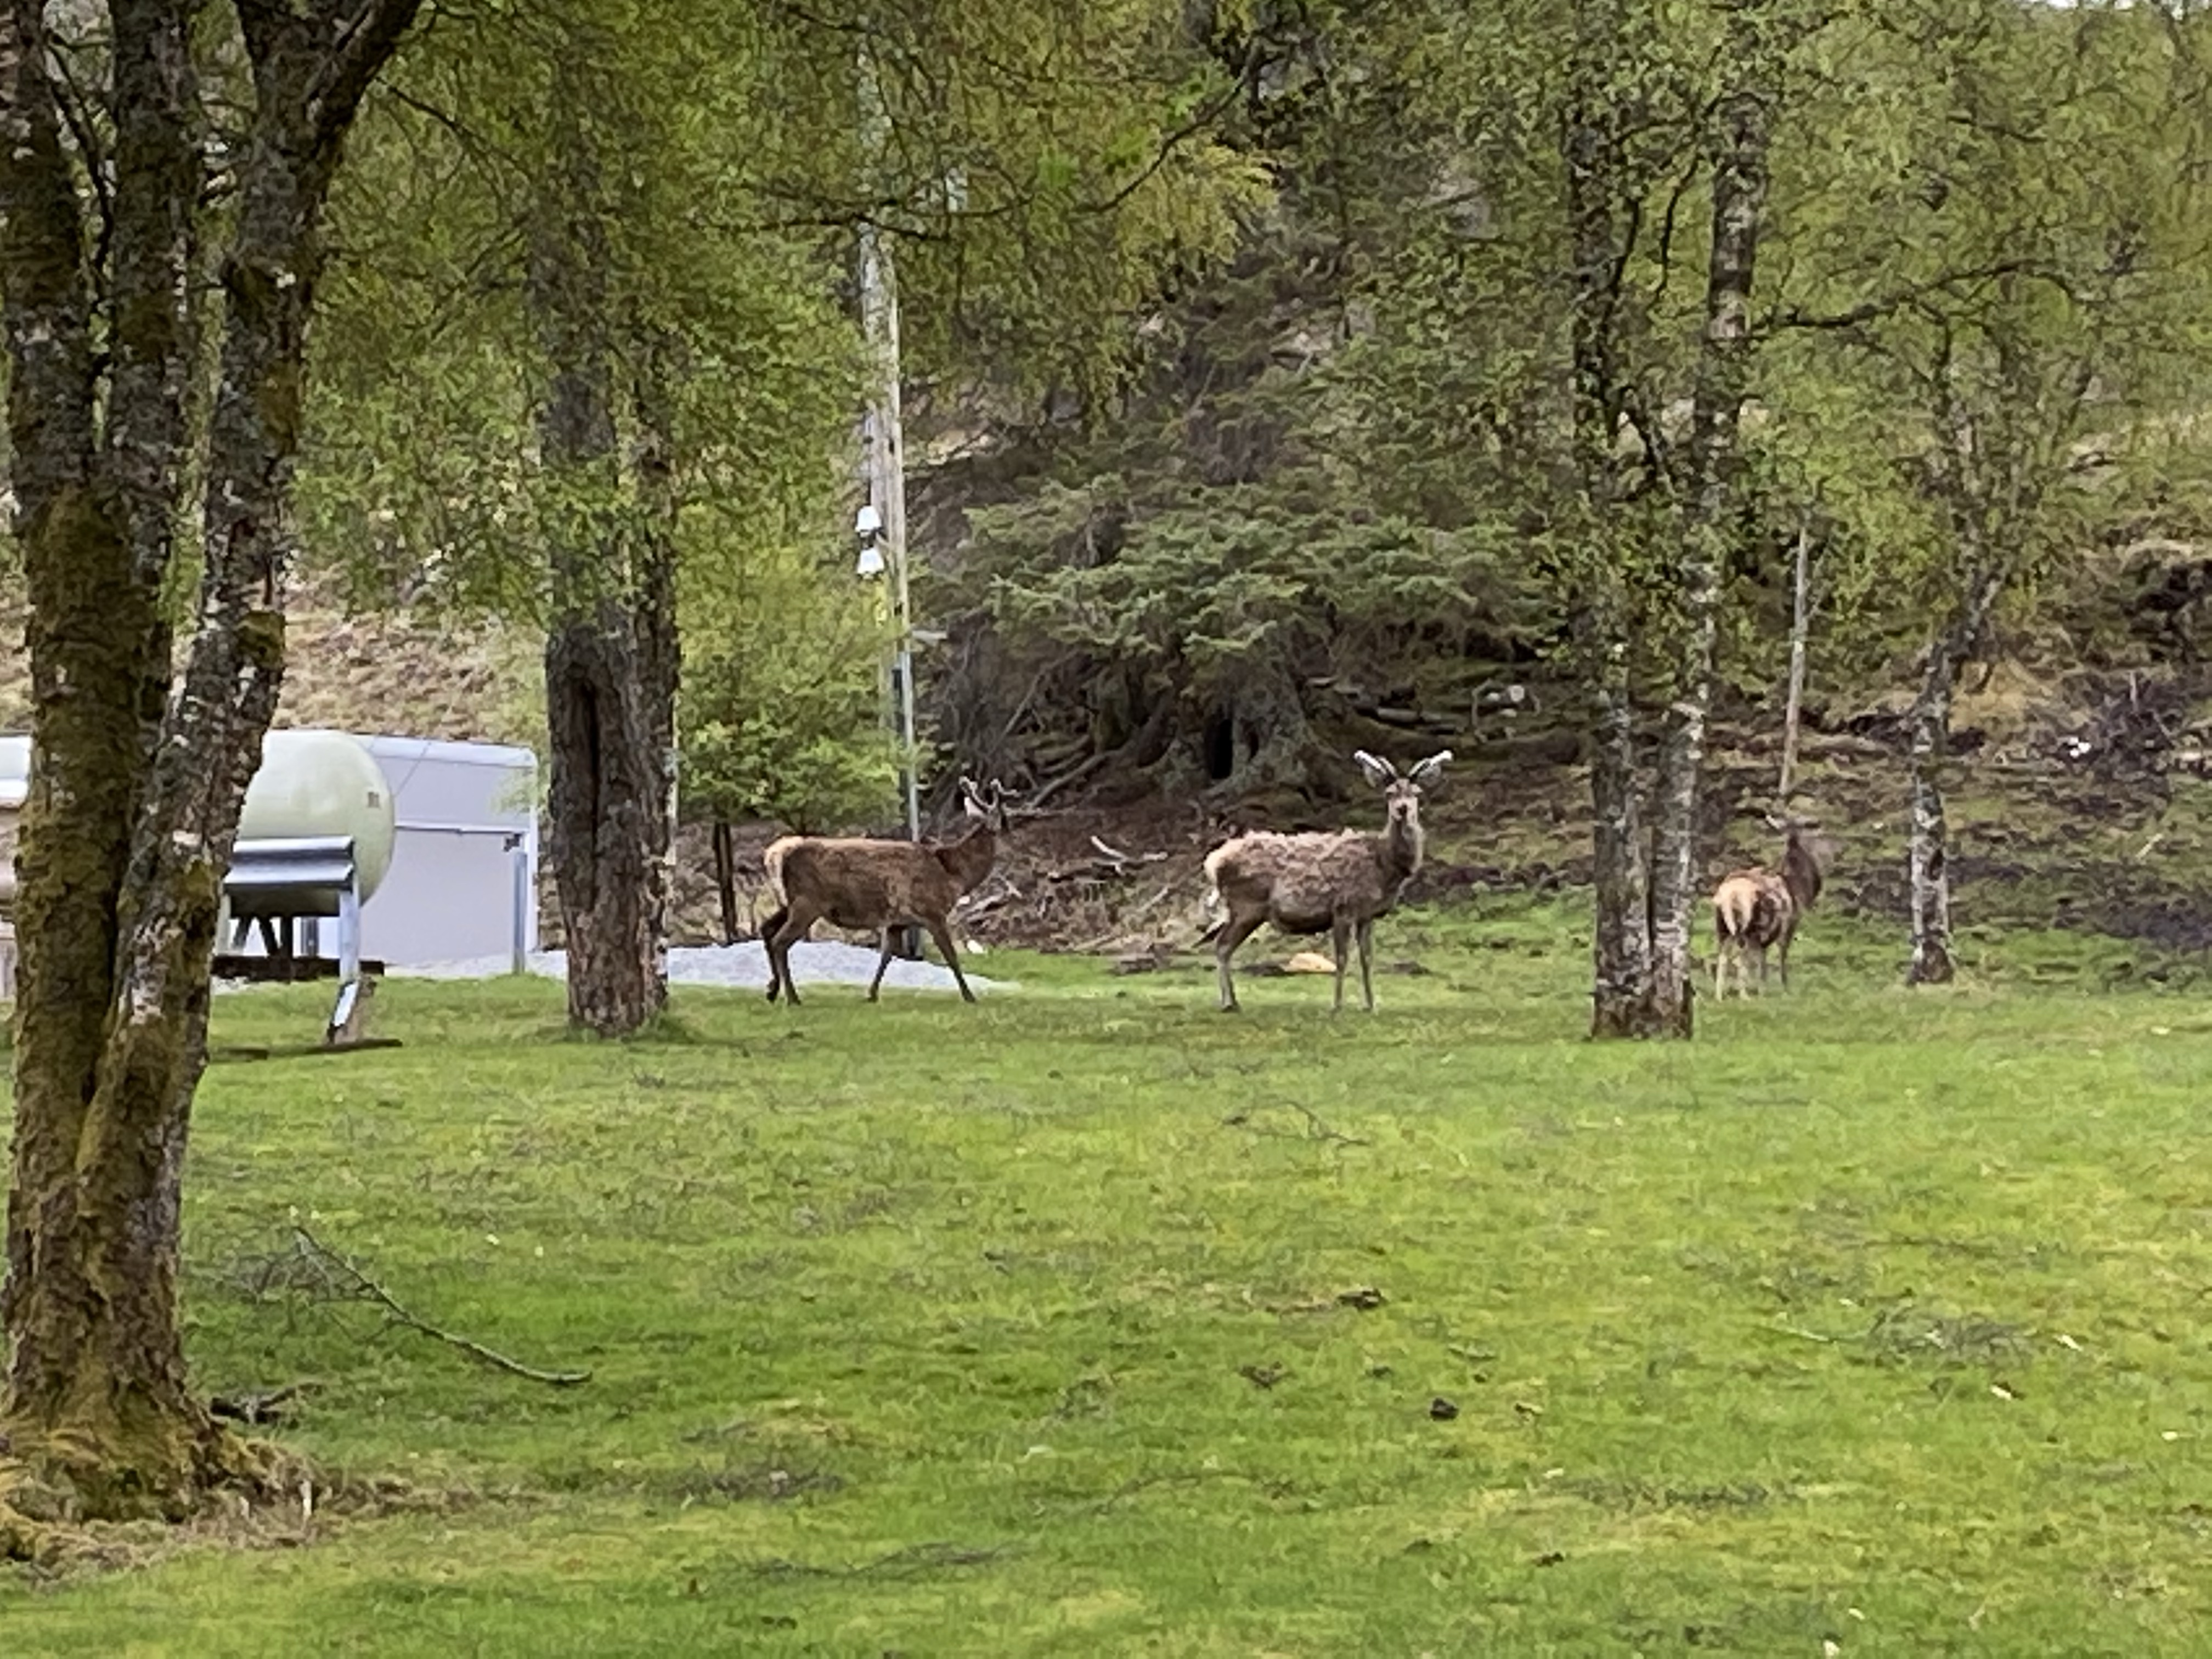
No alpine ice or airy ridges – but feet on the ground , at least one summit , fantastic views around the highlands and even some guest of the antlered ( and not) variety.
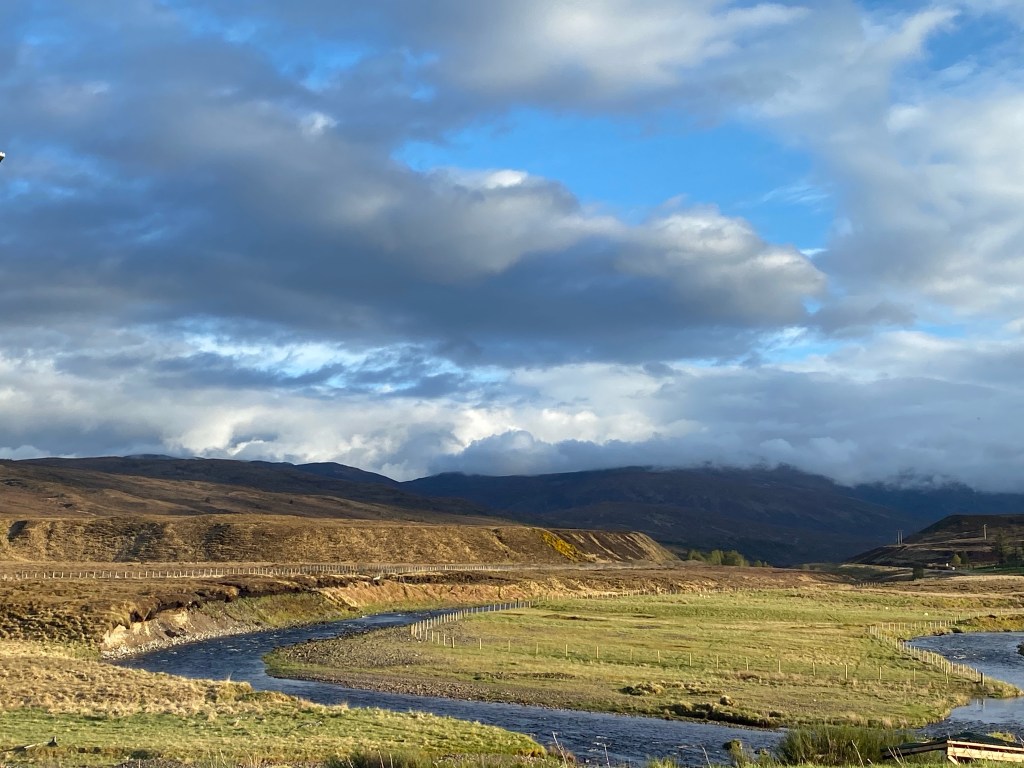
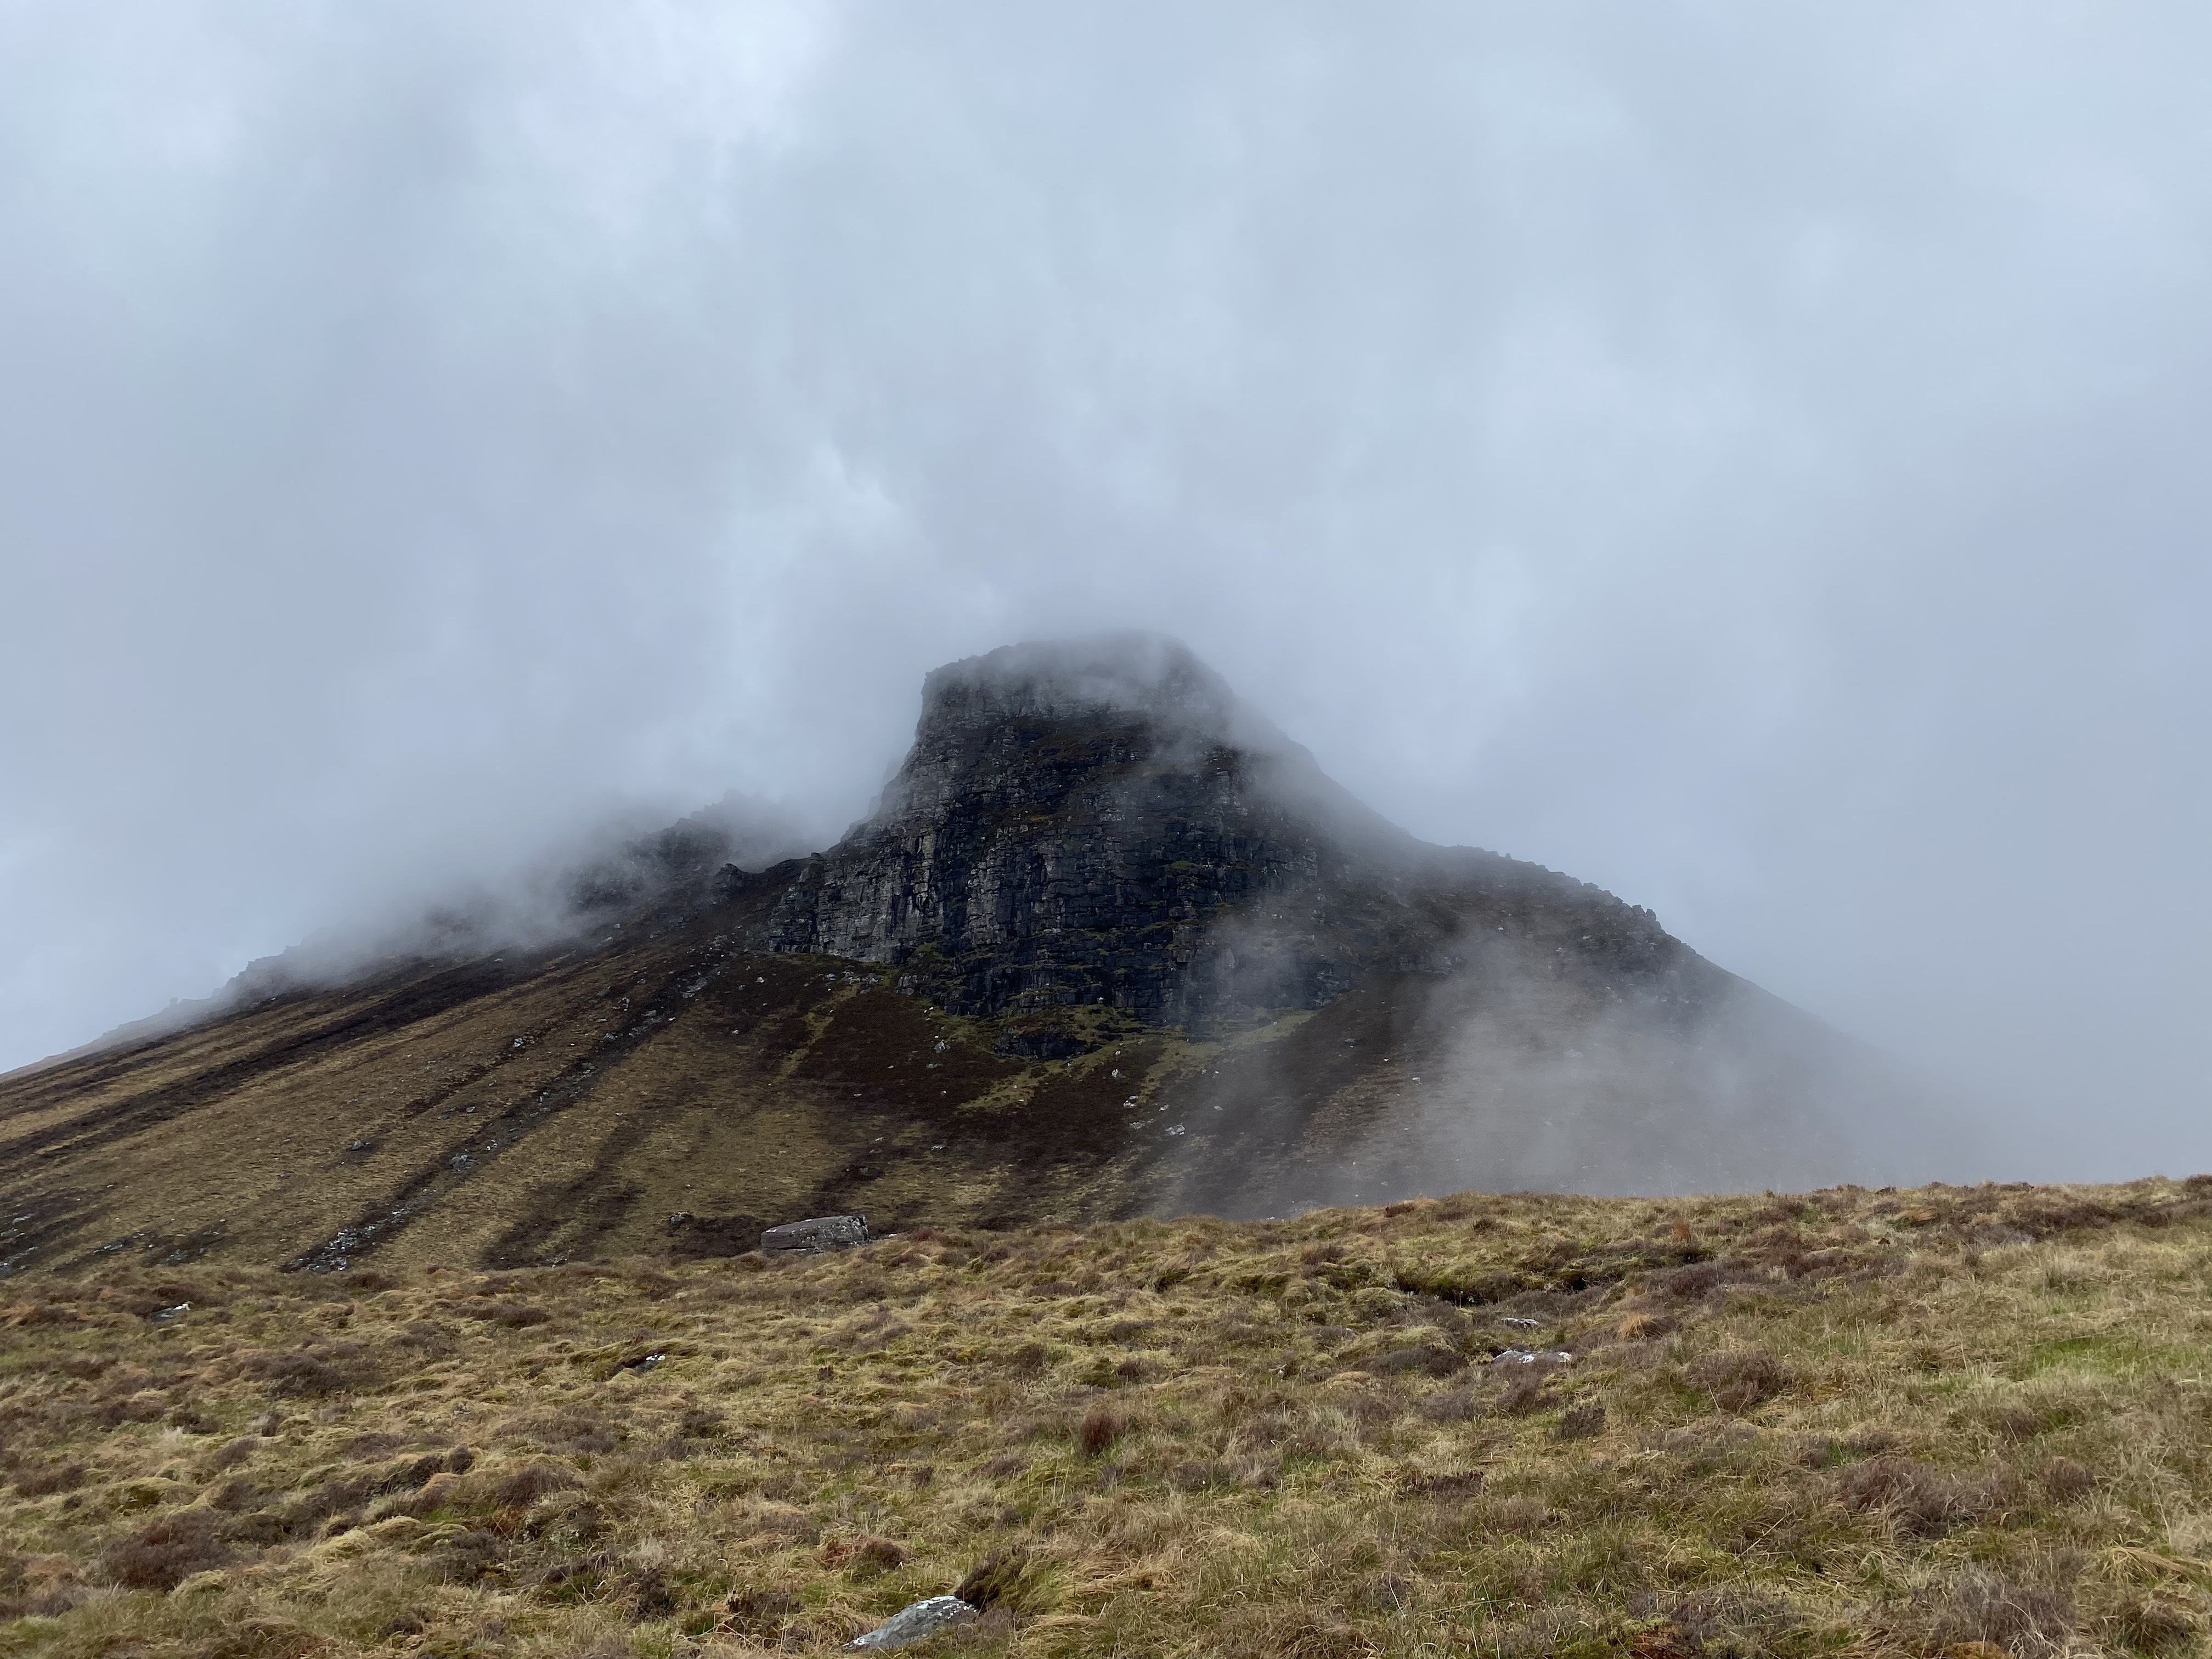
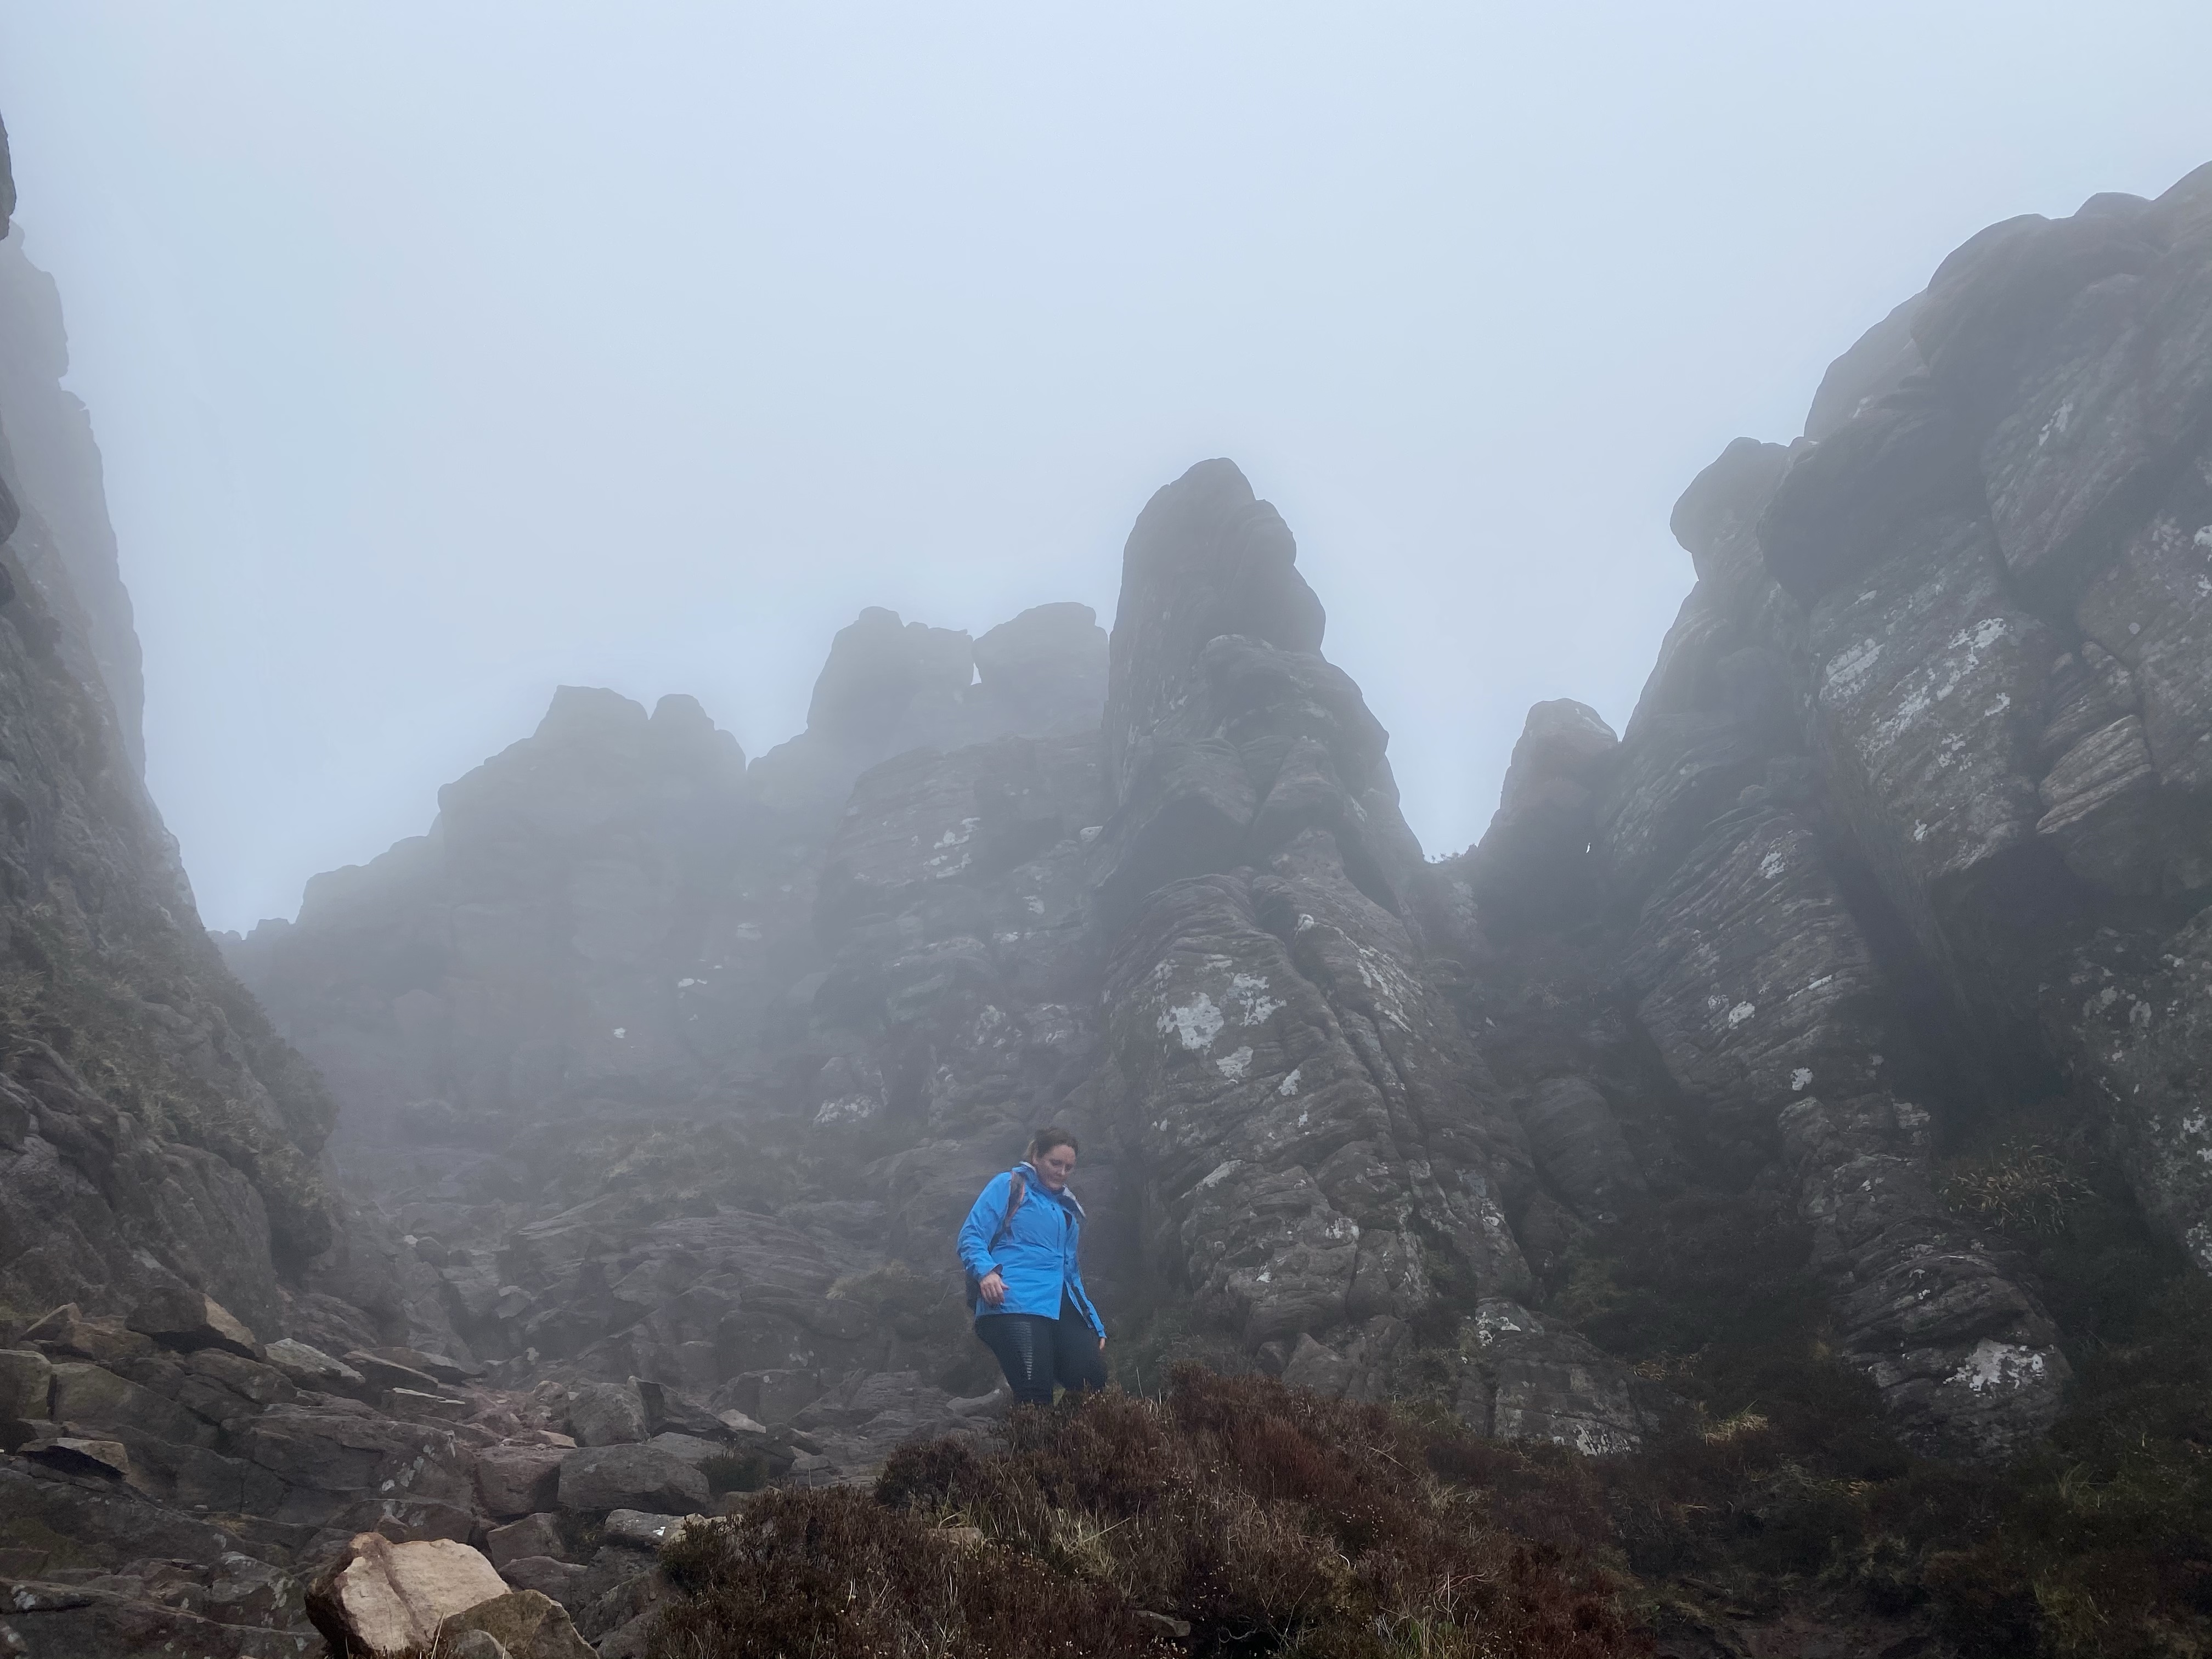
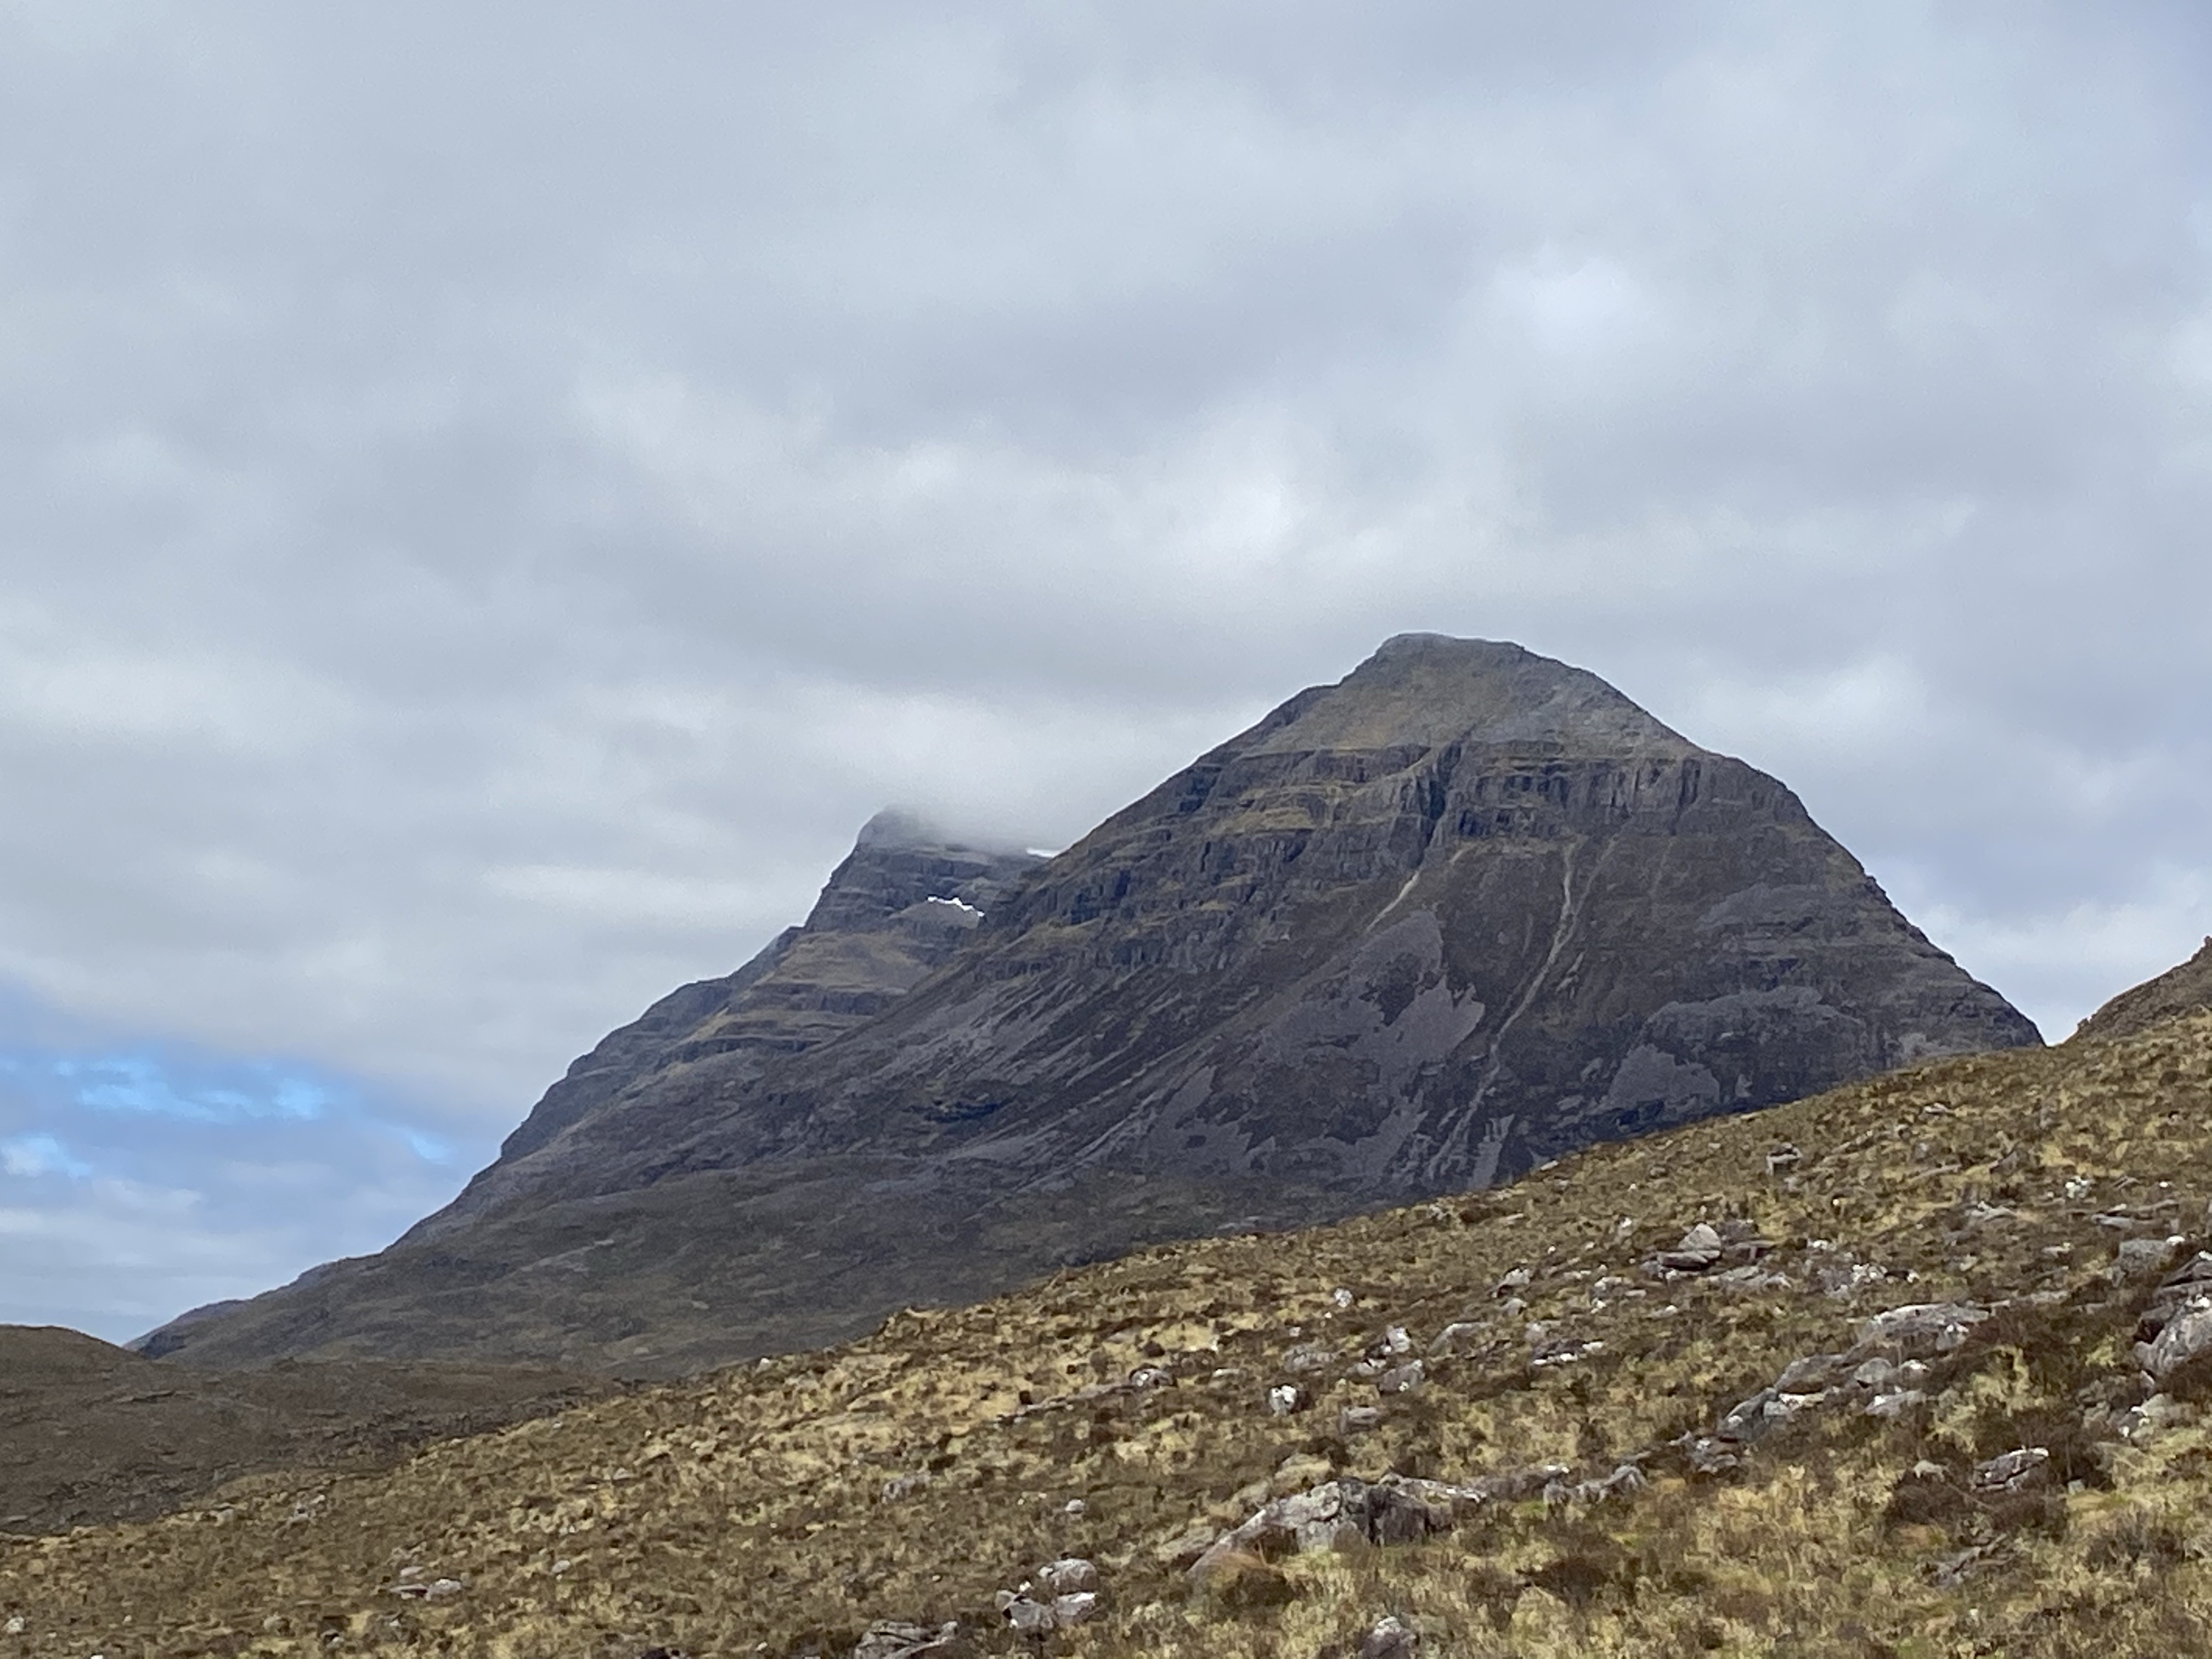
Some photos below of a short trip around Torridon /Assynt and sorrounding area in May , including a stay at Achnasheen ( near Loch Maree) and a summit of a flag bound Assynt classic Stac Pollaidh
View from our Achnasheen cottage Stac Pollaidh ( I promise )
Stac Pollaidh
Our Antlered breakfast visitor and his friends at the local hotel ( ex hunting lodge ironically)
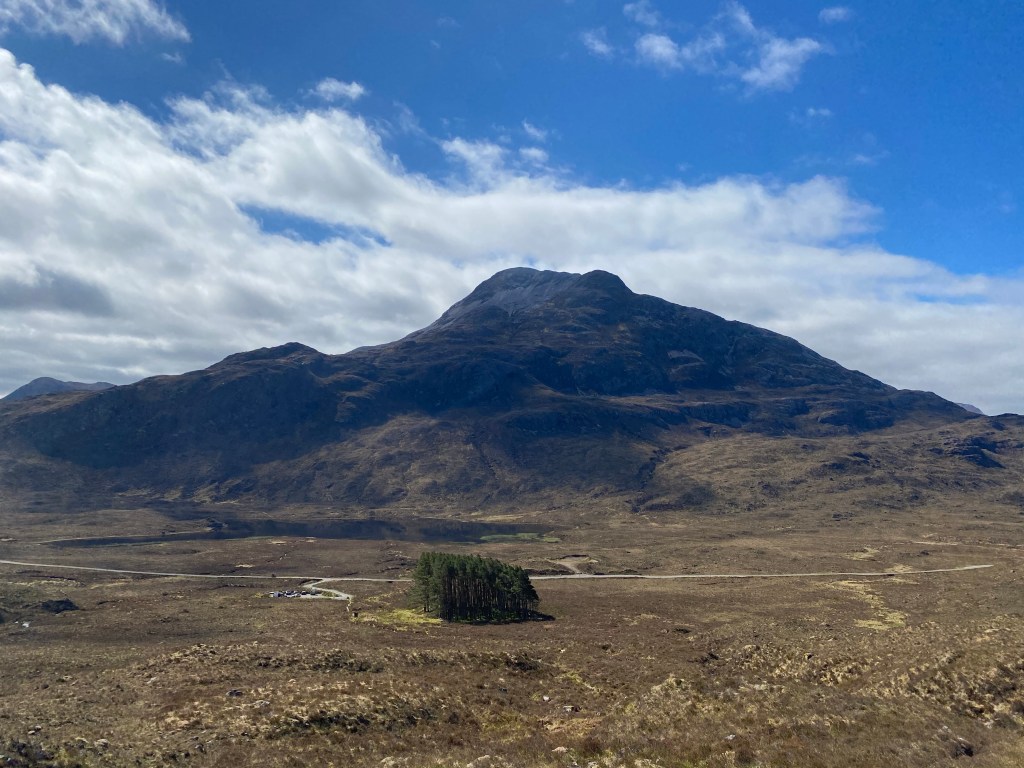
The unparalleled ( actually Glencoe might!) Glen Torridon – no summits here this trip ( see previous posts ) but some walking and just soaking up the sun
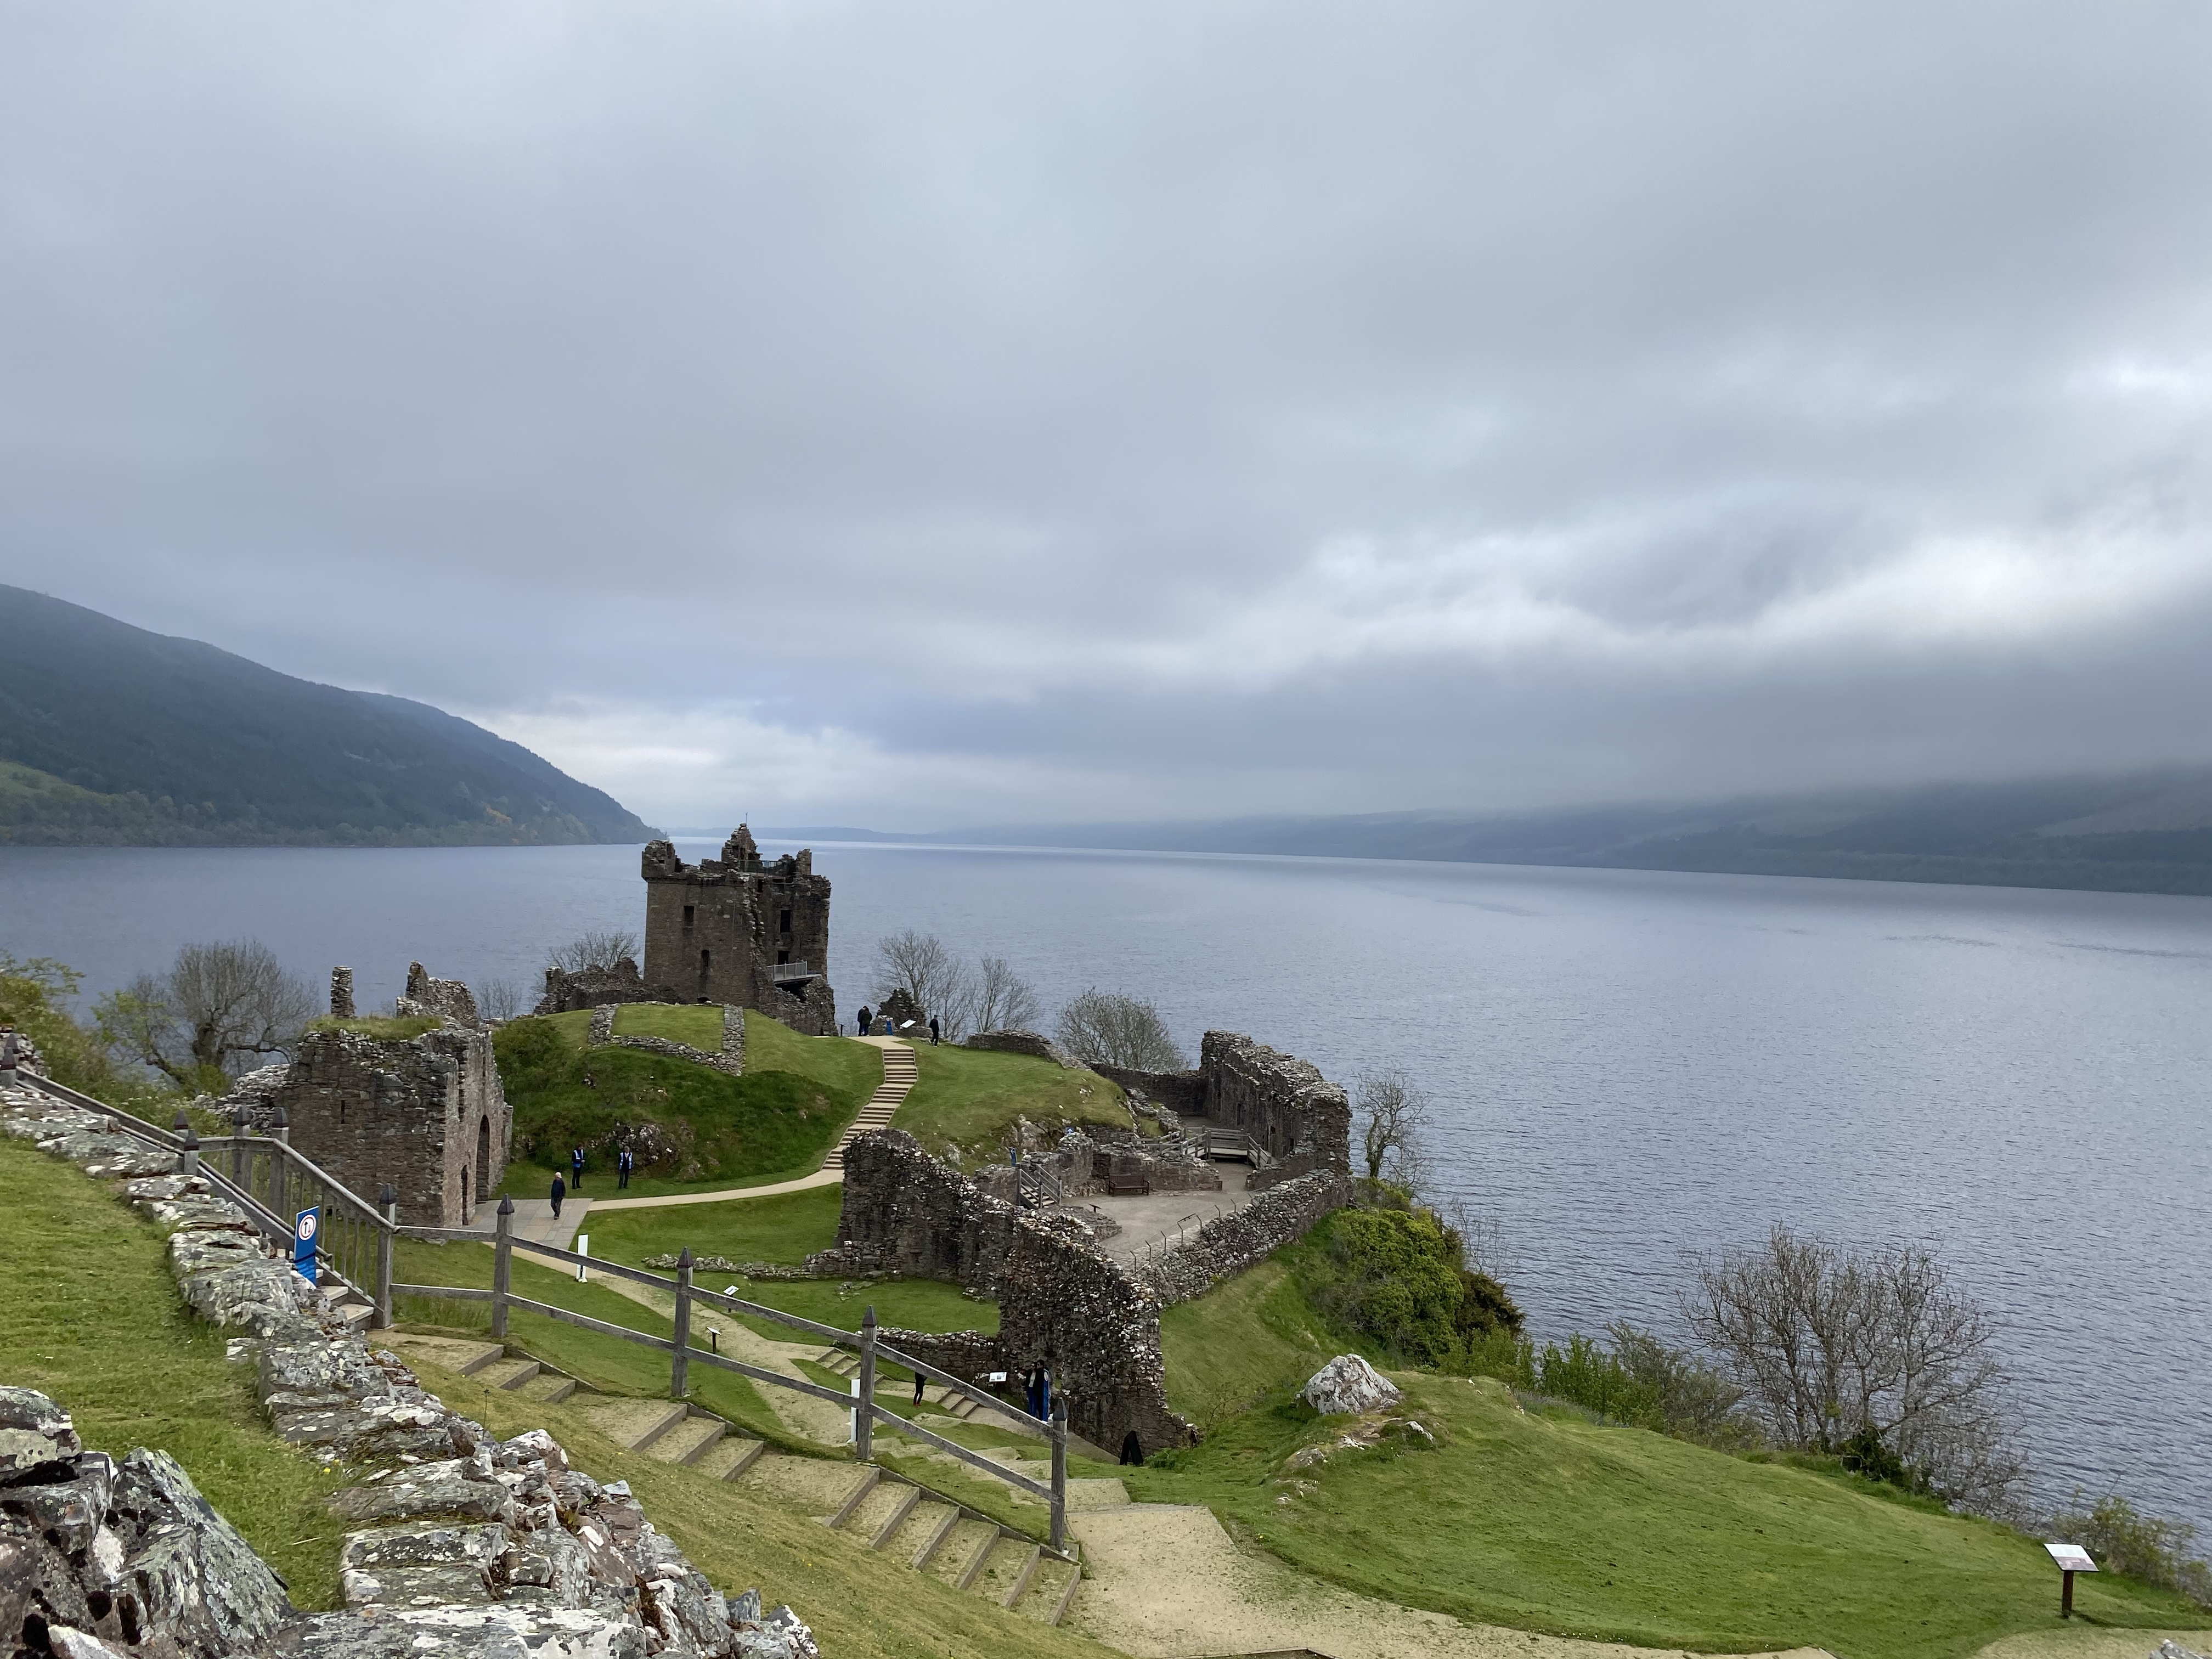
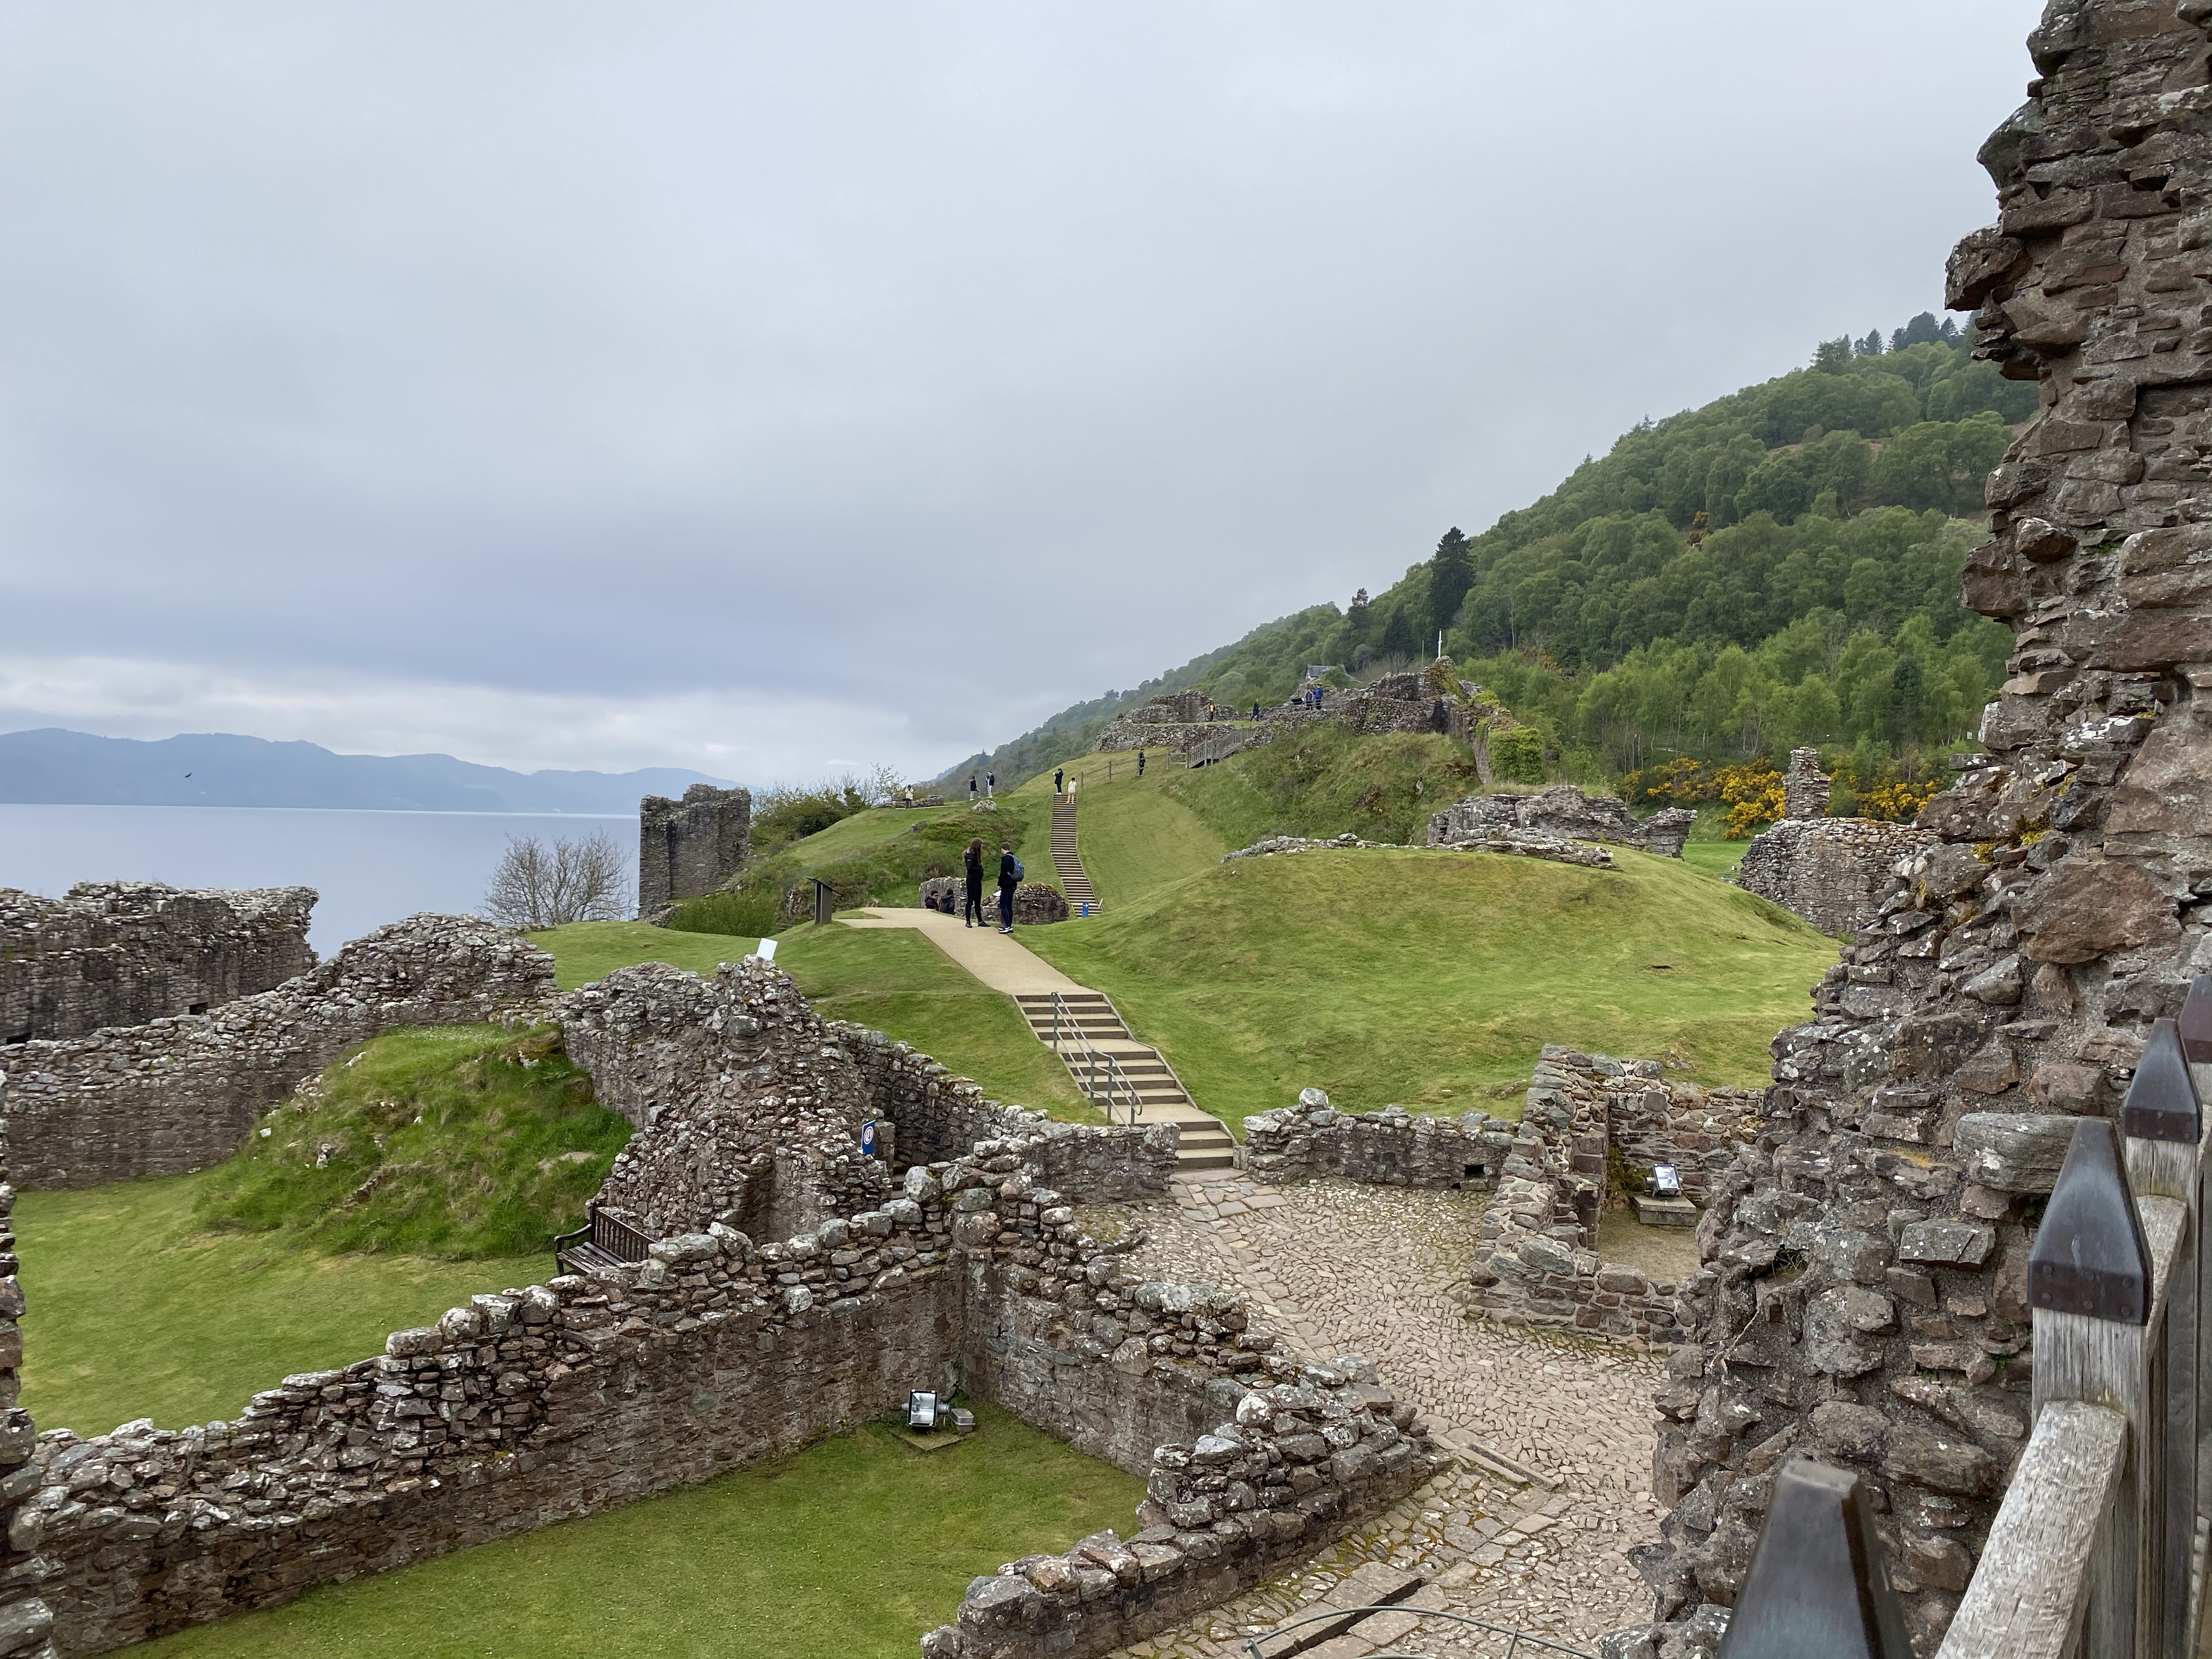
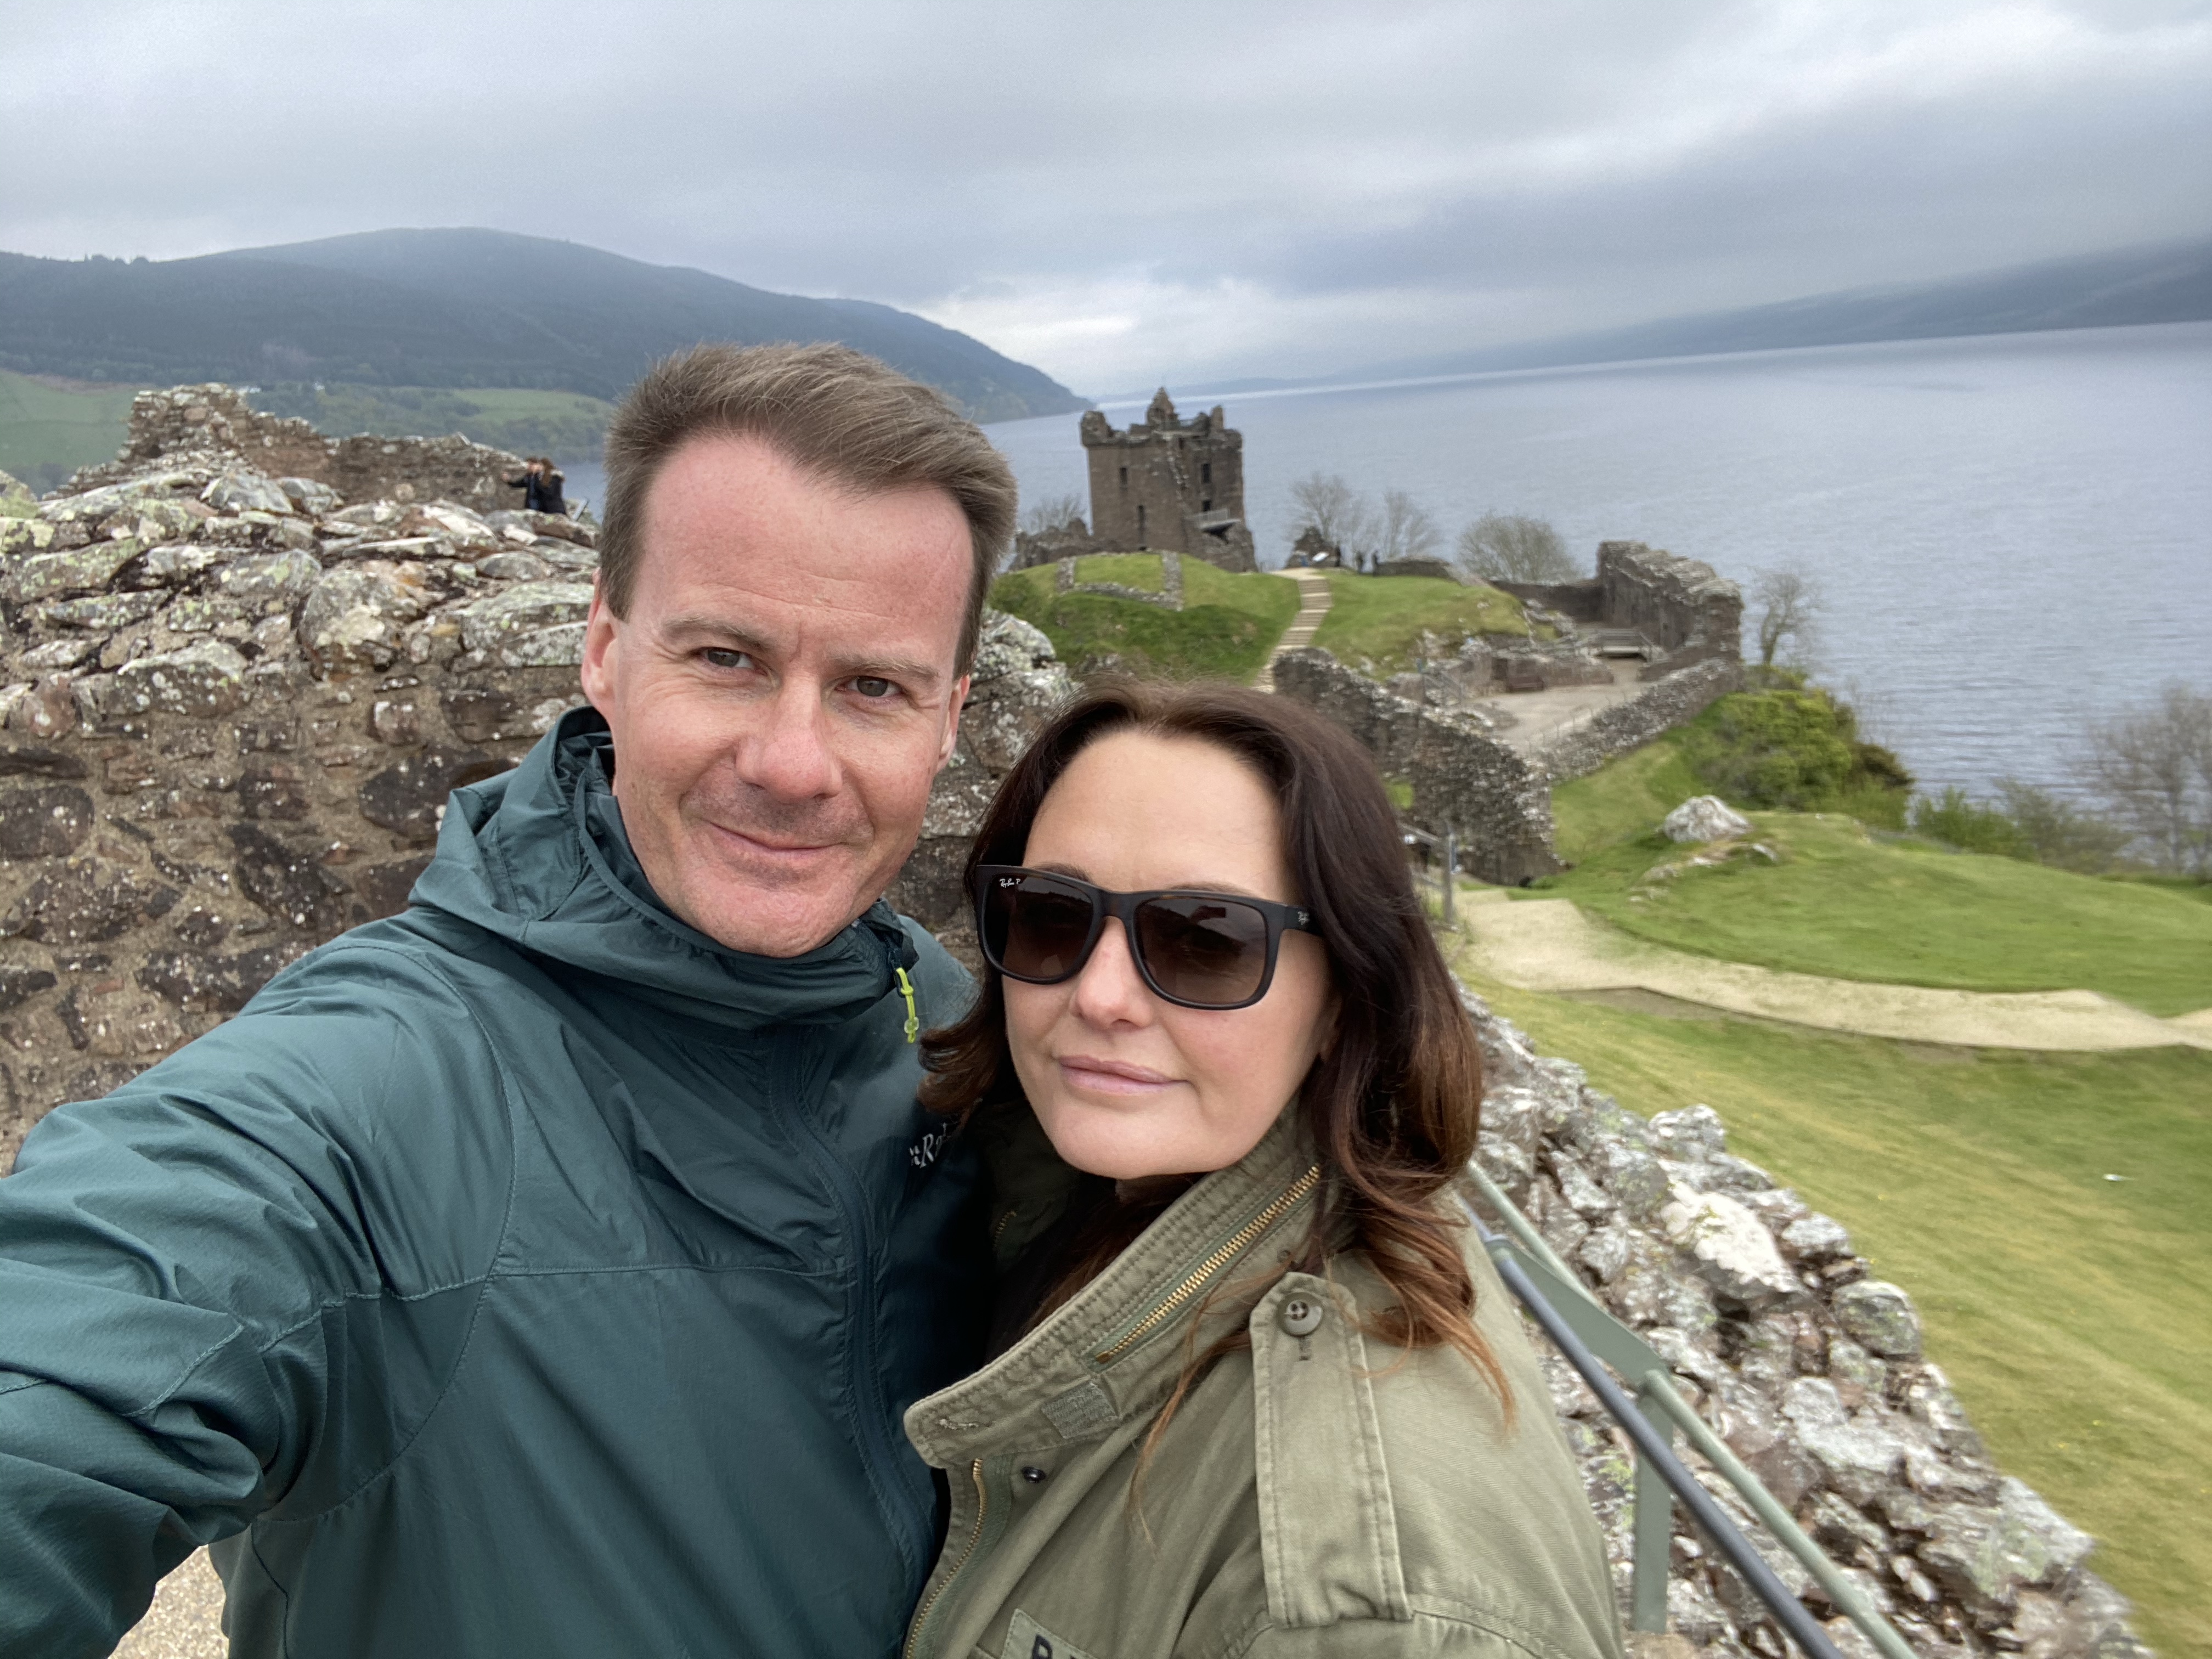
The amazing Urquhart castle , on Loch Ness – from Iron Age hill fort to comfy home and to ruin and now preserved – a must see
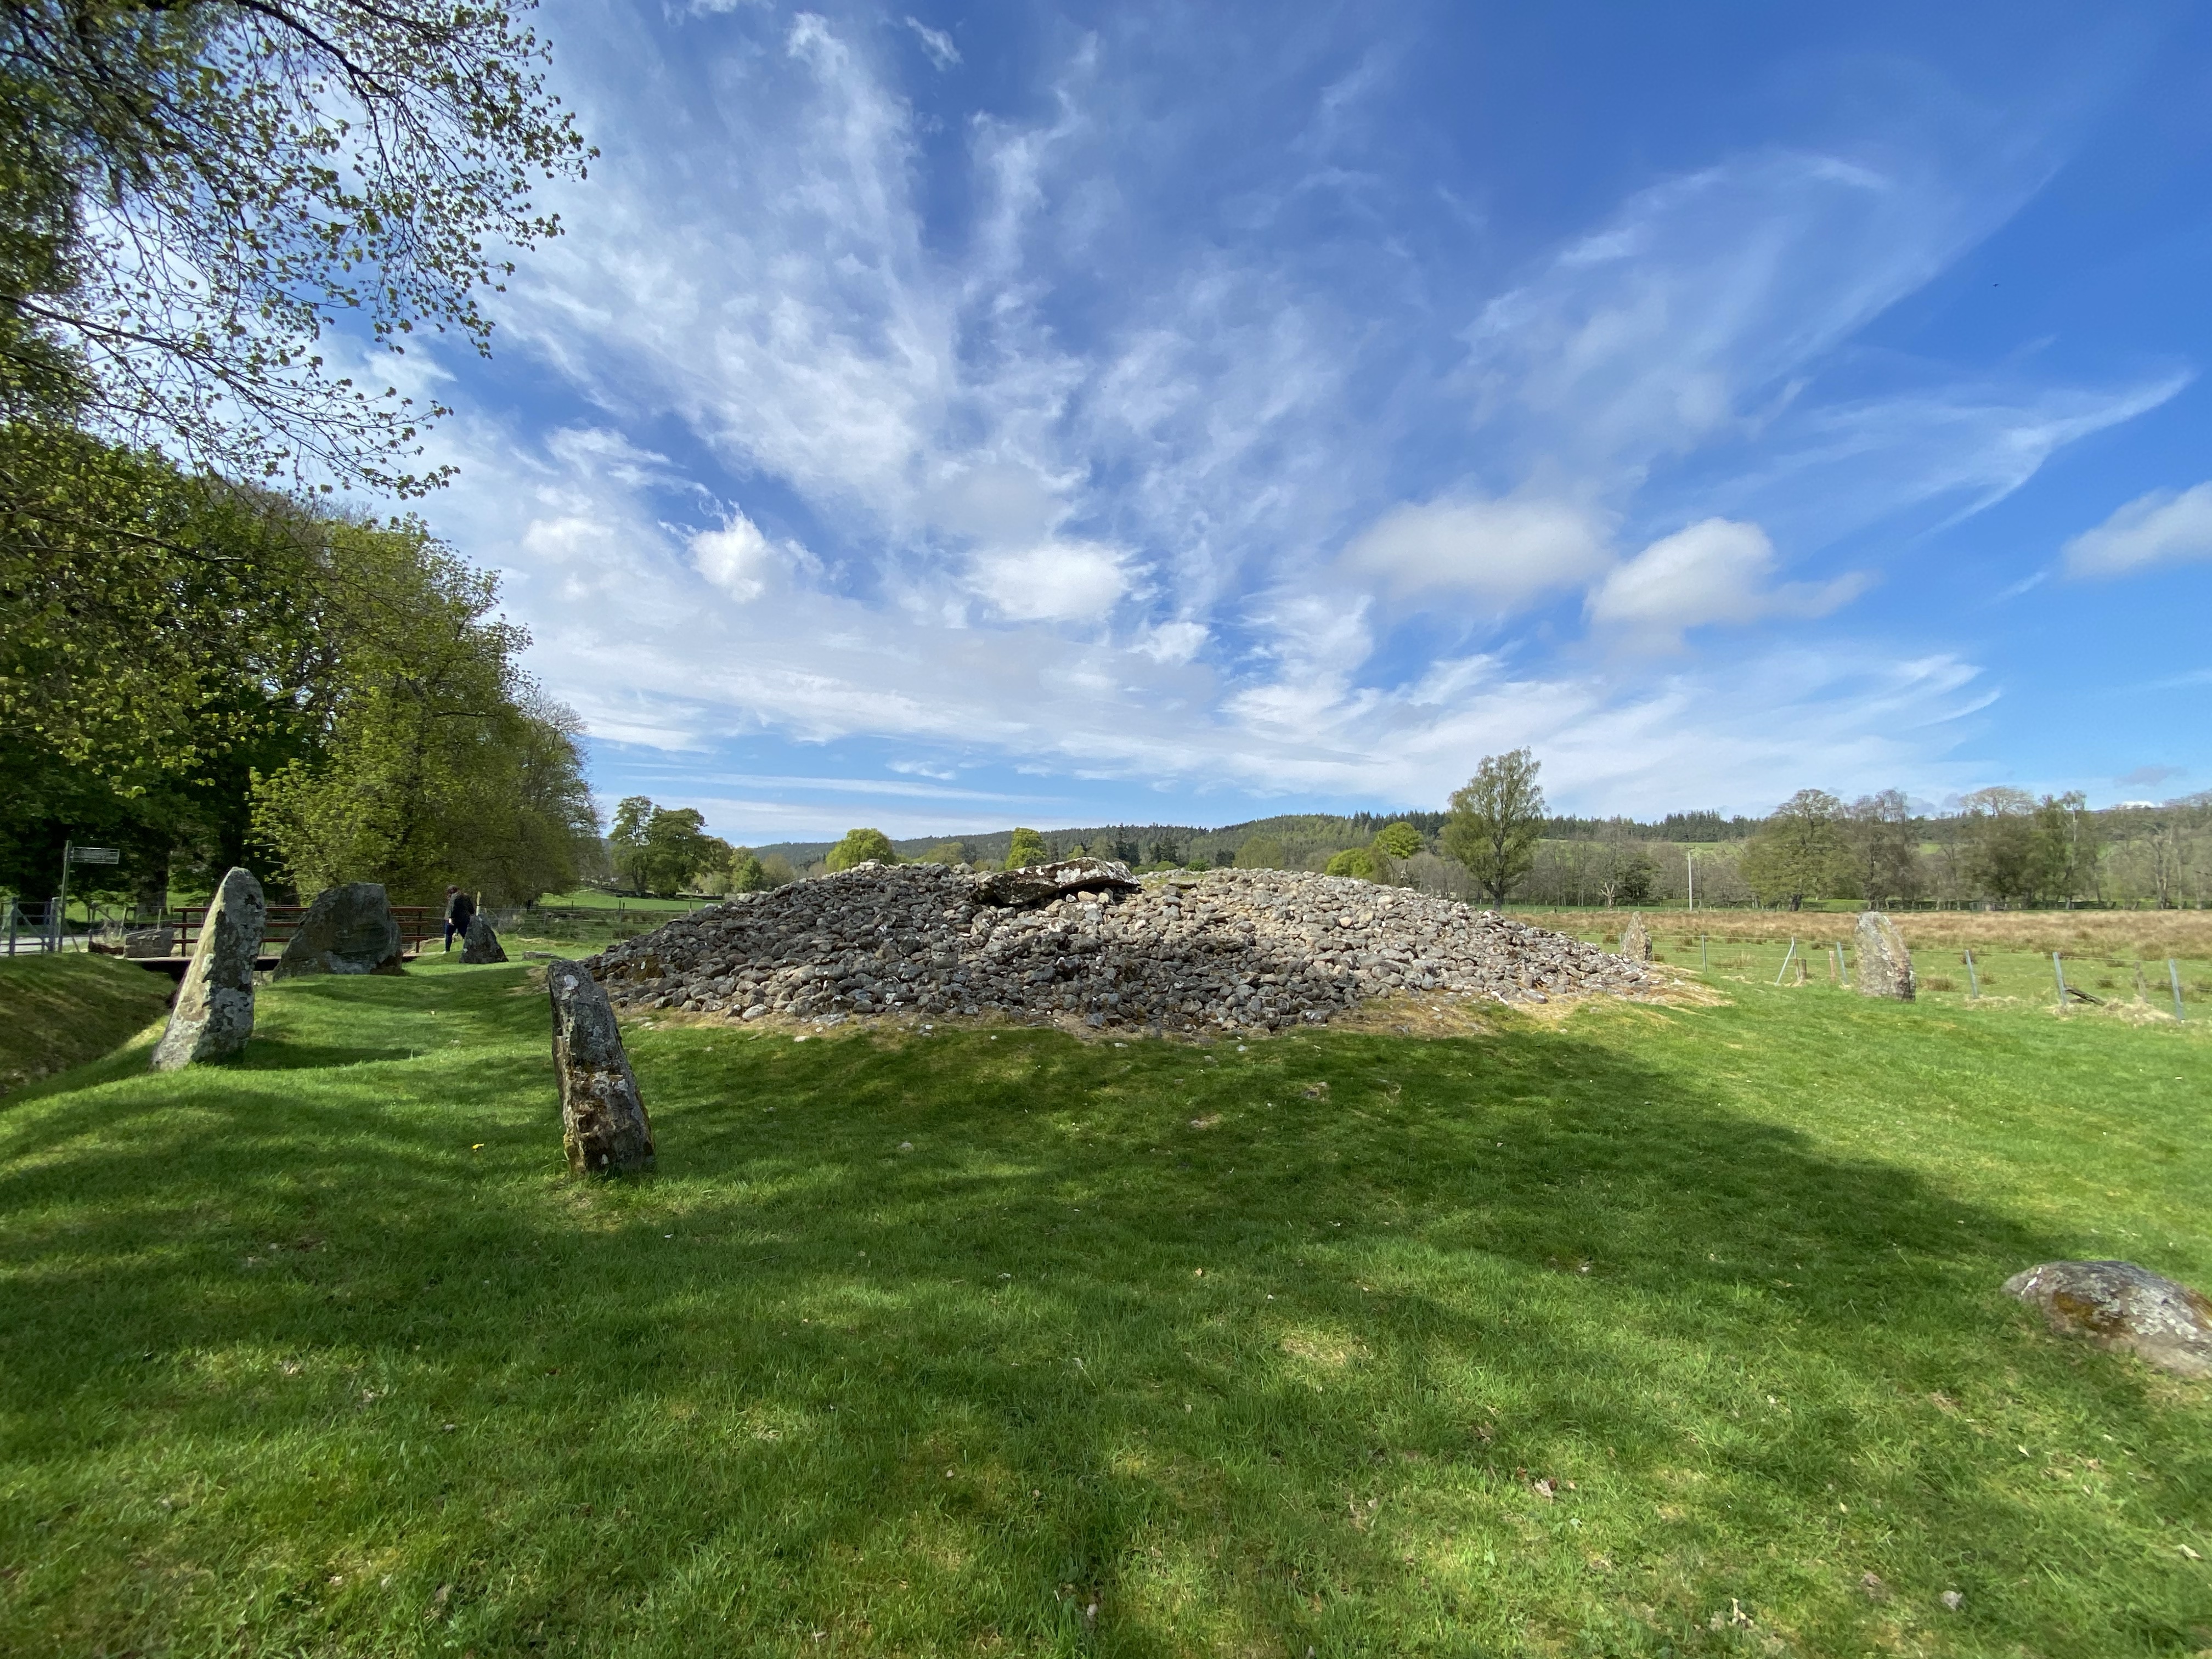
c.2000 BCE Chambered Cairn with stone circle – incredible !
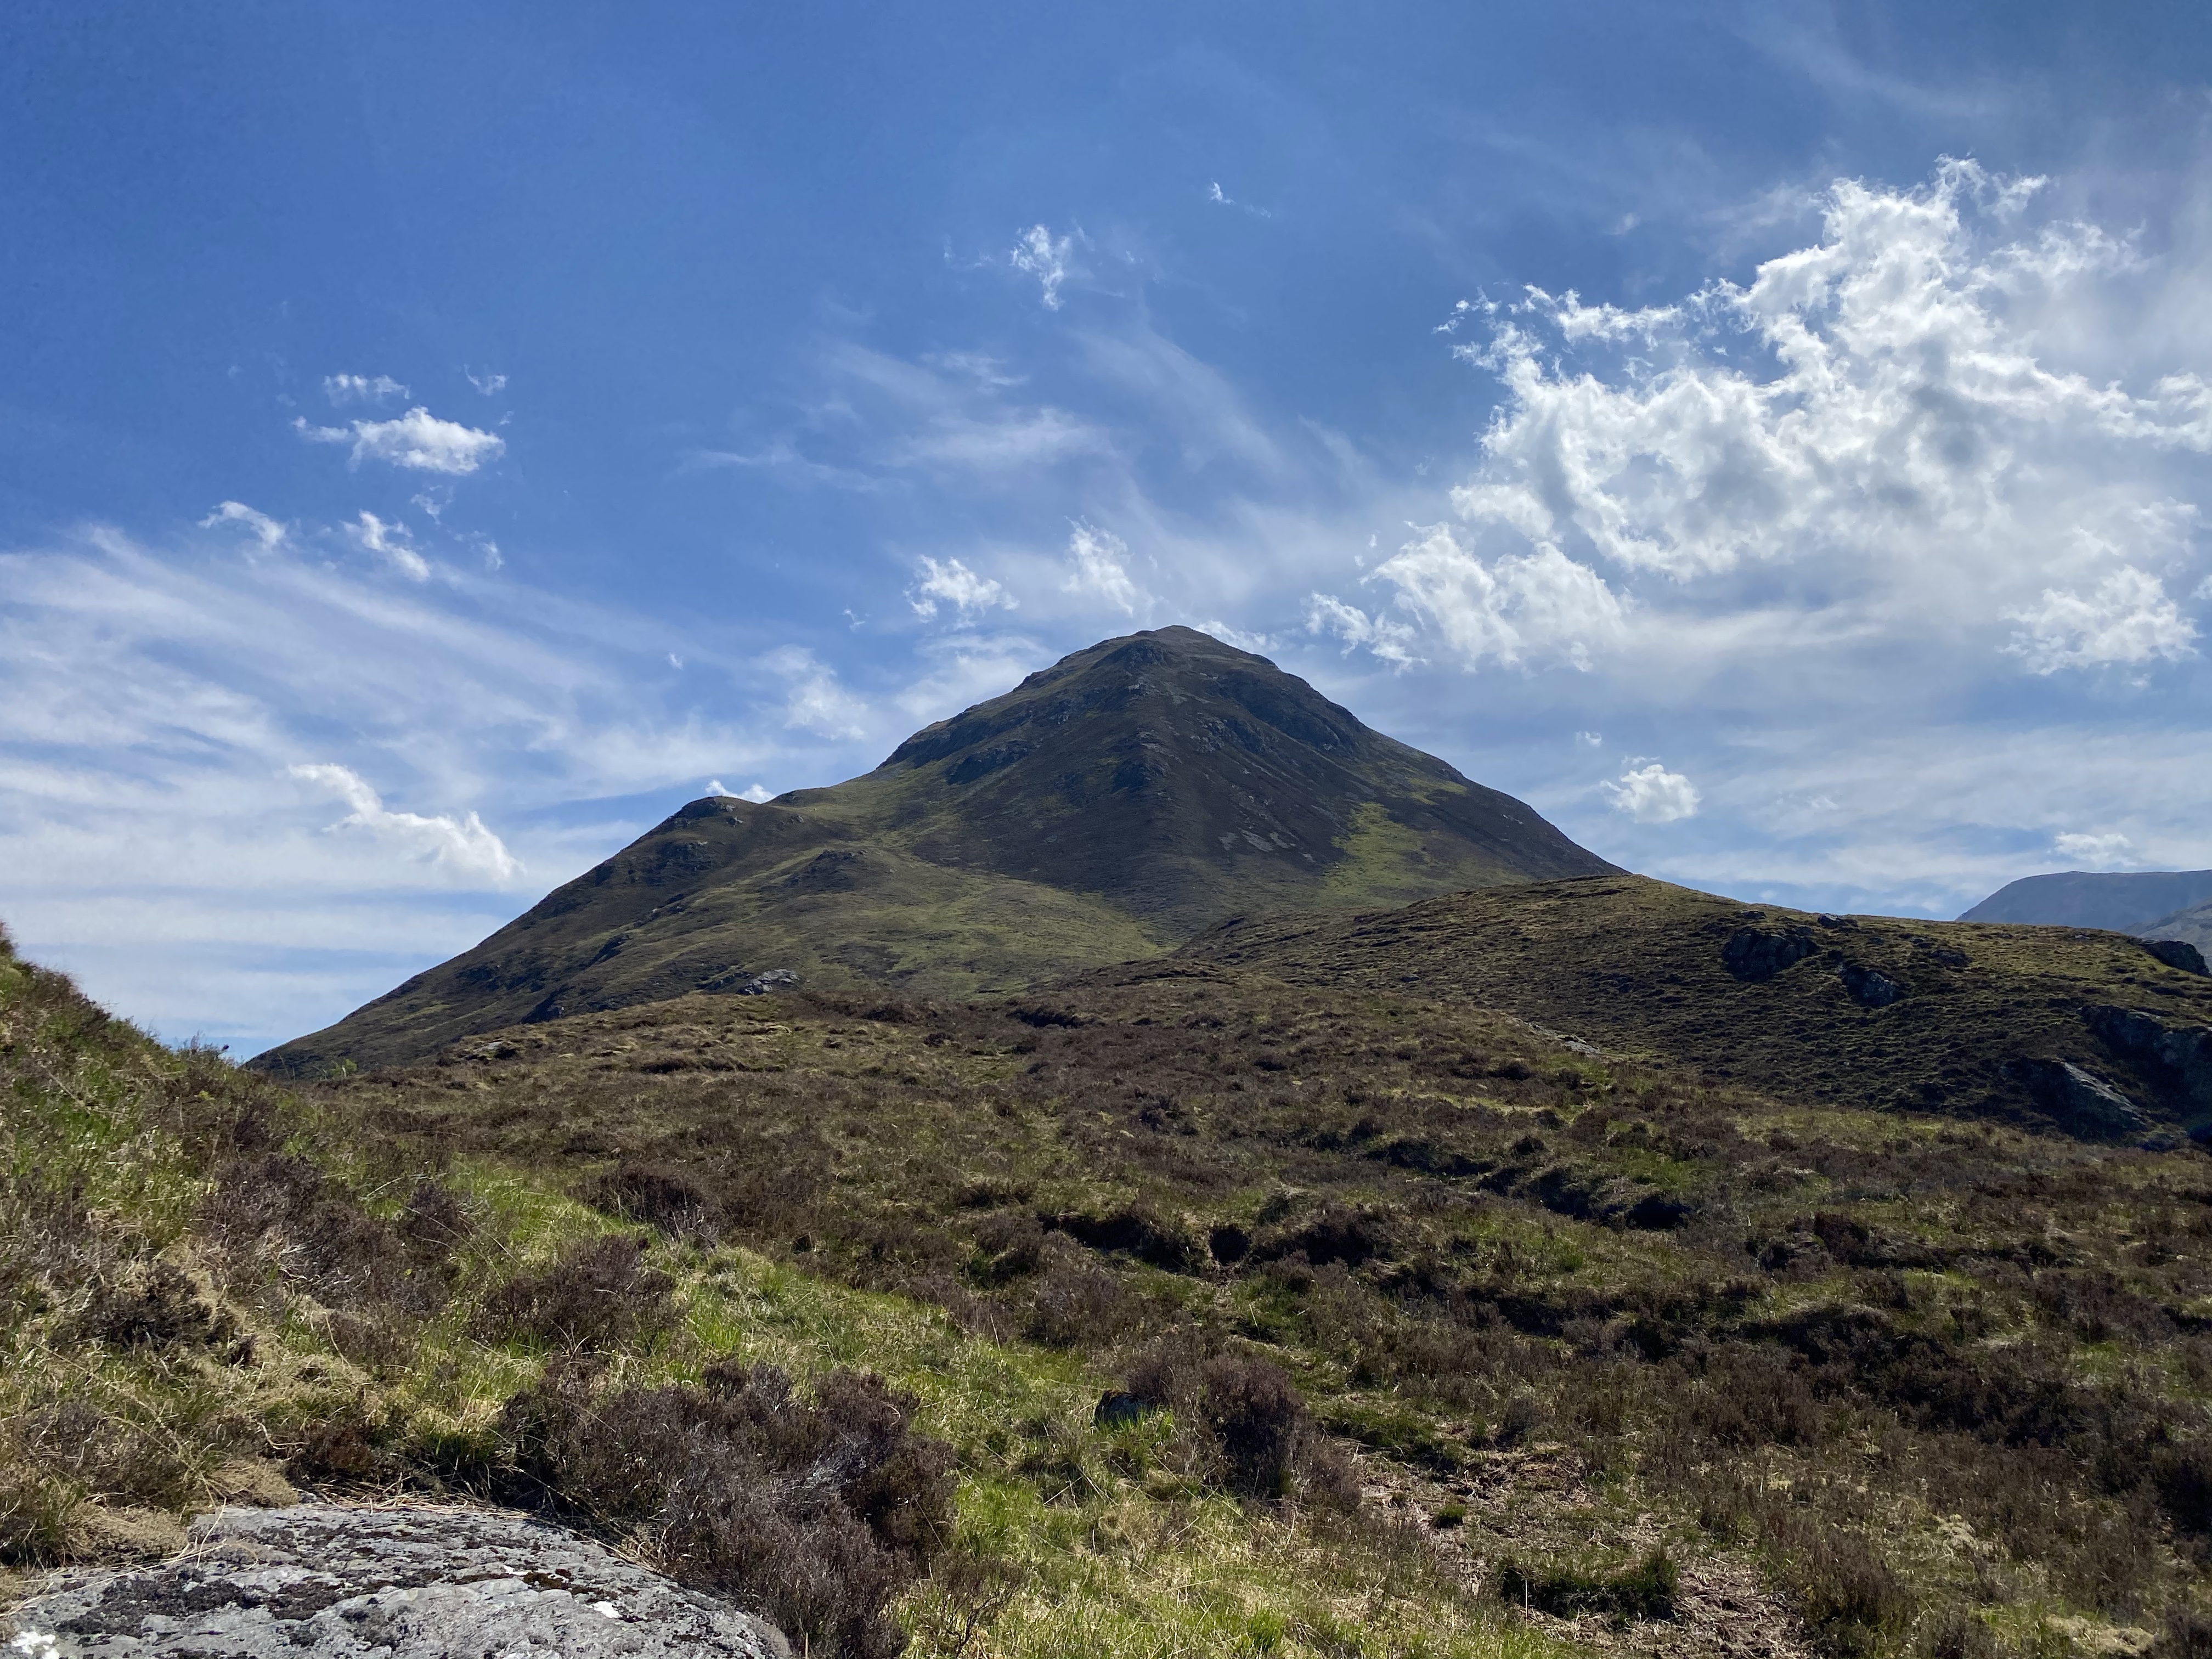
Garbh Bheinn nr Kinlichleven – super hot day just half way for a leg stretch – but stunning views
Hopefully lots more adventures soon ! You’ll see em here ( plus new kit in test !) – stay safe and happy trails all .
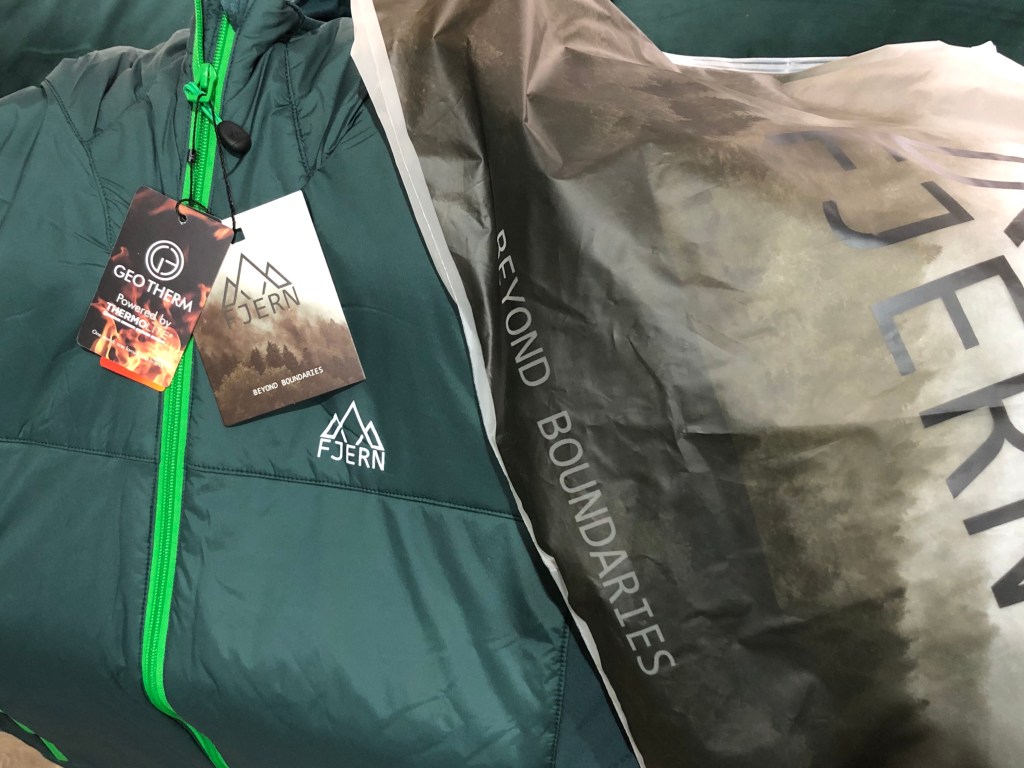
I received my sample Fjern Breen jacket very late 2019 and have been using it ever since both casually and in the mountains so have had ample time to really “get to know it” well so time to post my thoughts which I hope will help others make decisions when choosing outdoor gear.
The Breen is a part of the now pretty extensive but still “boutique” sized collection at Fjern – and can be viewed on their site here (will open in a new tab so you can still read this review). Its designed (based on Fjerns positioning) to act as a great outer insulated layer when its cold and dry or as a warm mid layer under a waterproof shell for when the wet stuff falls (or comes in horizontally as it does here in Scotland!).
One thing I think Fjern are consistently doing well is bringing good quality outdoor gear at prices real people can afford… I shy away from “cheap” gear and some brands I’m sorry to say i just wont tough for fear they will fail but Fjern bucks that trend 100% in my humble.
Designed with GEO-THERM synthetic insulation by Thermolite (not a name I know but turns out after much googling they make high performance outdoor insulated fabrics for many brands and are part of the Lycra group of companies (more info here ) – the technology mimics natural fibres like polar bear fur to trap heat and act a great insulator but be light at the same time. With better wet weather performance and lower cost than down this meets many people’s needs for a high warmth to weight ratio insulation which is anti-bacterial and kind to ducks!
The Breen comes in around 485G (M) so isnt heavy by any means but not quite as light as some featherweight down’s I have but then again they are different approaches and synthetic has its use cases (it performs better when wet typically for example).
The main body of the Breen is a pretty lofty amount of Thermolite under a DWR treated shell material (so will deal with light rain, snow or mist but not the full monty) which is soft and light to the touch, very comfy and flexible to wear and not heavy on the body in the slightest. Not as light as some super light down options but apples to oranges and all that when it comes to cost, materials etc
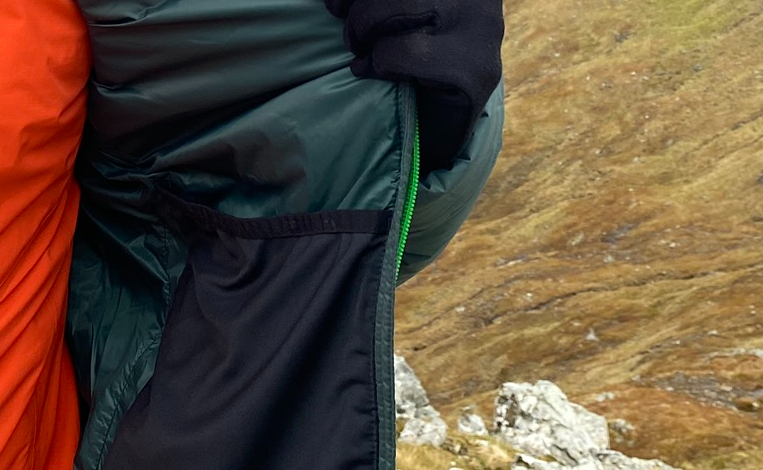
Running from waist to cuff under the arms is a panel of stretch breathable fabric that for me not only regulates heat pretty well while on the move but also provides extra flex and stops the jacket riding up when you lift your arms etc . The hood has a part Thermolite fill and is designed by Fjern to be relatively snug (without being tight) to go under a helmet if used in a climbing scenario (not tested yet). There is a lovely soft fabric chin guard inside and 2 generous side pockets as well as a very generous mesh pocket inside.
bit hard to see but the underarms down to waist have a flexible and breathable fabric panel
The inside pocket is great and roomy and made of a thin stretchy mesh so doesn’t add weight or irritate and is ideal for storing things like gloves or even a map and the jacket can be rolled up into it for storage . The side pockets again are handy and quite roomy and I think Fjern have put some thought into their design as they are accessed by a long zip which should get round some common belt issues but I have a pet hate around side pockets – if you are wearing a harness or rucksack belt they tend to be hard to get into albeit easier on the Breen – for me EVERY outdoor jacket should have a napoleon/chest pocket (or even 2!) for easy access on the move.
Cuffs are elasticated for a decent seal against the elements but not too tight (for me anyway) to restrict getting on or off or too tight on your wrists . The hood also has a stretch binding and once fully zipped up and with its well shaped /profile did tend to stay up and snug in wind as it doesn’t “balloon” but it does lack drawstrings if these are a deal breaker for you (not for me.. adds weight). Zips are ubiquitous but robust YKK and internally covered by that chin guard to avoid irritation. The hem does have a drawstring for closing in tight against wind if needed.
I’m 6’1 and have quite broad shoulders and lengthy arms and found the Breen was great in the arm length and offered enough room around chest and shoulders for ease of movement and comfort, even over a shell. If you prefer a snugger fit and are about or below my size id suggest going for a Medium (I have Large )
As the winter climbing season 19/20 really didn’t happen much for me due to work commitments and travel (remember travel?) i wore it around Glasgow often but the first real chance I got to put the Breen through it paces was a ski trip to Valdisere. Packs down small, light to carry and very comfy to wear with decent insulating properties was my finding. Roomy enough to wear over a mid layer but not too bulky so as to be uncomfortable under a shell if needed (again its coated in DWR not fully waterproorf ) so cold/dry days or on the piste are ideal use cases and its flexibility and room would make a great ski jacket (albeit lacking arm pocket for passes) . I used it every night for mooching around Val and one day on the slopes and basically never gave it a second thought – which really is the aim ! It just works well .
More recently I have used the Breen out on the Scottish hills where as we all know conditions can be .. well.. “variable” . At the risk of repeating myself again it’s not heavy to pack, very comfy to wear and with the combination of Thermolite and fabric I found I could move it very well and not get too hot when the wind got up and temperature dropped somewhat.
That internal pocket proving hand for a map as mentioned and the hood with its soft inner lining sitting well and not obscuring my vision at all. In the photos I’m wearing it as I would mostly when its not raining – i.e. over a light shell – for me this is its ideal use case – on the move or sitting for a bite, over a light shell or midlayer in Autumn/Winter/Early Spring when you need that extra layer.
The hood is nice and neat without being too tight (over a shell here – the orange bit) and with an elasticated cuff and soft chin guard behind the zip. Not the collar comes up well but isn’t too tight as to be uncomfortable.
For me its a little bulky to act as a real mid layer in my system , I tend to use much lighter items / fleece for that. My key takeaway is this jacket just does its job well, comes in a very attractive price point and is a real challenger to some big brands ! – and I’m looking forward to getting a lot more use out it heading into Winter 20/21 !
Last point – price … the best deals for Fjern are on Sport Pursuit and right now the Breen is going for a STEAL !
For ore info see Fjerns website , below are specs as published
Features:
Synthetic ‘GEO-THERM Powered by Thermolite’ Eco-recycled insulation
Matt finish, wind repellent Nylon ripstop outer fabric with DWR (Durable Water Repellent)
Underarm & side panels made from breathable fabric to aid temperature regulation
No-lift gusseted underarms
Partly insulated ‘under helmet’ hood with stretch binding
Soft Tricot panels inside hood, for added warmth and comfort
YKK front zip & internal insulated zip baffle with Tricot chin guard
YKK zipped hand pockets with warm Tricot lining
Corded zipper pulls are easy to grab, even whilst wearing gloves
Internal mesh pocket that doubles as a stuff sack
Stretch elastic bound cuffs for a flexible fit
Reflective logo
Adjustable drawcord hem
Hanging loop
Packable into internal mesh pocket
Garment weight (size M) 485gm
Nice roomy, soft mesh inside pocket , great for a map or gloves!
…. as a Final, last point….A few readers have asked if my blog is Fjern funded as I tend to review their kit but let me be clear for those at the back – it’s not.
I bought my first bit of Fjern kit (the Orkan jacket) off Sport Pursuit (a great place to get superb gear at good prices) as I needed a winter shell and it was a great price having had shells of various big name brands and in many an exotic fabrics – and it performed (still does) from there my blog and the Orkan got a lot of views as did my Instagram account , and Fjern kindly offered me 2 jackets to test for feedback for them in their designs – and this is one of them. Trust me if it didn’t work I wouldn’t be putting myself in situations deep in winter in the Cairngorms climbing in it.. that’s just insane !
The Breen is also available in Navy / Rust and is on my Highly recommended list as much for the price vs performance factor .. you will struggle to beat that combo elsewhere!
Retailing around £400 (more for Green and less for Grey I see on many sites) the MSR Hubba Hubba NX (or Hubba NX2 as I’ve seen listed) is MSR’s light 2 man, 3 season tent and has been gaining a lot of popularity across social media so I bagged one to replace our aging but bomber TNF Tadpole 2 – lets see how it faired on a Scottish Autumn wild camp. As this is only 1 test I’ll circle back to a fuller review some time in 2021 for some long term updates.
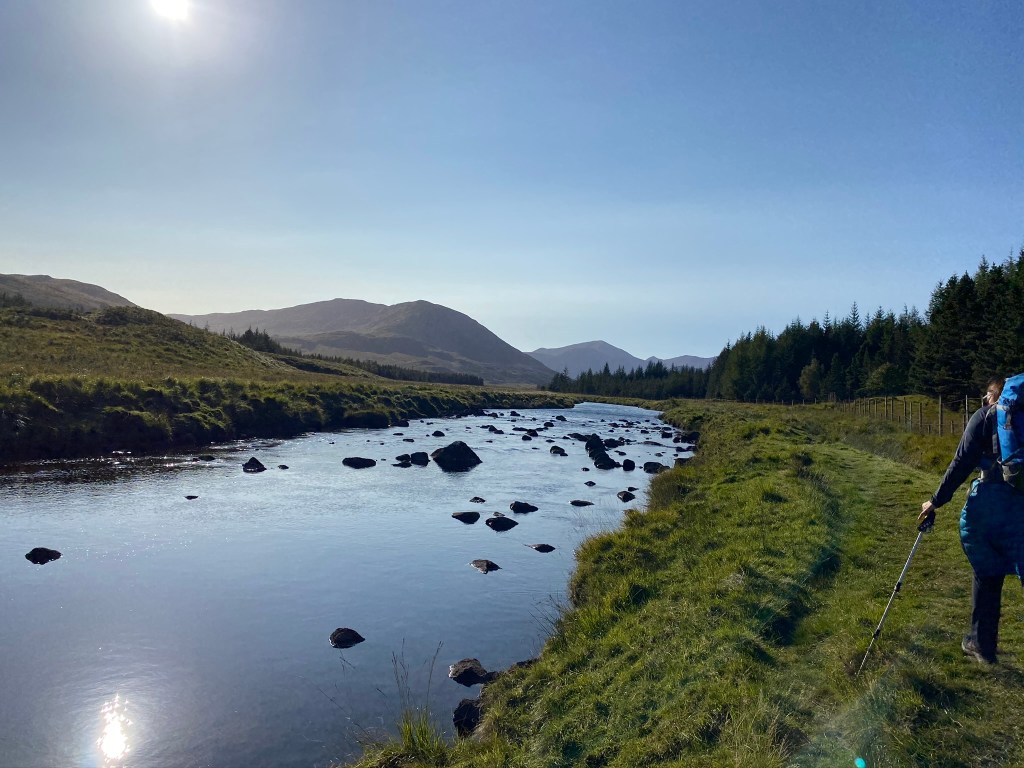
One of my favourite walk ins and plenty hills on offer
I’m not a massive wild camper just to be clear, I enjoy it for the most part but with my hate of midges and being 6’1 and getting on (in my 40’s) I’m not sure I’m completely designed for it – that said the mini adventure nature of I do love and the walk in’s views. sunsets (with a nice dram ideally), empty summits and sunrise’s do tend to be amazing so well worth the aching back and lack of sleep!
After a recent Ben MacDui wild camp I decided I wanted to try and drop weight in the pack so after some forum asking landed on and bought the Hubba Hubba NX for my wife and I , and I grabbed a Hubba NX 1 man for myself to do solo’s or with mates for climbing/bagging or just getting out in the hills (I’ll review that in time).
Lets do stats first.
The 2 Man Hubba Hubba come is 2 deployment options so can vary in weight but shipped with its standard pegs and in its full inner and outer mode and stuff sack the pack weight is listed at a really quite light 1.72KG. Removing the stuff sack could save you a few grams but its no worth it for me as it cinches everything down tight and neat. One small weight reduction I make is to swap the standard pegs for MSR’s Groundhog Mini’s (at 10g a peg). These are aluminium Y-bar design which is a proven strong approach and grips well. Its in this mode I used the tent.
The lightest config for the Hubba Hubba is the Fast and Light setup coming in at tiny 970g but this is just the rainfly, frame poles and a footprint (extra) – not ideal for a midge infested Scotland but good for those tarp sleepers out there who maybe want a more enclosed form factor.
Setting up – Inner first
Interior dimensions (for 2 remember) are a pretty adequate 1.27m wide (50″) by a very generous 2.13m long (84″) – I’m 6’1″ and can lie flat out with no touching of the fly which is superb! Internal height peaks at 1m(39″) which i was impressed with when needing to sit up , get in and out etc . The frame deign also means you get width at height as well not a sharp peak so both could sup up easily. Width wise its pretty good but if sleeping head to head its going to get pretty close so choose your camping partners carefully.. or go head to toe!
You have a handy apex gear loop for hanging headtorches etc (Tip : Always carry a couple of carabiners for gear hanging on camping trips!)
Inner up – very quick and easy
What I really like is that the Hubba Hubba has a zip door and gear vestibule on each side so no climbing over one another to get out, cook etc These have a usable area of just under a metre each side – enough I found for a rucksack, boots, water bottle and still have easy access in and out or to run a stove.
For the real stat heads – the total “liveable” space comes in at 1217L for main body and 48L for the combined vestibules. Living internal footprint is 2.7m sq with added 1.62m sq for the vestibules.
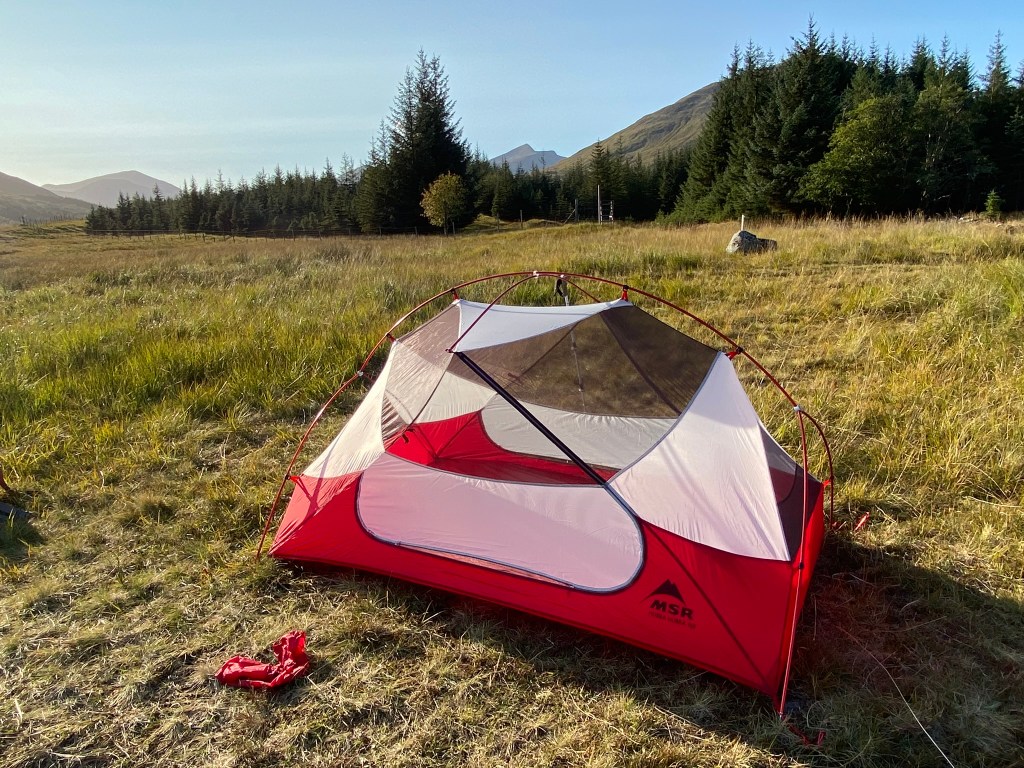
Fully built for scale
Onto materials.
The inner is a hybrid of a bottom bathtub design with the upper being mesh which not only reduces weight but helps massively with condensation and air – it does of course mean its going to get that bit colder in very low temperatures but its designed as 3 season tent so really using in Winter (especially Scottish) is outside its deign parameters.
The “bathtub” floor is 30D Ripstop nylon rated at 1200mm HH due to its Durashield polyurethane and silicone design – more than enough for usual terrain but for for very uneven or boggy terrain (or just to keep it protected ling term) you may elect to buy the optional MSR Footprint – coming in around £45 (may vary) but for me this adds weight… and I’m trying t reduce it! The upper section is walled in 20D ripstop nylon with DWR and topped with a 15 Nylon mesh. While light it doesn’t feel flimsy to me at all and at no time was I being overly careful handling. Very good construction in my opinion.
This is why we do it !
The frame system is a DAC Featherlite NFL one , designed specifically for quality fast and light backpacking tents and helps keep that weight down. Connected by elasticord the poles interlock very easily and quickly to form a main “H form” for corners ands roof ridge plus a shorter cross bar to add width at the internal apex. The inner then clips onto the bar along its length and voila you have a bathtub and mesh freestanding inner set up in under 5 mins – less if needed. Adding the fly again is VERY quick – read 2 monites or so and it connects to poles at the corners with a simple eye slot design.
The fly itself is made of 20D, 1200MM ripstop Durashield polyurethane and Silicone with guy points, those 2 easy 1 way zip and velcro vestibule doors and 2 very clever “leg stand” vents on each end to aid airflow if desired. Doors can be tied back on both outer and inner by the usual eye/loop type affair. At head and foot internally you also get neat mesh pockets for phones, hat etc which always saves a 2am root around trying to find stuff!
Pitched on wildcamp – near Glen Kinglas – Frosty!
Being a 3 season tent I wouldn’t suggest this would stand up to very high winds (think 60Mph Scottish gales) , its high apex design and the pole design are perfect for 3 season and we did get winds around 25mph on our pouting that caused the Hubba no concerns – I haven’t personally tested it in higher winds but general feedback from others is its outside parameters.
I do know the guys over at MyOutdoors have tested in some pretty gnarly conditions so keep and eye out. They do have a great site for lots of things but I hope you remember to come back and see us here 😉
Vestibule coffee making – note the frost!
The Hubba Hubba (like its 1 person sibling) comes in 2 flysheet cover options – Silver/Grey or Green (which I opt for). Both use the Silver/Red inner.
Sunsets at camp – always worth it
First impressions then.
With 2 sleepers using air mats , big sleeping bags and each with a pack we have enough room for a pretty comfy nights sleep. No issues with snagging zips or not being able to get in or out the tent. Opening the inner door allowed me to stay in bed and get a brew on with the Jetboil which makes getting up and about much more palatable on a very cold frosty Scottish morning. Plenty leg room, never once was I touching the inner sides (something I did suffer in my Tadpole 2) . Clearly the mesh is cooler and of course as winds pick up you get some air flow but the reduction in condensation and associated frost was a a real bonus and on a warm summer night this would be brilliant.
Honestly – very impressed – this is a light but very well functioning 2 person tent. Superb living space and vestibules, nice touches with vents and that hybrid mesh design, well constructed and a confident feel to the materials. For 3 season use at this price point, and for someone of my height this is a great option – highly recommend having a look. There are lighter offerings up the price foodchain and some cheaper but smaller ones around – this is a great sweetspot offering for my money .
Slainte !
Important note – and I encourage all to follow and share with others – All camps we undertake follow the Leave No Trace ethic – anything carried in is either consumed or carried out. Latrines are dug away from watercourses and paths and topping replaced. No open fires are lit. Colour choice (green) acts to lessen impact on surrounding aesthetics and no drones are ever employed again to minimise “modern” impact on others in the area. After camp is removed we walk the area to double check no litter or kit remains and any rocks moved for seating, wind protection are replaced as found.
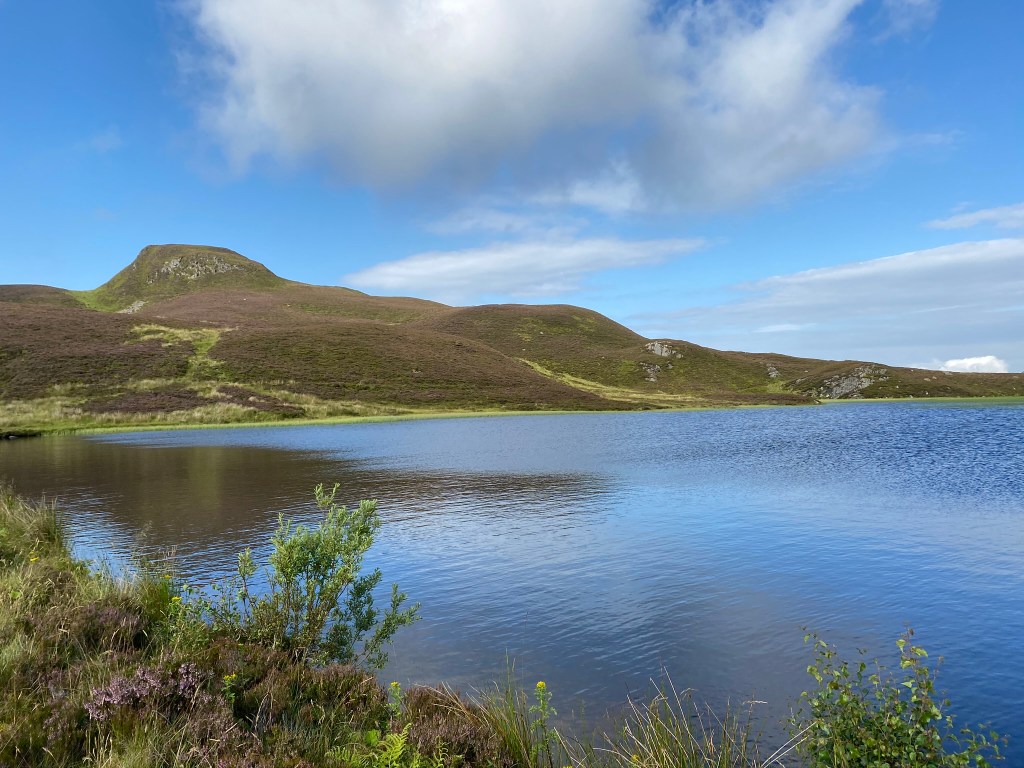
Ben Vrackie is a Corbett (Scottish mountains between 2,500 and 3000 feet high , just below Munros) near Pitlochry, Perthshire . The name means “the Speckled Mountain” and it rises to 841m via a lovely and relatively easy ascent from Moulin , just outside Pitlochry (use the 1st larger car park ideally , the 2nd smaller one fills fast and I tend to leave that for those who need less of a walk).
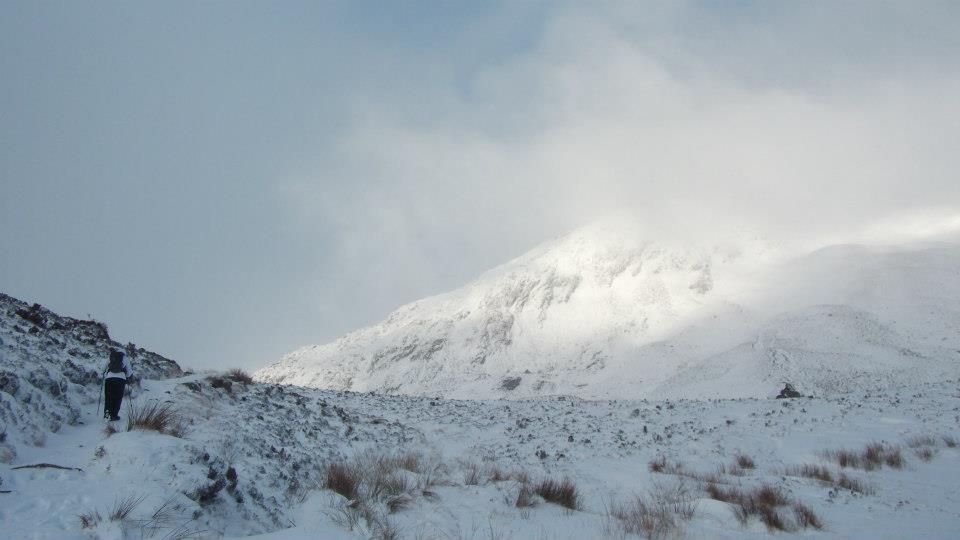
We had first walked Ben Vrackie in the deep of winter back in 2013 when the small loch on its lower flank was frozen and the whole world was wrapped in deep snow. We didn’t actually summit that day, the wading through snow, poor visibility and impending dark drove our decision to turn back as it turns out VERY near the summit. We knew we had been close but having returned now in summer it was clear just how close!
A snowy walk in in 2013 Loch a Coire, in a frozen January, 2013
Staying at the lovely Craigatin House (lovely place and very lovely staff – I cannot recommend the raisin and cream porridge enough ! ) meant we could get up and out early so that’s what we did.
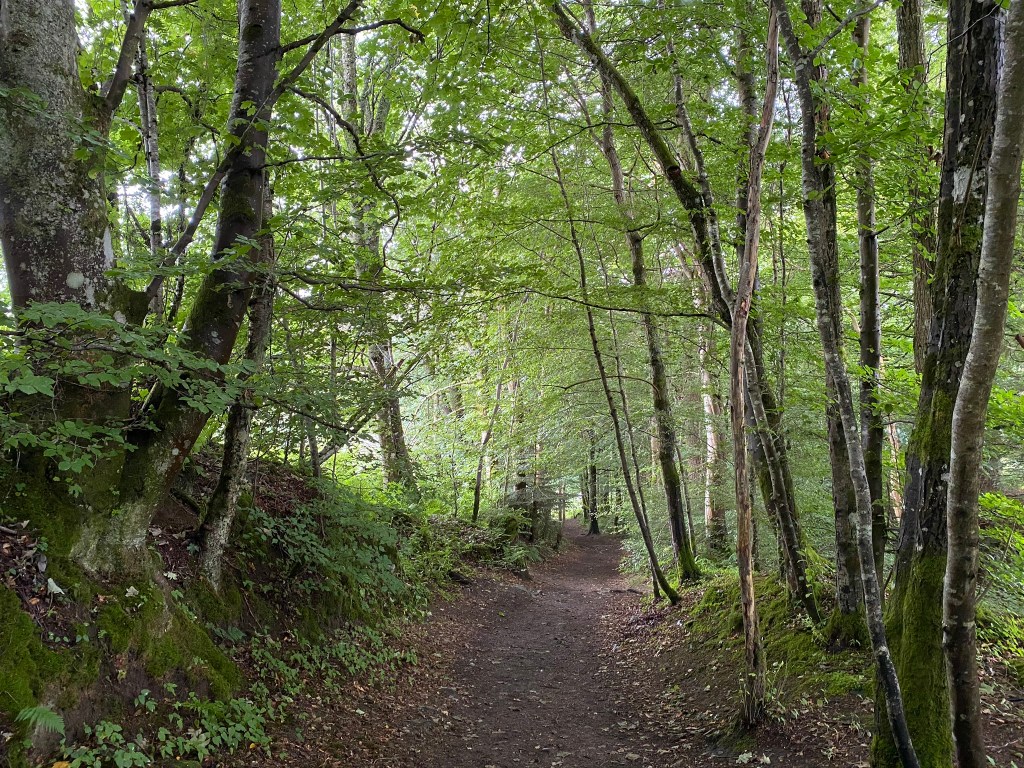
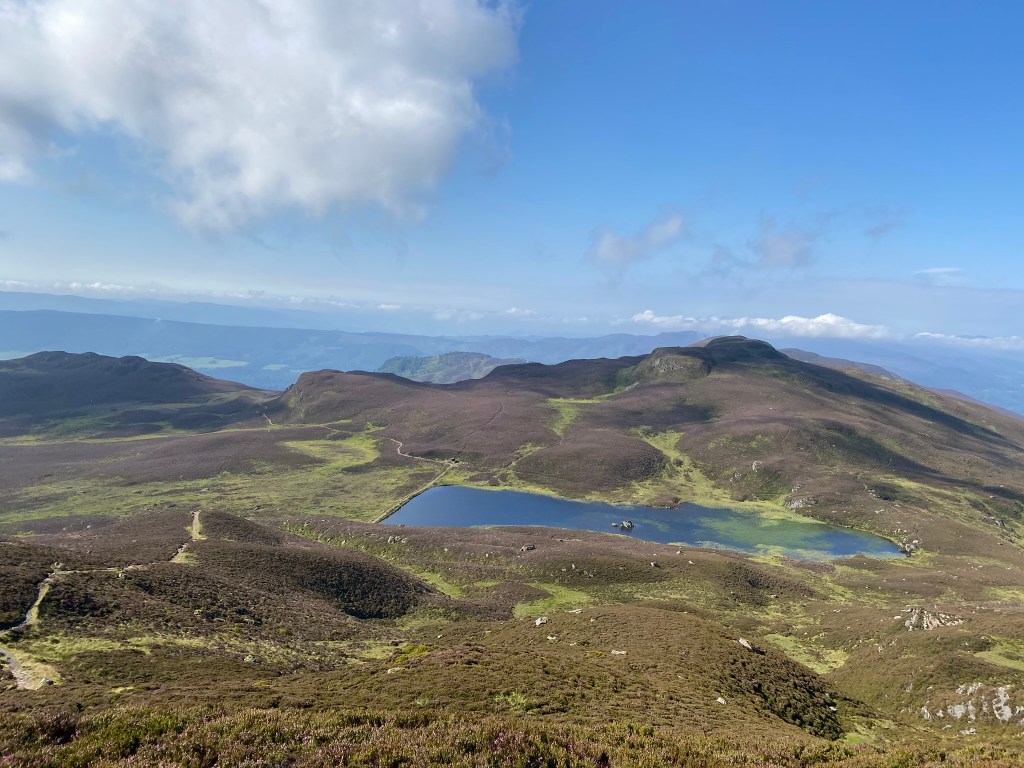
The route itself follows a very nice path first climbing through the beautiful green woods, along side the Moulin Burn then out across open land blanketed in beautiful heather with Ben Vrackie summit peak rising to the North/North east. Never tough the winding walk offers beautiful views and there is a lovely bench set at a viewpoint en route for those needing a a tactical break 😉
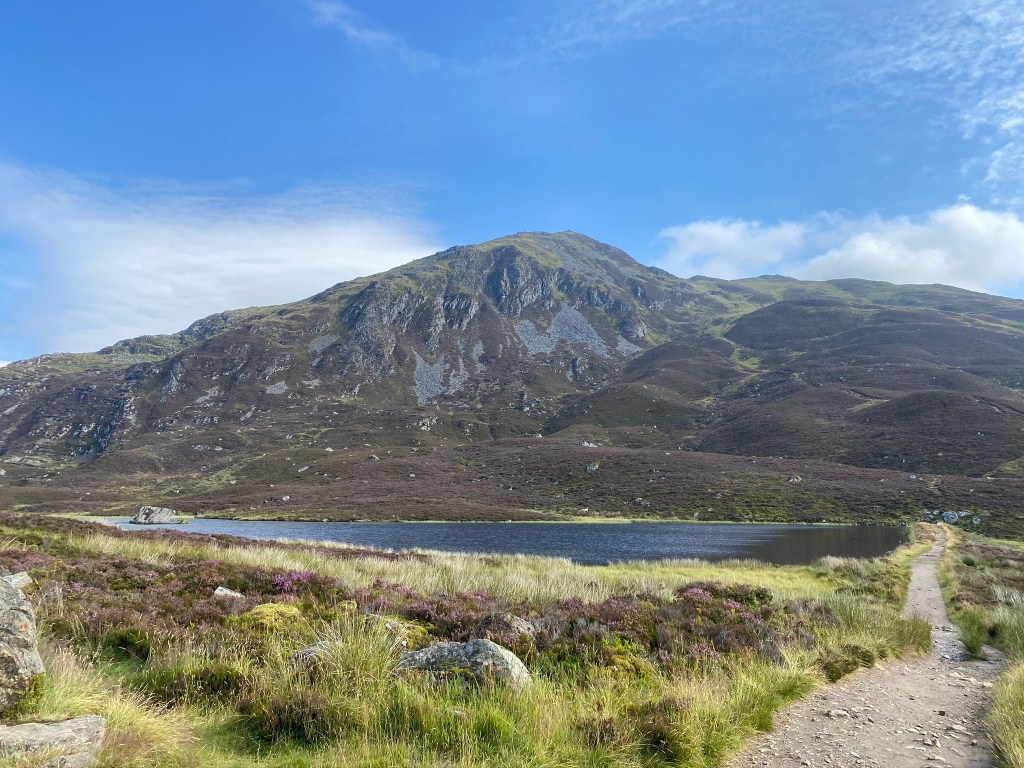
At around 460m you pass between two minor tops and approach Loch a Coire , now beautiful in its summer repose , you cross the east edge via a footpath over the dam to begin the final , steeper but never difficult ascent. With beautiful views back down to Pitlochry and Killikrankie its a fairly quick walk up the well made path, the wind picking up nearer the top taking the heat out the air (very welcome).
Along the way a good game to play is “spot the caterpillar” – these long brown, striped an hairy little fellas are prolific here , we counted 35 before giving up! Watch your step !
Just below the summit we met a well tanned, fit looking gent of perhaps retiral age, descending with a glass of beer in hand. Normally I’d shake my head but it was clear he knew this path well and this was his “thing” . Stopping to chat he told me he had been up Ben Vrackie no less than 32 times since lock down alone, the early weeks requiring a 30 mile cycle to get there from Perth – colour me impressed ! The tan on him was indicative of how much time he spends outdoors, and it was clear he was fit as a butchers god – despite the recent hip replacement he’d had ! #FitnessGoals #RetirementGoals – Kudos! . Ive since seen him post on some Facebook groups and the beer is indeed his trademark – well done sir and long may it continue ! (although I suspect not safe in winter 😉 )
The Loch , in summer
Final summit push and into the wind , we hunkered down in the lee of the hill to take in the views and have a snack. Just taking the time to enjoy a summit and drink in the views and fresh air, the expanse below you, the sky above and the patchwork of fields, pimpled with hills as far as the eye can see is a treat for the soul you need to experience to understand.
From here we got a great view North West to the Bheinn A’ Ghlo range, with Carn Liath, 976m, rising from Bridge of tilt, its scarred South west flank bright in the sun. (We came back to do it a week or so later , check that post).
After a nice seat, a summit pic (mandatory) we headed back down to Pitlochry by the same path.
Returning to finish Ben Vrackie has been a great decision, stunning hill and perfect for a lovely summer day.
Wildcamping – a word that if you go by the general media means a lot of different things.. to folks who get into the mountains a lot, respect its ethics and understand the responsibilities that go along with the experiences it means (and I paraphrase) getting well away from then road, ideally high in the mountain (or deep in the interior) , being self sustained and most importantly LEAVING NO TRACE.. did I shout? ! Yes – an I’m going to do it again just for you folks at the back… LEAVE NO TRACE.
Striking camp late (after most hill walkers have gone and breaking early before they return is also one of the accepted practices. In Scotland we have the luxury of the right to roam so can legally wild camp (ensuring we flow the above ethics), in other regions of the UK it varies. That right is precious and every single one of us who head into the mountains has a responsibility to maintain these ethics or we risk losing that which is most dear.
Right.. lecture over 🙂
I’ve only done 1 or two previous wild camps, one of those was a bivvi half way up Carn Mor Dearg (next to Ben Nevis) with a great climbing mate Davy Wright. We had planned a winter ascent of a route on the North Face of the Ben but due to ridiculously unseasonably warm weather for January we clearly weren’t getting on Ice and snow so opted for a CMD arete walk instead.
Lying in the grass, in my down sleeping bag and bivvi bag, looking at the night sky and down into the valley below with Fort William a twinkling bed of embers, shrouded in rolling low lying mists and fog, was just amazing – even if it took me a while to get used to feeling exposed to the elements.
As Mrs McLovinMountains was joining me for this trip (us getting out together is always my preference as the experience shared is better!) we opted instead to drag the North Face Tadpole 2 out of dry storage , air it out and take that.
One thing a wild camp gives you… and at my age this is not to be sniffed at.. is the option of a long lie in your own bed on the day of the walk in, time to organise kit and then take a nice drive up, even stopping off for a coffee with the aim to arrive (in this case) at the Caringorm Ski centre around 3 or 4 for a leisurely walk in (parking donation made)- rather than up at 5.30am to beat the crowds!
That we did, even stopping off at “the mothership” (or Tiso Perth as most of you may know it) for some late supplies including some ultralight MSR tent pegs, inflatable Exped pillows and some snacks. Arriving at the ski centre is usually a rush job after a hairneck drive (within speed limit) fro Glasgow, dead of winter and out in the bracing cold to get winter boots on, heft a pack and set off. Not so today! All very chilled off we set for an easy stroll.
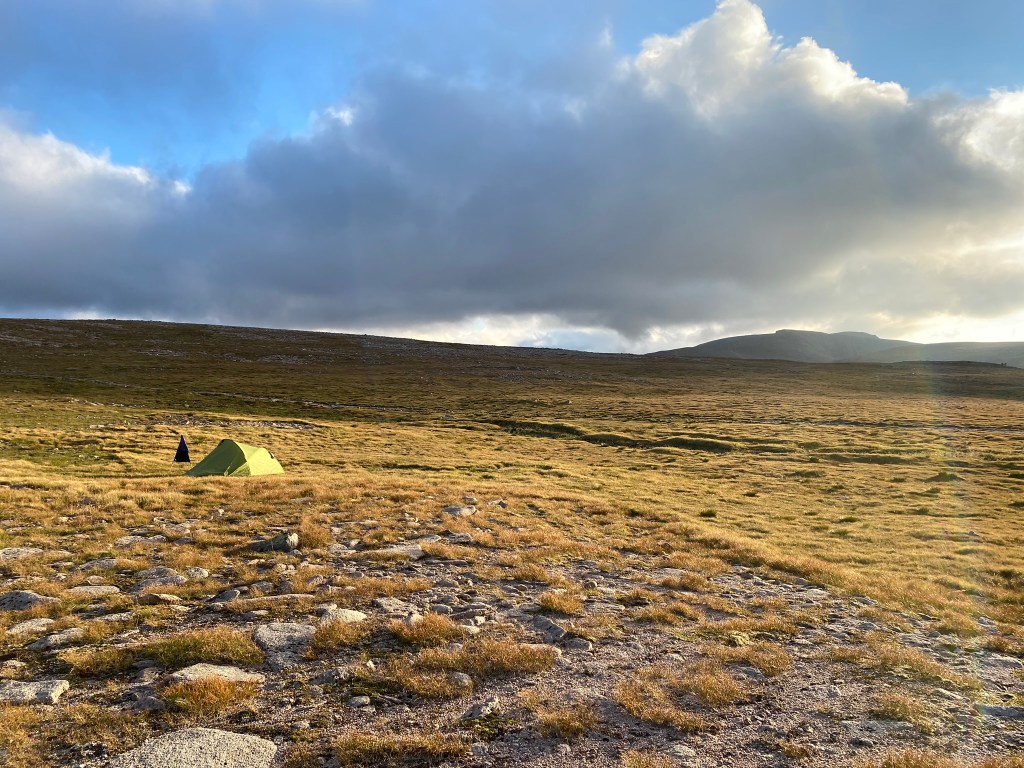
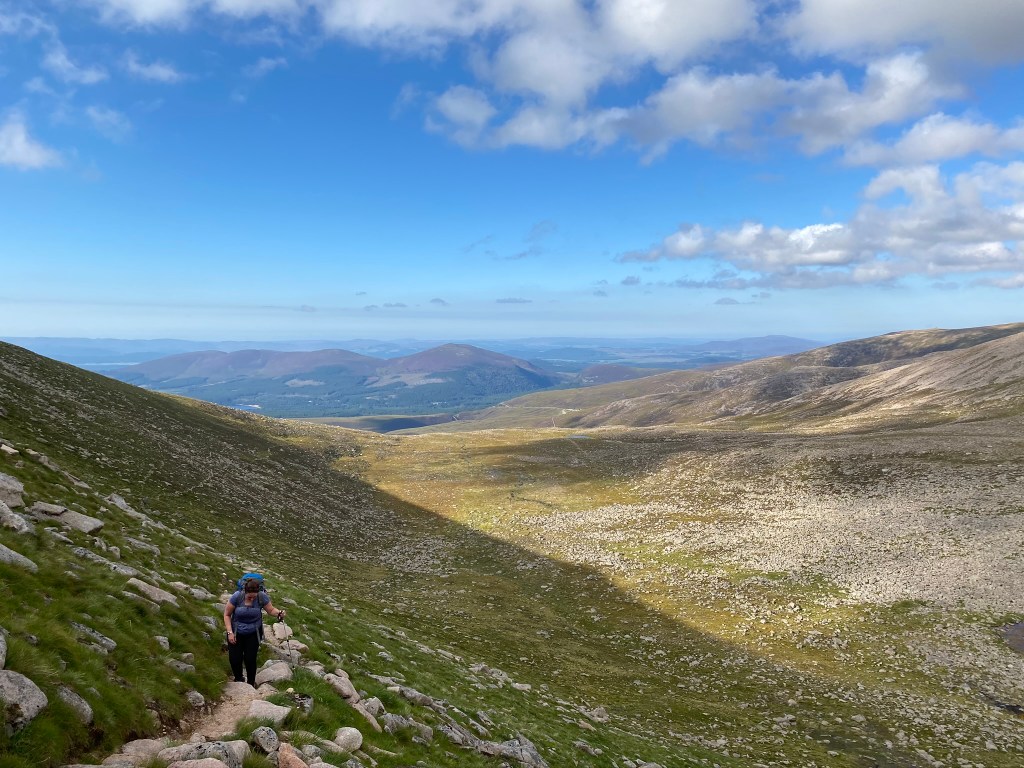
Exact location will not be divulged but we headed into the North corries by the usual paths , aiming to get in close to Den MacDui , camp overnight and summit at sunrise. We knew from forecasts there was likely to be a stunning sunset, clear sunrise and hopefully some awesome cloud inversions.
Both with pretty full pack – especially when you take extra water for porridge/coffee, stove and bags, mats, snacks etc – we headed in while most walkers were heading down and past us. The sun was warm and we took our time – just drinking in the views – very excitied to get a camp but with some trepidation on Mrs Mc’s part – in part about camping in general but mostly because id been winding her up with stories of the mythical Big Grey Man of Ben McDui – that reported spectre or man beast known to frequent the plateau above Loch Aven, or around the shelter stone itself.
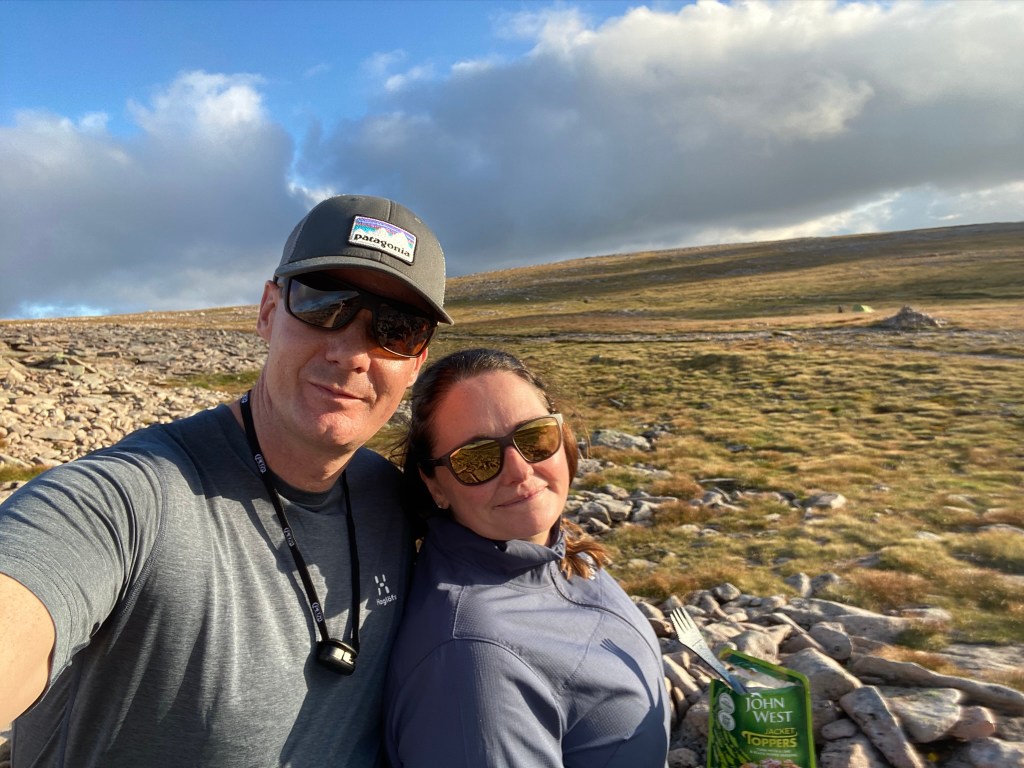
Chow time at campWhat a spot! And its even flat!
After pitching and getting gear sorted we got down to food stuck our head torches around our necks (trust me do this when light so your not struggling to find it post sunset!) we had the chance to just sit back, hang out on the amazing flat rocks in the still warm evening sun and await the sunset…. that and fight the midges!
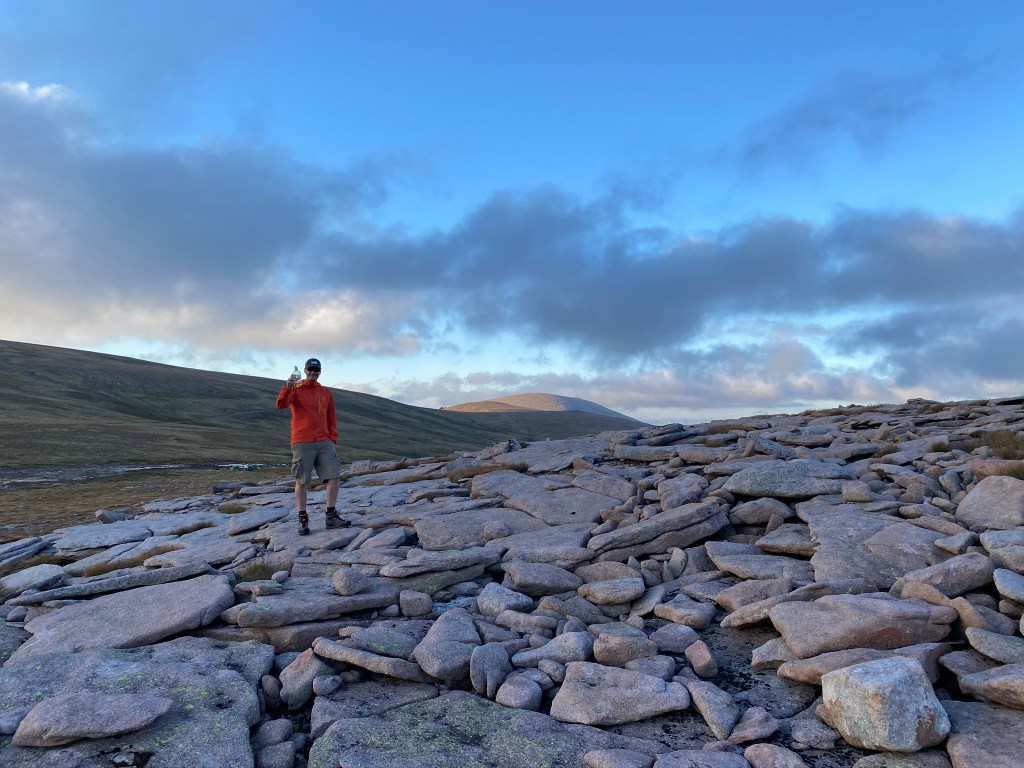
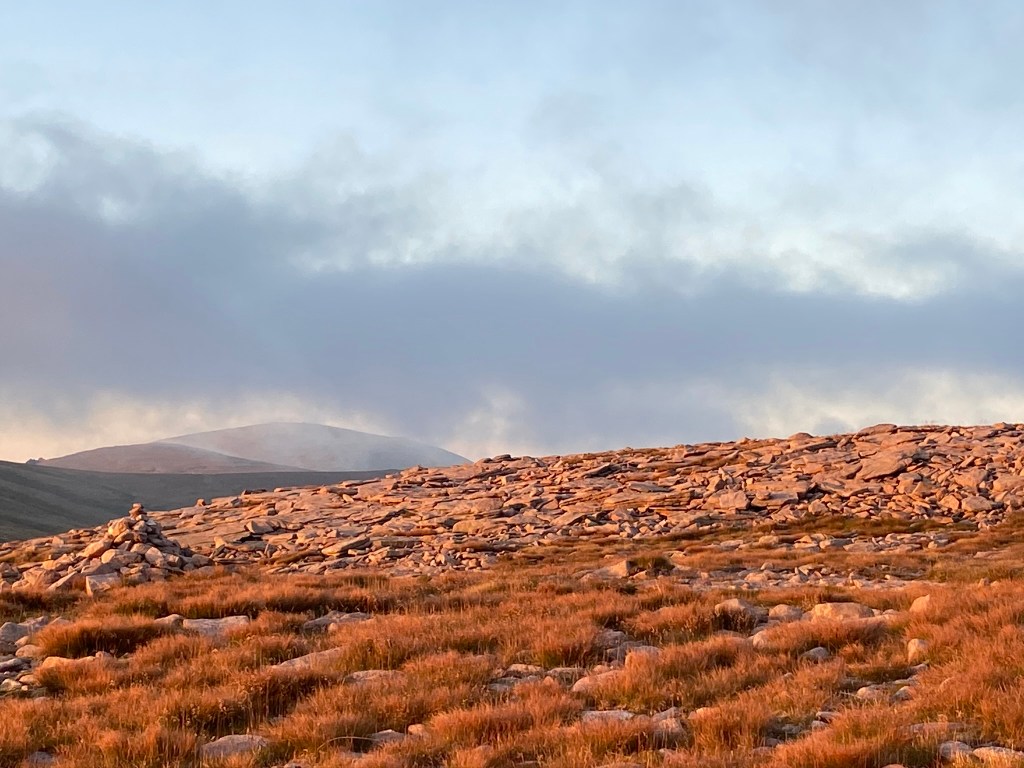
Slowly the light reddens, peak take a pink hue and the grasses shine like amber – this is why we do it – truly stunning and nothing on earth compares.
Cairn Gorm summit in the background
The sun dropped down behind the mountain tops and our camp was washed in fire , sunglases on to seee it melt away fully , a truly awesome sight and one we wont forget soon.
Yep, I’ve had worse camps !Even getting up for a pee gives you a view!
Wild camping isn’t all beauty and wonder though… Its you duty to keep you world tidy, allow no litter to escape or be left, don’t set a fire if you can avoid it (use a stove), bring a trowel for when nature calls – and then there’s the midges. For any non Scottish readers.. click here to find out more about these little vampires.. Scotland in summer is stunning .. but its prime midge season. With no wind and warm summer evenings, and with water near expect CLOUDS of them.. and they bite… As I type here almost a week later I’m still scratching, applying cream and generally bemoaning the little buggers.
But its worth it !
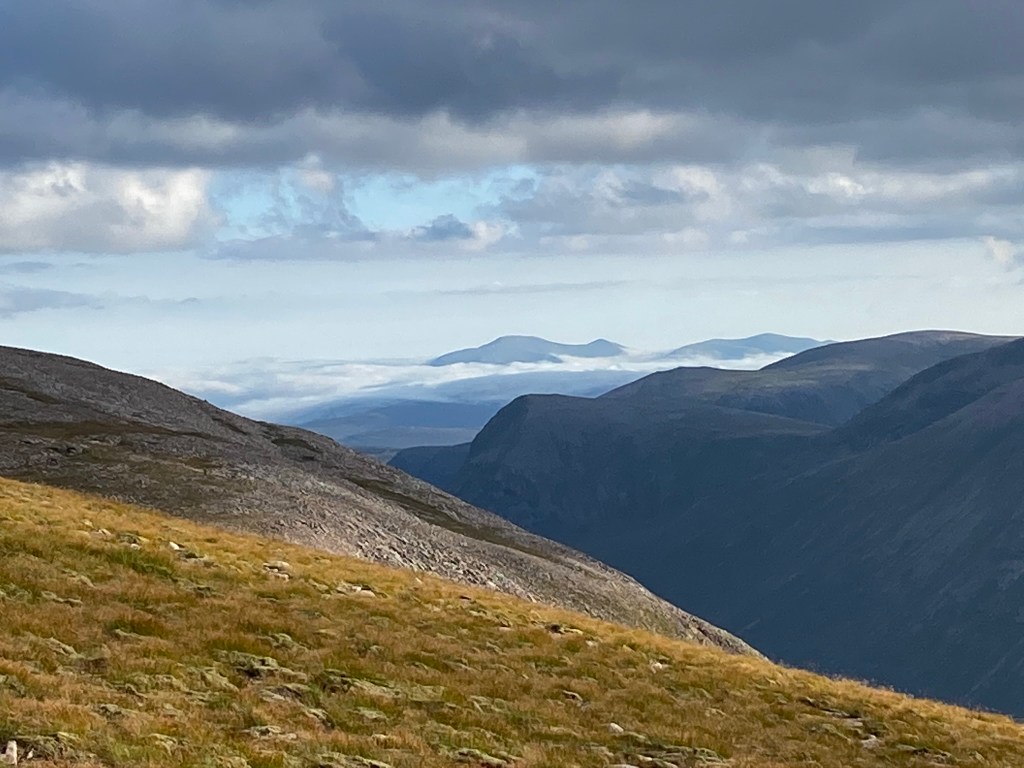
Sunrise, up and at em! Quick protein bar, grab your water bottle and off we set to summit Ben MacDui (Hill of McDuff) , Britain’s second highest mountain after Ben Nevis at 1309m. A mere 200 or so metres of ascent from camp we had a mind-blowing summit . Just jaw dropping beauty in all directions – not another soul around – like a little slice of heaven all to us. We sat and took time to watch the sun rise higher, taking in the simply incredible cloud inversions in all directions before caling it quits and deciding to head back down to break camp, clear everything away and head back to civilisation (not an easy decision…)
En route to the final summit rise we spotted a mum a baby deer grazing in the dawn sunlight. (Bit tricky to see but look middle of photo where the grass line ends and gives way to rock and dark green.)
Quick rocky walk up, past the many route marker cairns (handy I’m sure in winter or when the clag sets in) and we were at the trig marker. New summit for us to add to the list.
These are for sitting on right?
Camp packed – fighting the hordes of midges we set off fast to get over the rise and into some slight wind (midges hate wind) where we garbbed a seat, got the JetBoil out and made coffee and had anotyer bite to east before the final push to get back down. The path down still giving us those wonderful inversion views , Aviemore hidden out of site below a pillow of clouds.
An amzing couple fo day and a reminder as to why the Cairngorms is such an incredible place, more trips planned very soon… and a new tent already inbound (will post my thoughts once ive tried it out).
Get out and camp folks, but remember – know and practice the ethics – LEAVE NO TRACE. But … enjoy 🙂
Necessary and unquestionably the right strategy to save peoples lives during the (ongoing) horrendous global pandemic that is Covid-19.
It really puts hill walking… and everything else into perspective doesn’t it?
That said, like many, while I managed to keep myself busy with work and the garden , I was really starting to find the (necessary) restrictions on movement ,and in particular the mountains, were really weighing me down.
There is no question that my overall mental health was being eroded as I stared at 4 walls, tended the limited bounds the of garden (very lucky I know as many many were stuck inside small flats, and for it I will be eternally grateful) and walked round my small town for the umpteenth time – I was increasingly missing the Mountains – and more than I had for some time – which in a funny way is a blessing in disguise. I found myself craving being out on long hill walks more than I had done for probably close to a year.
So when the Scottish government started to outline the plan to ease restrictions I started to crave getting out more and more.
But here’s the rub .. I had done almost zero gym time, little if any running , only a little local mountain biking (although I did do a 25 press ups for 25 days challenge) so… lets face it.. im out of shape! …
But on one my unpaid leave days it got so bad that at around 11 am I just decided to drive to Loch Lomond, see if the Inveruglas car park had space and if so i was gonna make a stab at a previously climbed steep but “quick” Ben Vane . So basics packed (light waterproof, couple of snacks, water etc) i jumped inn the car and arrived at Inveruglas to find indeed there was space . Jumped out the car and set off up towards the Sloy Dam.
Wow… I’m outta shape – its a hot day, a tarmac walk in and by the time I get passed the herd of happily grazing cattle and turn left to start the ascent I’m sweating and puffing..
I stop to check my map for the ascent path and have a bite to eat and as I do so I look back down towards Loch Lomond and … breathe..
For the first in a very long time it just hit me – the calm, the air, the green, the rising mountains – breathing it all in.
Off I set, forgoing the well structured (new?) path (which I ended up descending) and instead forging from the small bridge across the boggy rising trail and up. I was breathing hard and feeling every metre of height gained but – yep – I was back! And my god it felt right.
I’d decided to give myself until only 2pm (ish) then turn back to get home for around 4.30 or so for dinner/some food shopping my wife and I had planned so I only got so far (the flat section at around 450m) and just sat and drank in the views. Magnificent !
Chatting to the few folks I saw it felt we were all sharing the same experience and all feeling the impact of too much pizza and Netflix (and wine.. and whisky) but were all SO happy to be back out.
A quick descent and hopped back in the car to get back to Glasgow , smiling, sun reddened and feeling very very much better.
Tomorrow we had planned Dumyat to get us both to a Summit for a psychological “win” on the road back to hill fitness. But tomorrow was another day.
For now, I could just … breathe.
And it was mountain air – there is no better air.
For photo’s of all my adventures check out @coachmacca on Instagram
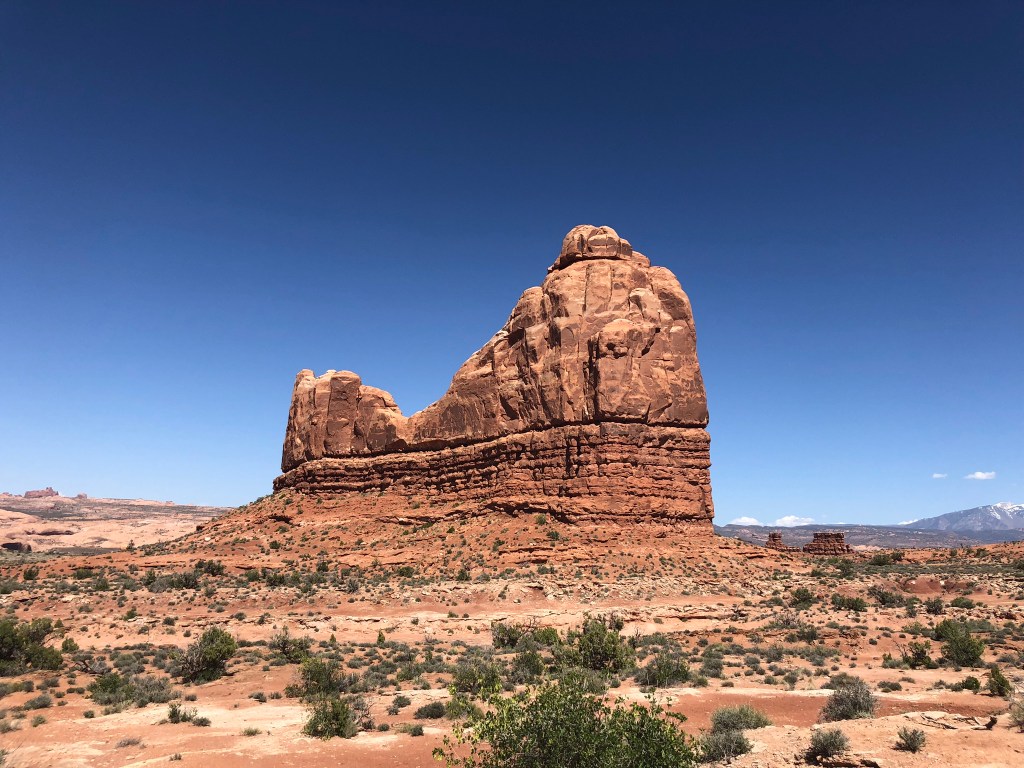
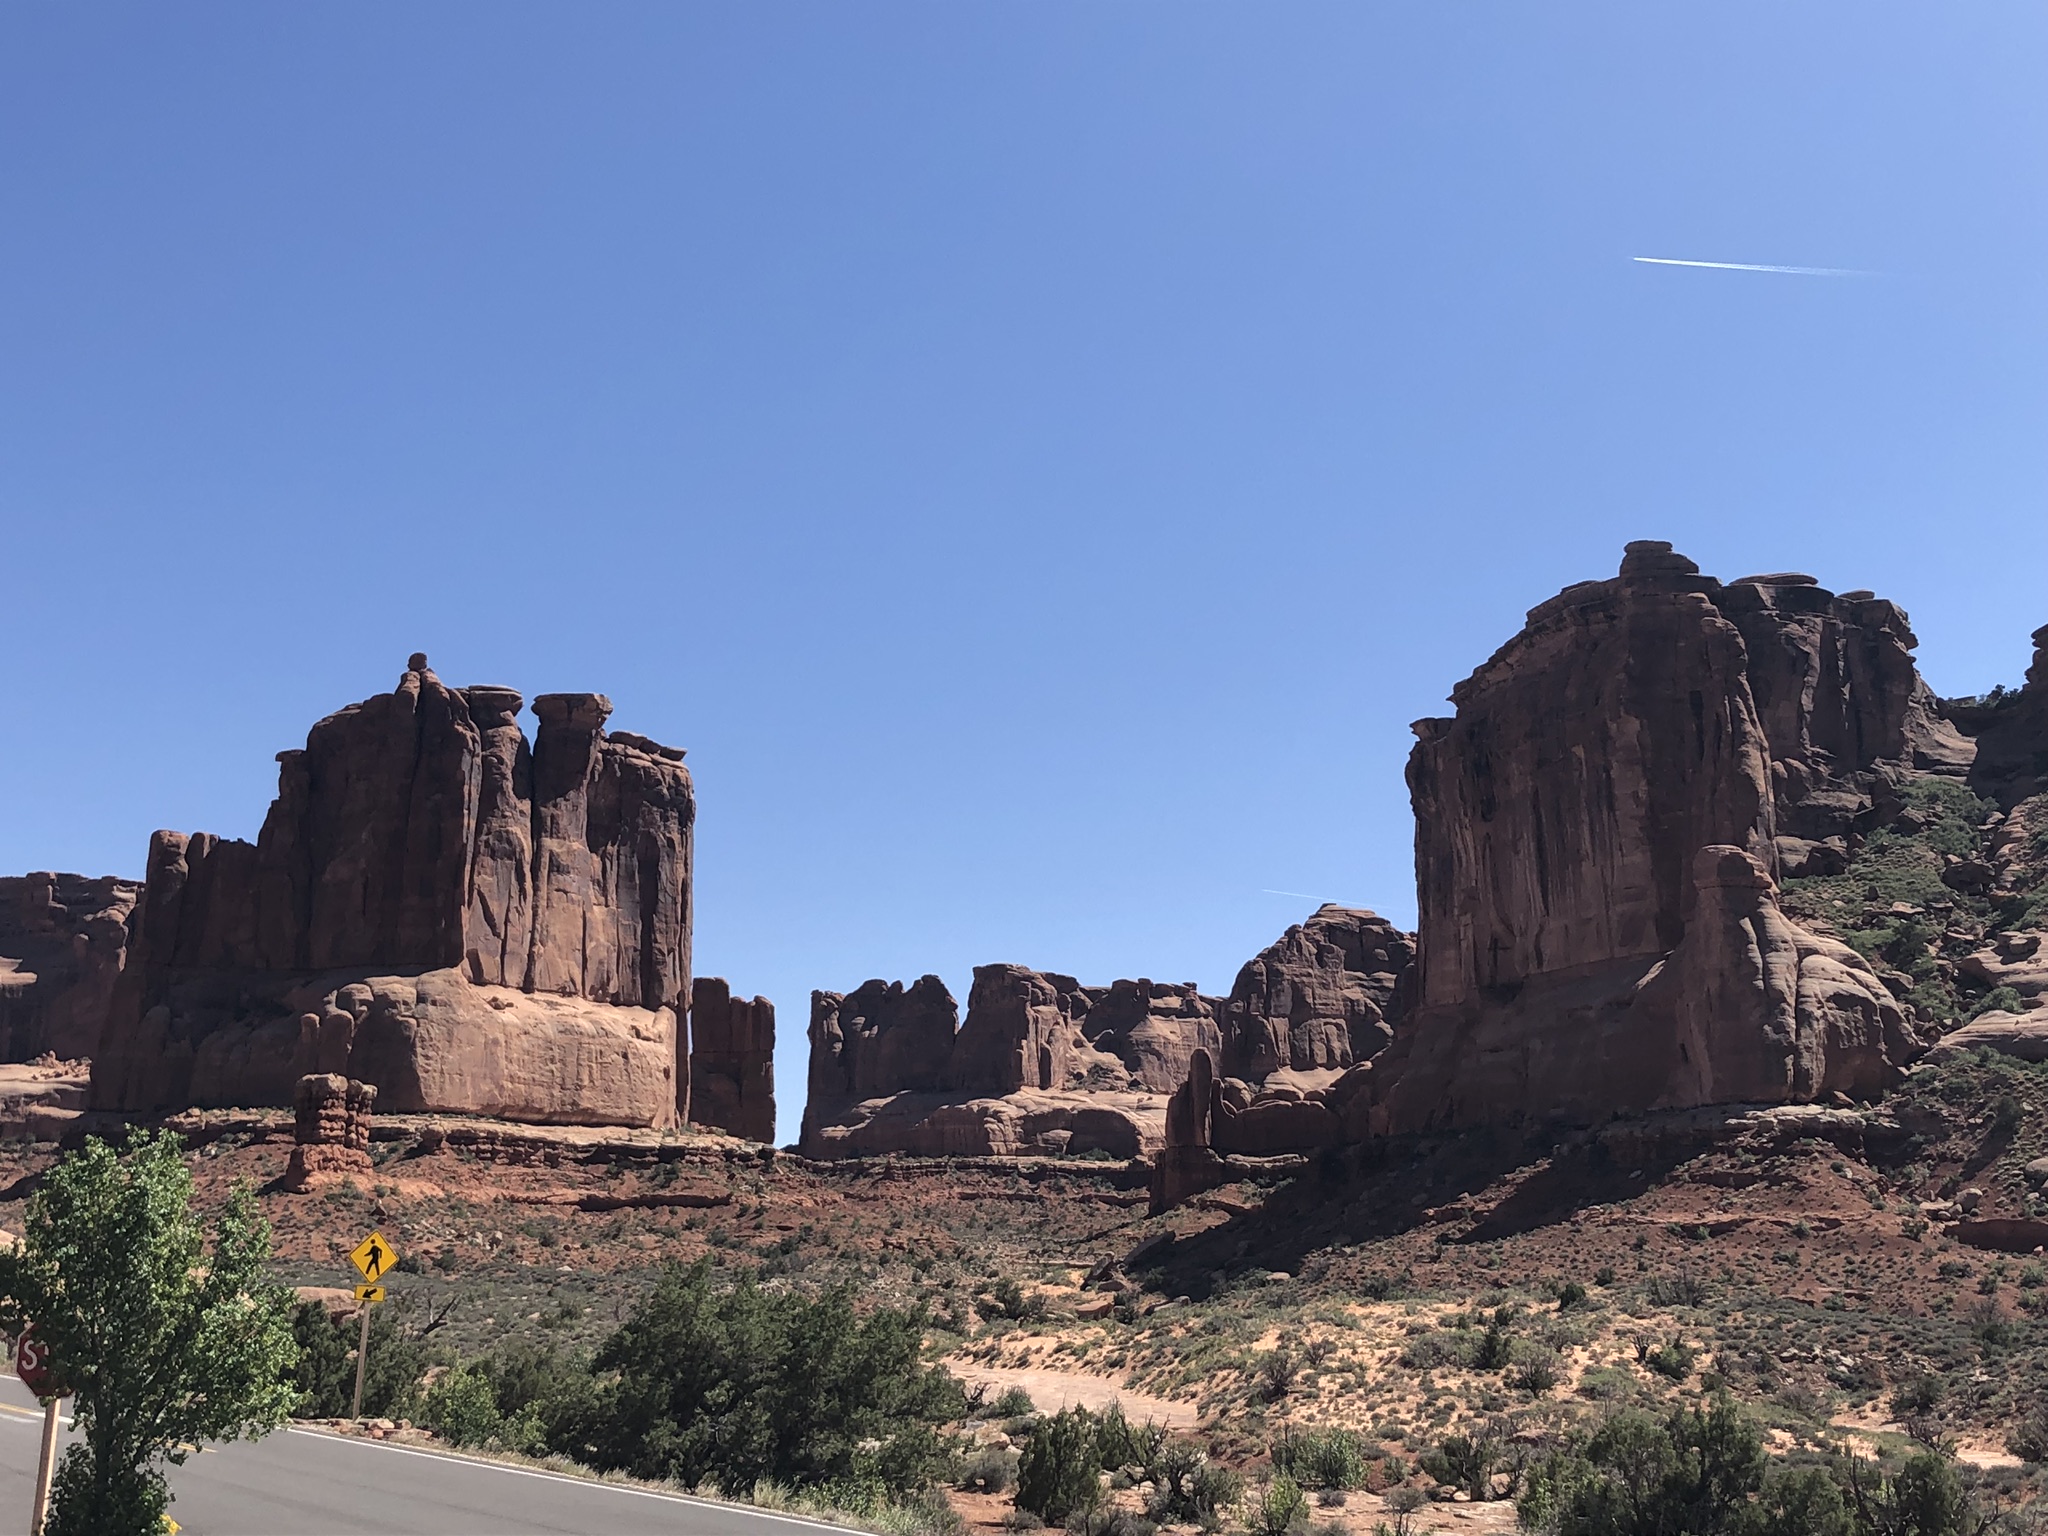
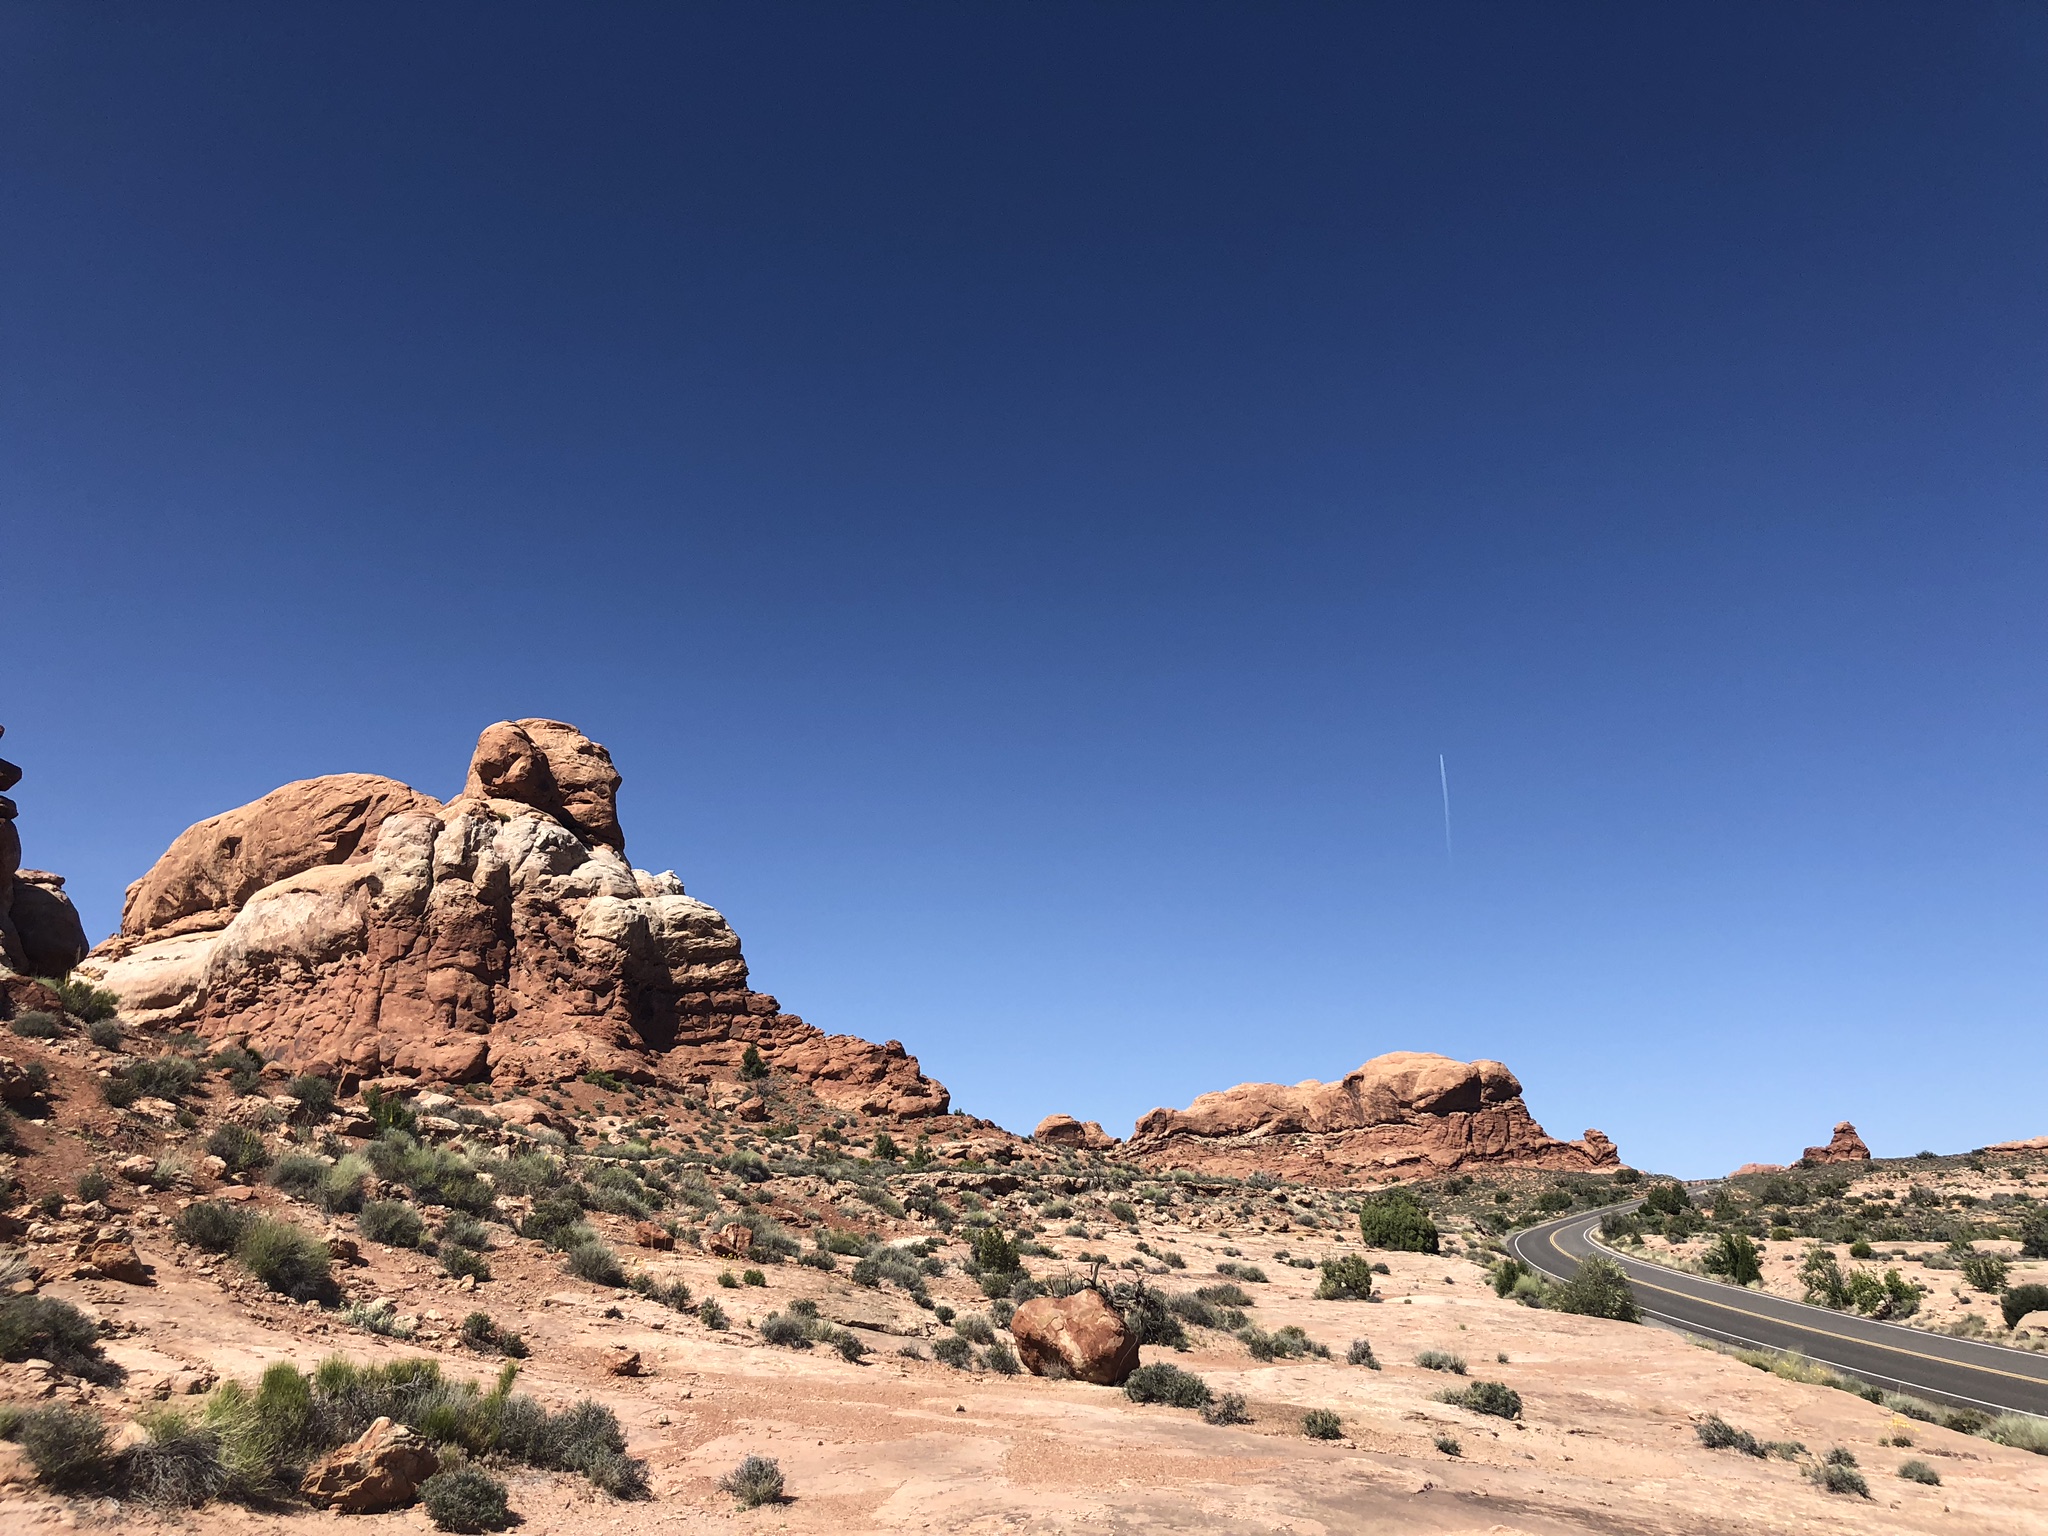
While the Road Trip report dedicated to Arches contains much more , I had missed some photos and the afternoon hike so putting here for completeness 🙂
Sam and a Hoodoo
Sam and a Hoodoo
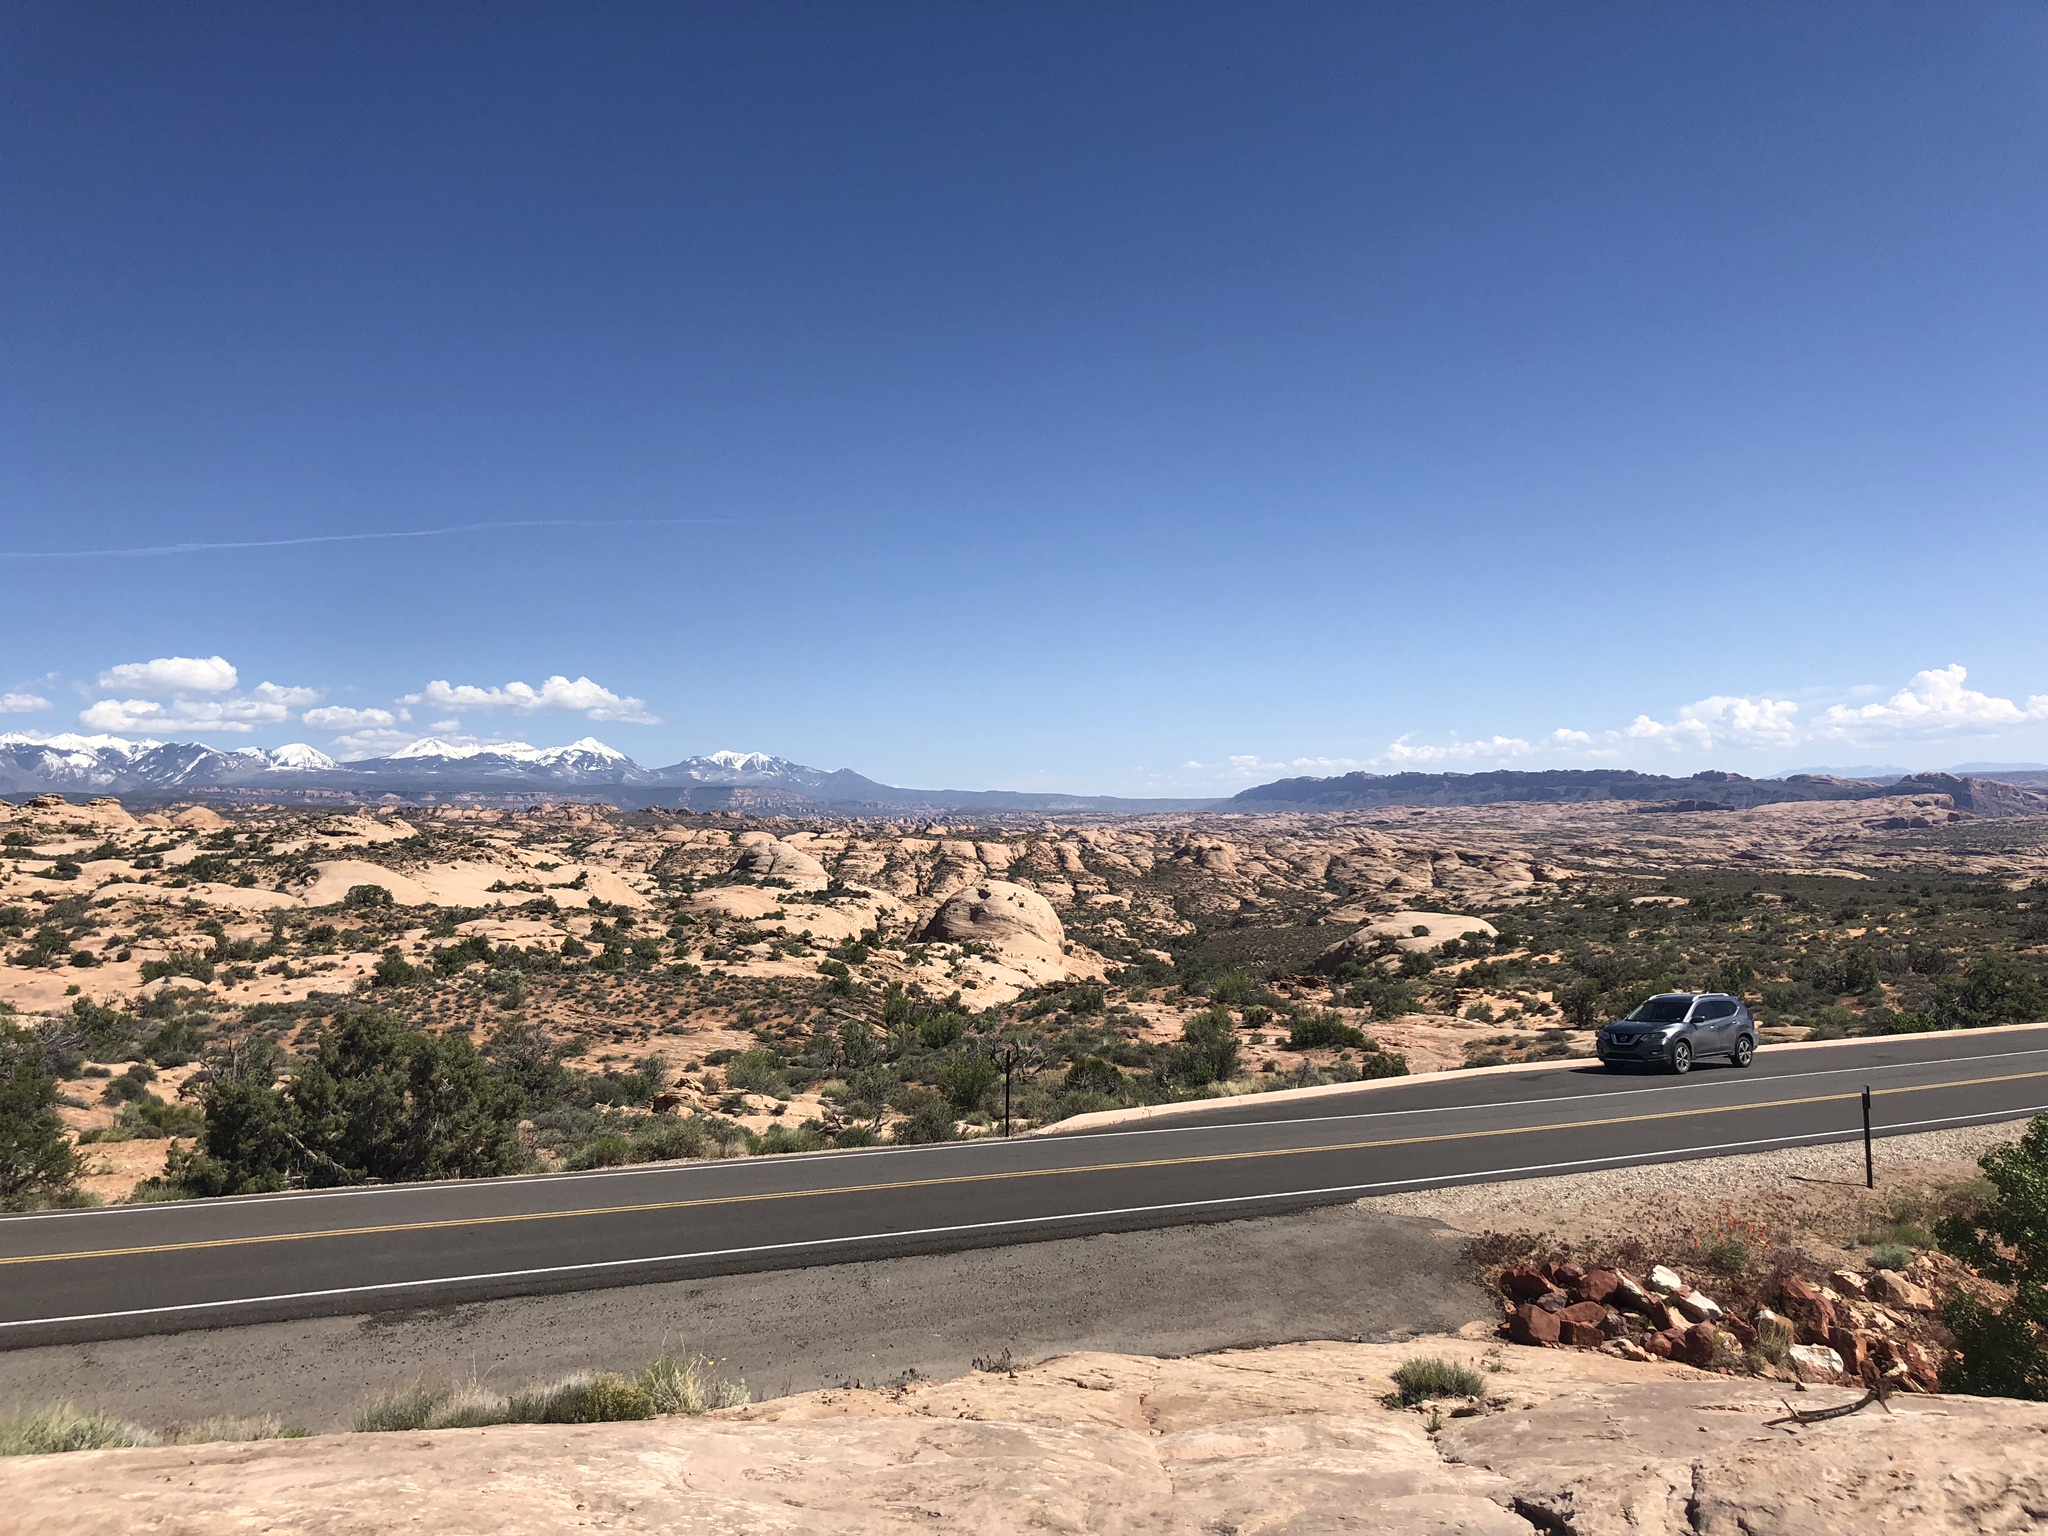
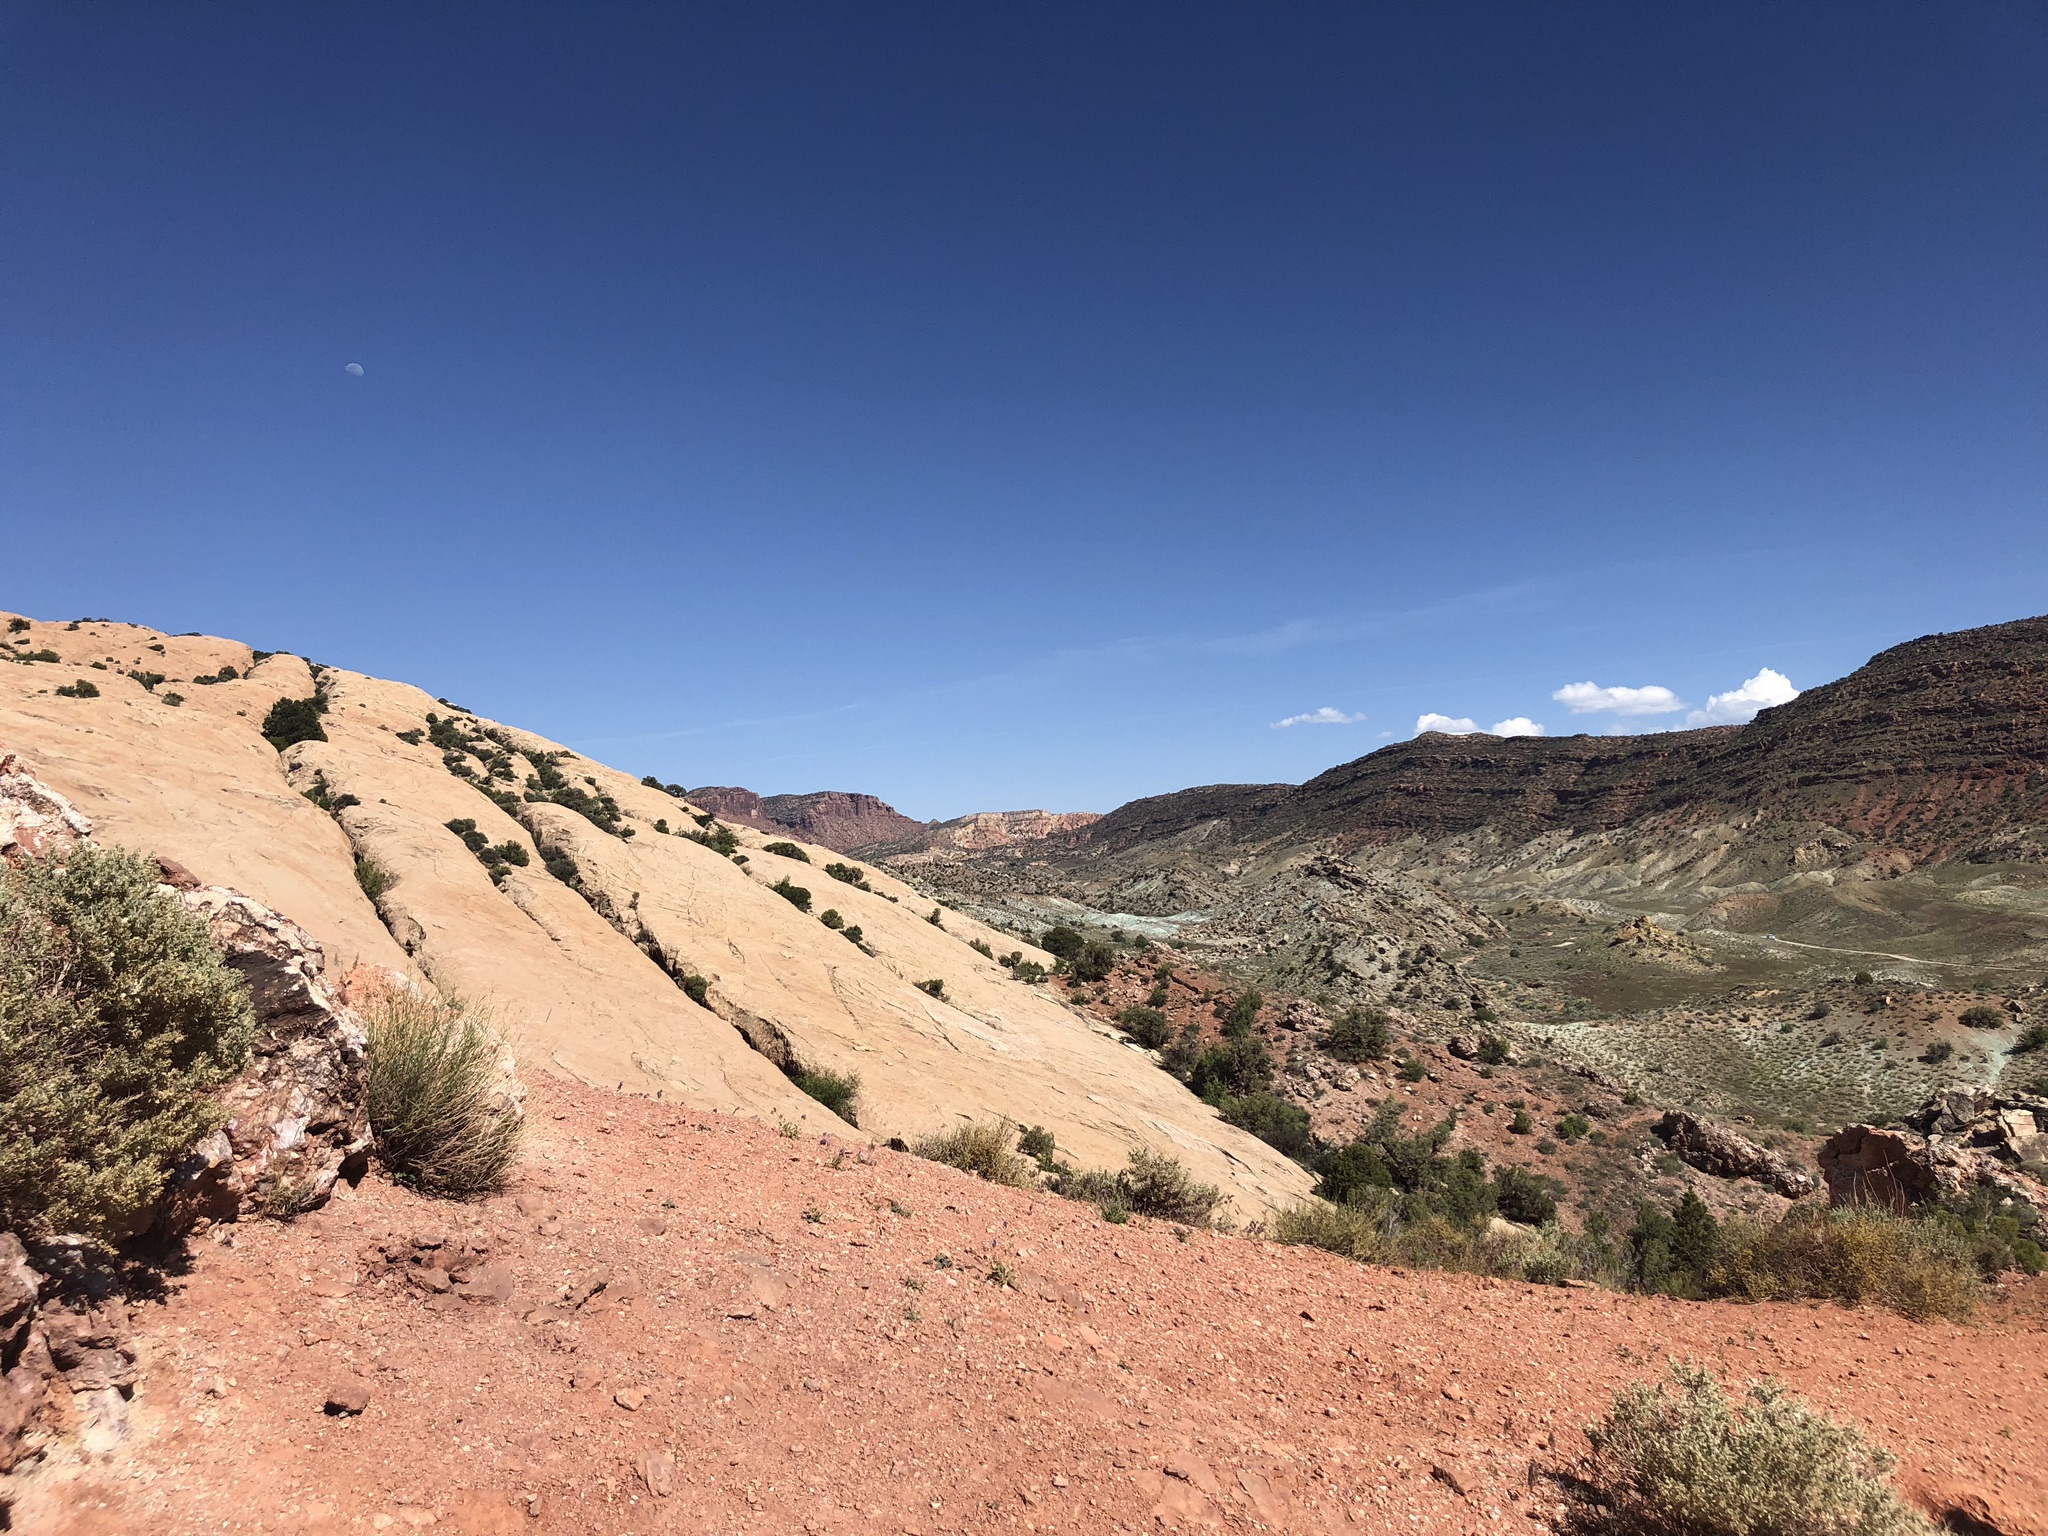
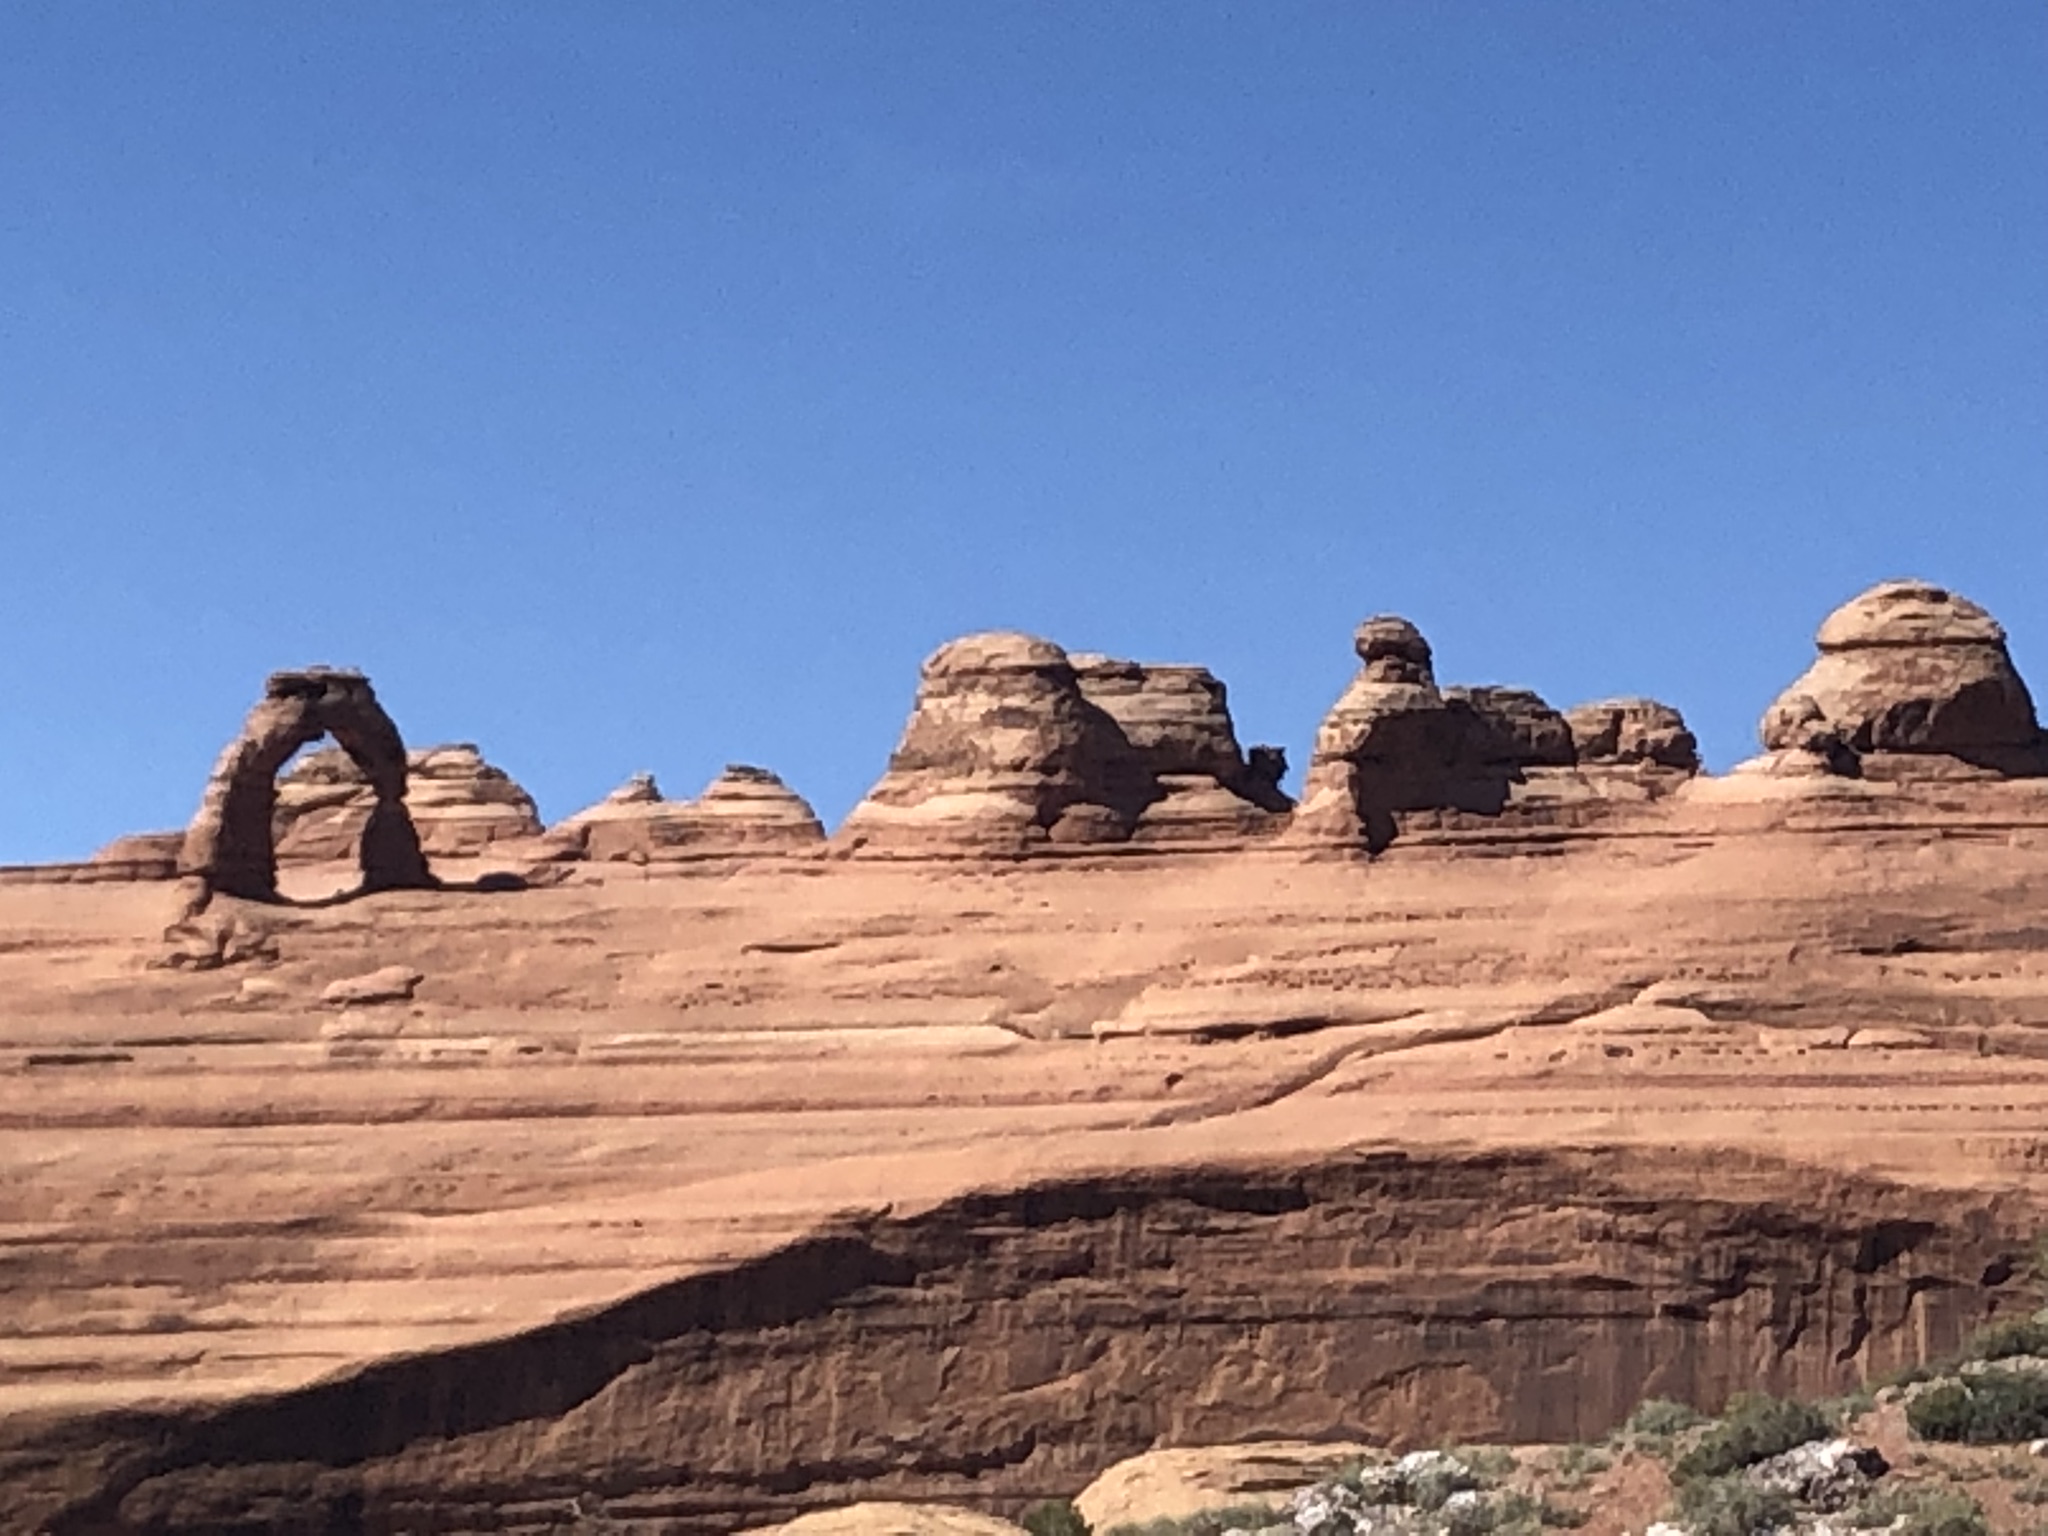
The following photos are taken on an afternoon hike up to overlook Delicate Arch from a distance, it was from here we decided to get up at dawn and hike up to the Arch itself and try to avoid the crowds at such an iconic and popular structure.
The incredible Delicate Arch from a distance. When hiking to it you approach from behind the ridge to the left of the arch